Wing Tip Installation
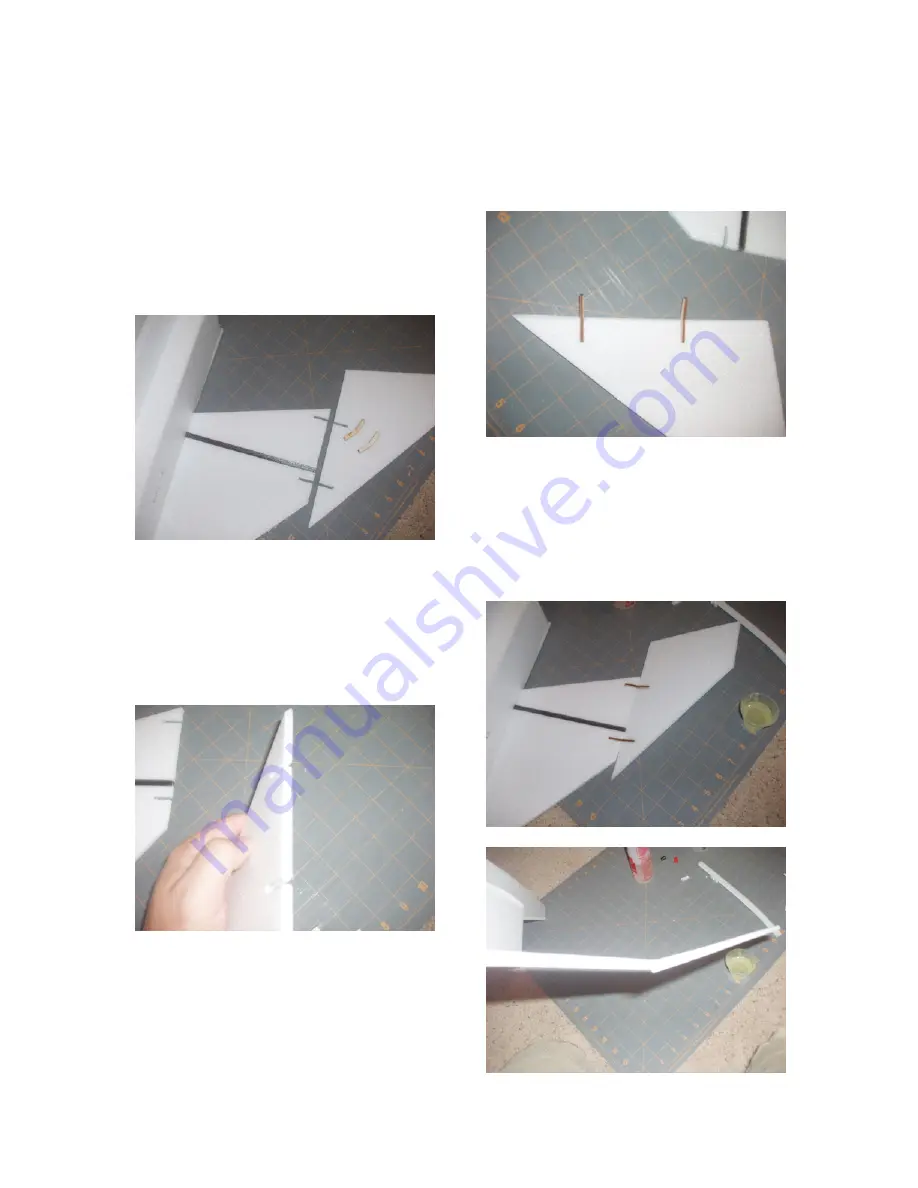
1. Now it’s time to install the wing tips.
The wing tips cant up. For this step you
will need four (4) of the angle braces
provided and the wing tips. They look
like little wooden boomerangs. This
provides the correct angle for the wing
tip installation.
Before applying epoxy to the angle
braces, dry fit the angle braces and wing
tip against the main wing. Bevel the
edge of the wing tip to match the angle
so the joint is flush. This can be done
with a medium grit sandpaper (150).
Bevel applied to wing tip edge
2. Next, lay the wing tip on a flat
surface. Put a strip of tape across the
angle brace slots so you don’t glue your
wing tip to the table. Using a small
amount of epoxy, install the angle
braces, making sure the edges of the
braces are flush against the table. This
will insure that the angle of all the braces
will be the same.
3. To finish wing tip installation, apply
adhesive to the angle braces and to the
edge of the wing and press into place.
Make sure the wing tip does not sag
during the curing process. Repeat
process for other wing tip.


