


3. Repeat for other side.
Top Intake Assembly
1. Next you will be installing the intake
top. NOTE: If you want to avoid
fishing your servo wires later, servos can
be installed at this point for ease of
wiring.
See
our
SERVO
INSTALLATION page later in the
instructions to see our recommended
placement.
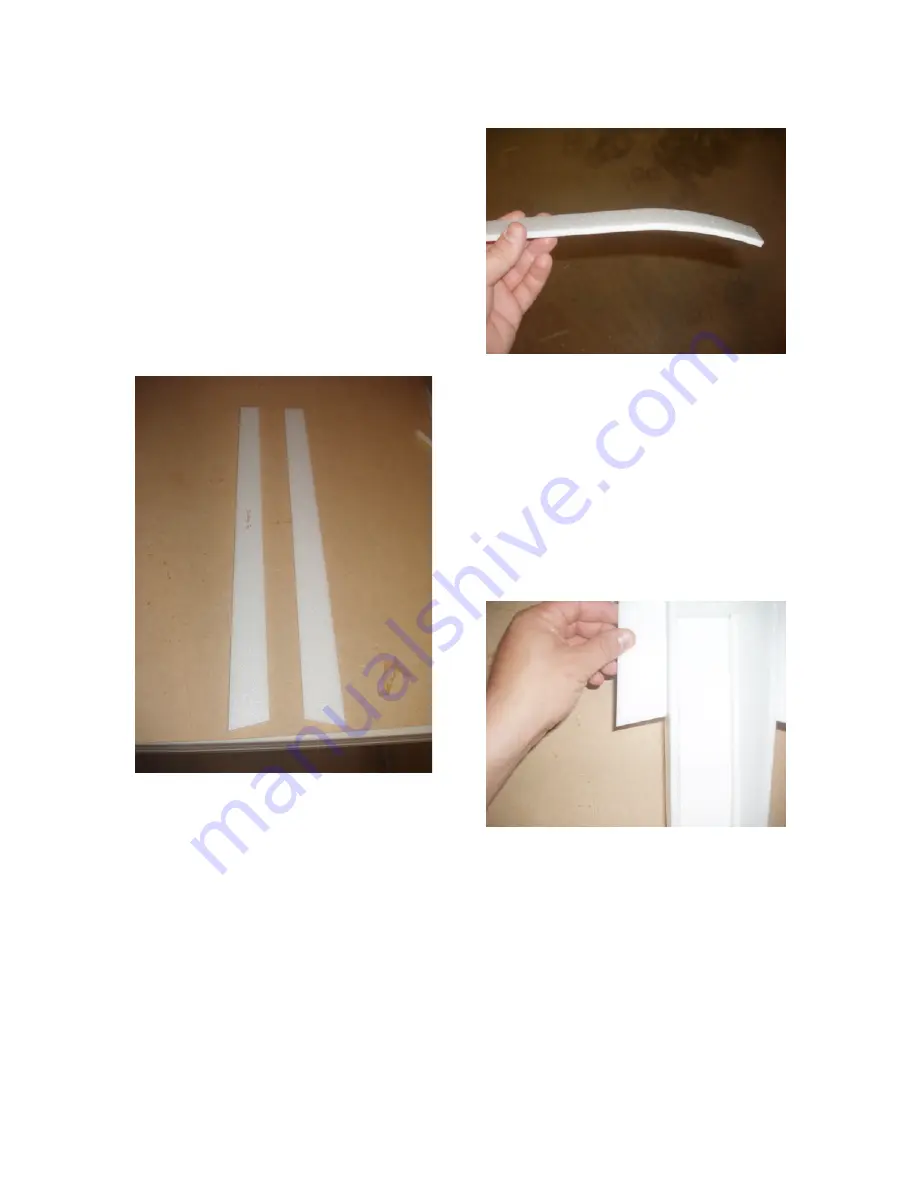
2. Take your intake tops and note the
angled portion featured at the bottom of
the picture. The right and left placement
of the tops is represented in the photo as
well. The angles cant outward on the
intake. It may be necessary to gently
bend the REAR of the intake tops to
curve around the intake sides.
This can be done by gently bending the
pieces by hand or with a heat gun on
very low heat. We recommend just
using your hand.
3. Next apply epoxy to the top of the
intake side you are working on and to
the edge of the intake top that butts
against the fuselage side. Attach the
piece, making sure to get a good bond.
Repeat for other side. Make sure you
align the piece from the front to back,
making the front flush and saving the
rear for any trimming that may be
needed.
Top intake installation continued.


