


User Manual|
VISIX Network Camera
10225 Westmoor Drive, Suite 300, Westminster, CO 80021 | www.3xlogic.com | (877) 3XLOGIC
30
!
Record File Size:
Select the packed size of the manually recorded and downloaded video
files to 256M, 512M or 1G. After the selection, the maximum record file size is the value
you selected.
!
Save record files to:
Set the saving path for the manually recorded video files.
!
Save downloaded files to:
Set the saving path for the downloaded video files in playback
mode.
!
Picture and Clip Settings:
Set the saving paths of the captured pictures and clipped video files. Valid
for the pictures you captured with the web browser.
!
Save snapshots in live view to:
Set the saving path of the manually captured pictures in
live view mode.
!
Save snapshots when playback to:
Set the saving path of the captured pictures in playback
mode.
!
Save clips to:
Set the saving path of the clipped video files in playback mode.
Note:
You can click
Browse
to change the directory for saving the clips and pictures.
3)
Click Save to save the settings.
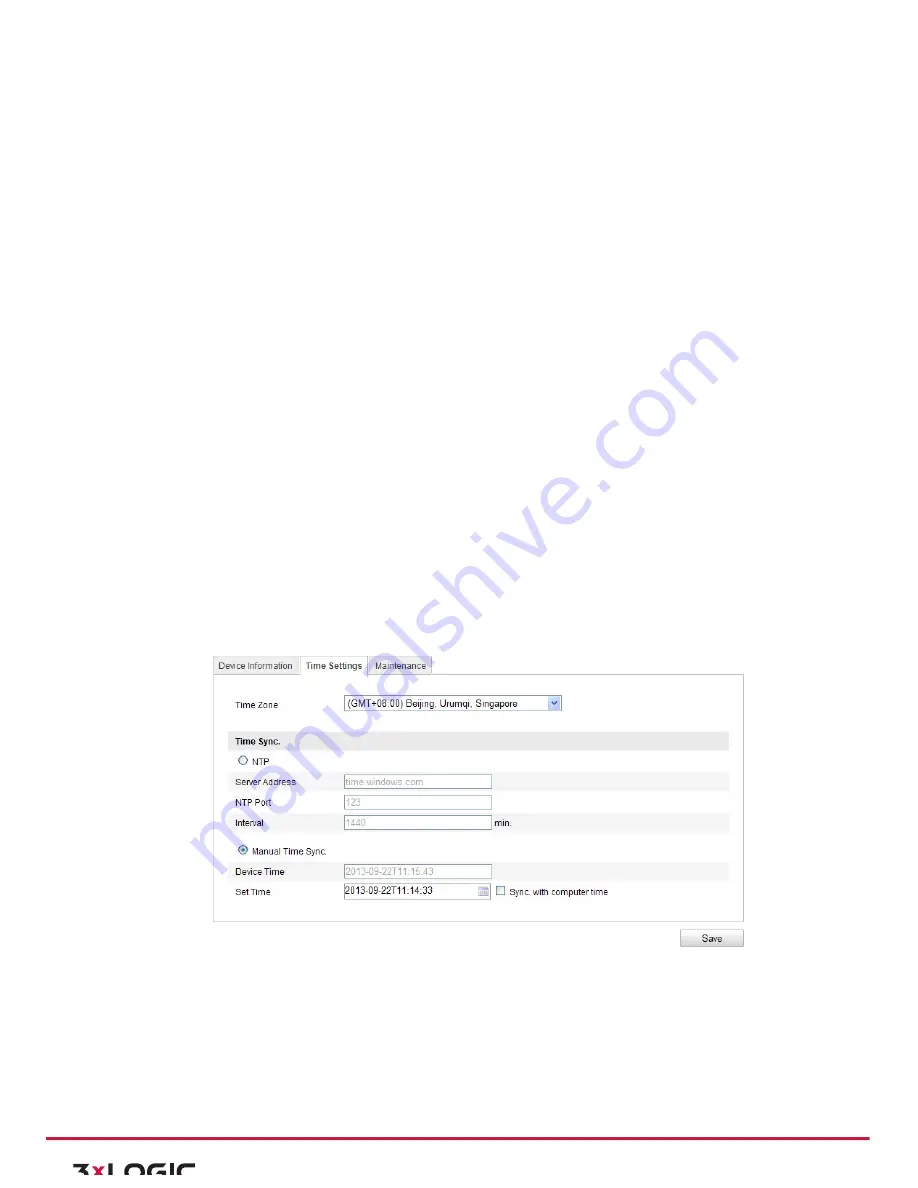
6.2
Configuring Time Settings
Purpose:
You can follow the instructions in this section to configure the time synchronization and DST settings.
Steps:
1)
Enter the Time Settings interface:
Configuration > Basic Configuration >
System > Time Settings
Or
Configuration > Advanced Configuration >
System > Time Settings
Figure 6-‐2
Time Settings
2)
Select the Time Zone.
Select the Time Zone of your location from the drop-‐down menu.
3)
Synchronizing Time by NTP Server.
a.
Check the checkbox to enable the
NTP
function.
b.
Configure the following settings:
!
Server Address: IP address of NTP server.