


User Manual|
VISIX Network Camera
10225 Westmoor Drive, Suite 300, Westminster, CO 80021 | www.3xlogic.com | (877) 3XLOGIC
21
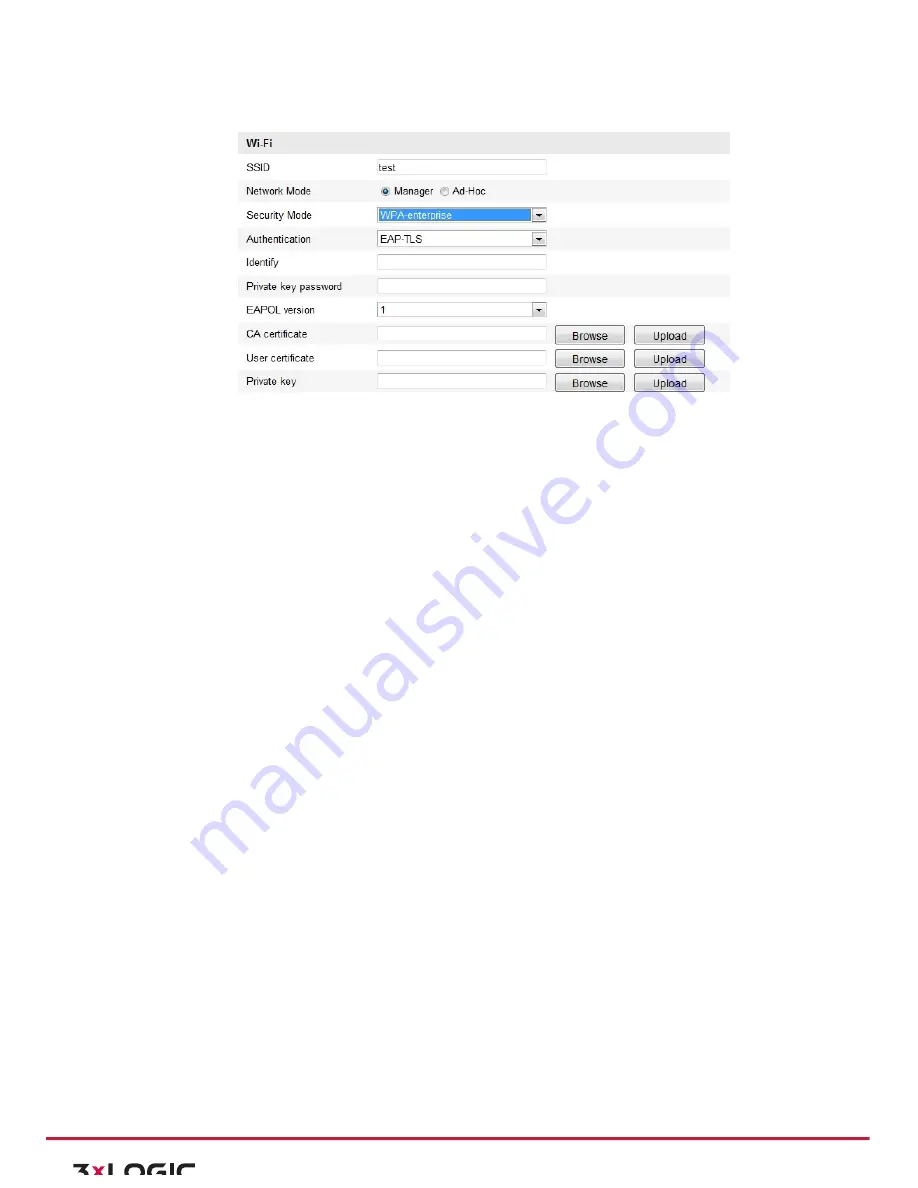
EAP-‐TLS
Figure 4-‐9
EAP-‐TLS
!
Identity
-‐ Enter the user ID to present to the network.
!
Private key password
– Enter the password for your user ID.
!
EAPOL version
-‐ Select the version used (1 or 2) in your access point.
!
CA Certificates
-‐ Upload a CA certificate to present to the access point for authentication.
EAP-‐PEAP:
!
User Name
-‐ Enter the user name to present to the network
!
Password
-‐ Enter the password of the network
!
PEAP Version
-‐ Select the PEAP version used at the access point.
!
Label
-‐ Select the label used by the access point.
!
EAPOL Version
-‐ Select version (1 or 2) depending on the version used at the access point
!
CA Certificates
-‐ Upload a CA certificate to present to the access point for authentication
4.2
Easy Wi-‐Fi Connection with WPS function
Purpose:
The setting of the wireless network connection is never easy. To avoid the complex setting of the wireless
connection you can enable the WPS function.
WPS (Wi-‐Fi Protected Setup) refers to the easy configuration of the encrypted connection between the device
and the wireless router. The WPS makes it easy to add new devices to an existing network without entering
long passphrases. There are two modes of the WPS connection, the PBC mode and the PIN mode.
Note:
If you enable
the WPS function, you do not need to configure the parameters such as the encryption
type and you don’t need to know the key of the wireless connection.
Steps: