DT-01822A
Kiosk ePassport Reader User Guide
© 3M 2007 All rights reserved.
9
Installing the Hardware
Unpacking the Reader
Each reader package consists of:
•
1 reader
•
1 test card
•
1 Documentation/Software CD
•
1 USB communication cable
•
1 Scotch-Brite™ Microfiber Cleaning Cloth
1.
Remove the contents from the box and separate the components from the packing
material.
2.
Verify that all the parts described have been received. If any parts are missing, contact
3M Global Technical Services (GTS).
For more information, see Appendix D: Customer Service on page 26.
3.
Store the packaging in the event that the reader may require reshipment to 3M for
maintenance.
Note:
Allow the reader to come to room temperature for a minimum two hours
before operation, if it has been stored below room temperature.
Kiosk Design Considerations
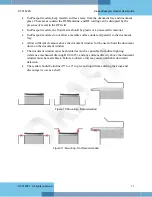
The reader is designed to be mounted behind the kiosk front panel with only the document tray
protruding. The front panel must provide an opening to allow users to insert their documents and
hold them flat on the document glass for scanning. The opening should form a box, open at the
front and closed at the top, sides and back.
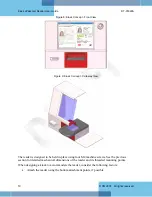
To better illustrate this, a typical kiosk concept is shown in the following figures. It is
recommended that the material forming the document cavity and the front fascia around the
reader be non-metallic (e.g. Polycarbonate) to avoid affecting the RF performance. This is
illustrated in red in the following figures. The cutaway view shows the reader mounted to the
bottom surface of the kiosk chassis, with the plastic insert forming the document cavity. The
document cavity must allow sufficient clearance for a user’s hand to hold the document down on
the glass.
To assist in the mechanical design, 3D CAD models of the reader are available in all popular
formats. Contact your Sales representative or 3M Global Technical Services (GTS) for details.
Summary of Contents for Kiosk ePassport Reader PV35-02 Series
Page 8: ......


