SOFTWARE CONFIGURATION
Adjusting colors or resolutions of either monitor
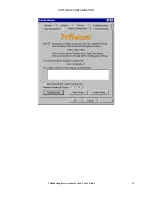
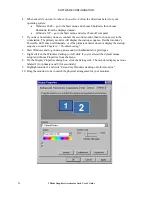
1. Click the icon for that monitor or select the monitor from the pulldown menu under Display.
2. With the monitor to adjust selected, click Advanced. Select Wildcat Monitor and make changes to
the Colors or Screen area. Click OK.
3. Select the other monitor icon or select from the pulldown menu under Display to change the color
or resolution of the other monitor.
NOTE:
Any changes made under Wildcat Configuration will affect both monitors.
Optimizing the Wildcat Driver
Refer to the documentation that came with your application for information on optimization support. If
your application supports optimized configurations, you can choose to enable the application
manufacturer’s pre-set configurations or create your own.
Enabling application-specific optimizations
1. Right click on the Windows desktop (or left click if you’ve altered the default mouse
setup) and choose Properties from the menu. Click the Settings tab, then click Advanced.
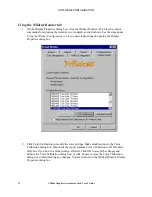
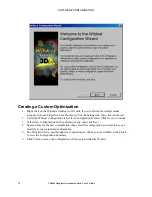
2. Under the Wildcat Configuration tab, select Configuration Wizard. Click Next to continue.
3. If your application supports optimized configurations, select the configuration for your
application from the Configuration pulldown menu and click Next to view a summary of
the application-specific configuration.
4. Click Finish to save your configuration and dismiss the Wizard, or click Cancel to close
the Wizard without accepting any changes.
NOTE:
You cannot alter the application manufacturer’s pre-set configuration. If you want
some (but not all) features of the application manufacturer’s configuration, you
must create a customized configuration. See “
Creating a custom optimization”
for
instructions.
Enabling Direct3D optimizations
1. Right click on the Windows desktop (or left click if you’ve altered the default mouse
setup) and choose Properties from the menu. Click the Settings tab, then click Advanced.
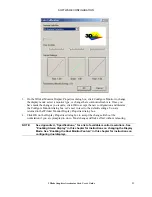
2. Under the Wildcat Configuration tab, select Configuration Wizard. Click Next to continue.
3. From the configuration pull down menu, select Default Direct3D Settings, then click Next.
NOTE:
Configuring the Wildcat III 6210 or Wildcat III 6110 for Direct3D will use all available
off screen memory.
4. Click Finish to save your configuration and dismiss the Wizard, or click Cancel to close
the Wizard without accepting any changes.
3Dlabs Graphics Accelerator Card User's Guide
27
Summary of Contents for P Class 450/500/550/600/650/700/750
Page 5: ...3Dlabs Graphics Accelerator Card User s Guide v ...
Page 6: ......
Page 7: ...CHAPTER 1 INTRODUCTION 3Dlabs Graphics Accelerator Card User s Guide ...
Page 12: ...INTRODUCTION 3Dlabs Graphics Accelerator Card User s Guide 6 ...
Page 13: ...CHAPTER 2 SETUP 3Dlabs Graphics Accelerator Card User s Guide ...
Page 25: ...CHAPTER 3 SOFTWARE CONFIGURATION 3Dlabs Graphics Accelerator Card User s Guide ...
Page 27: ...SOFTWARE CONFIGURATION 3Dlabs Graphics Accelerator Card User s Guide 21 ...
Page 35: ...CHAPTER 4 TROUBLESHOOTING 3Dlabs Graphics Accelerator Card User s Guide ...
Page 40: ...APPENDIX A SPECIFICATIONS 3Dlabs Graphics Accelerator Card User s Guide ...
Page 44: ...SPECIFICATIONS 3Dlabs Graphics Accelerator Card User s Guide 38 ...
Page 45: ...APPENDIX B SOFTWARE LICENSE 3Dlabs Graphics Accelerator Card User s Guide ...
Page 50: ......
Page 51: ...APPENDIX D TERMS AND DEFINITIONS 3Dlabs Graphics Accelerator Card User s Guide ...
Page 56: ...TERMS AND DEFINITIONS 3Dlabs Graphics Accelerator Card User s Guide 52 ...
Page 57: ...INDEX 3Dlabs Graphics Accelerator Card User s Guide ...
Page 59: ...INDEX Safe mode 31 3Dlabs Graphics Accelerator Card User s Guide 55 ...


