background image

10

3D Systems, Inc.

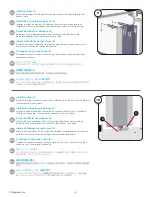
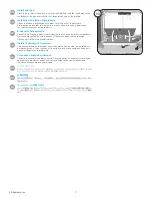
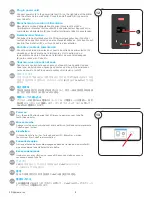
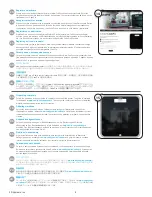
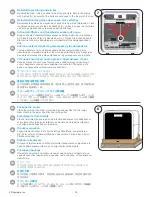
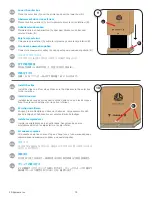
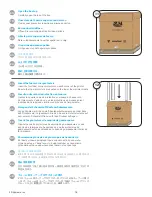
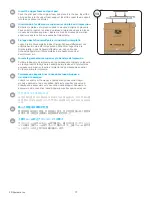
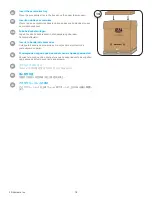
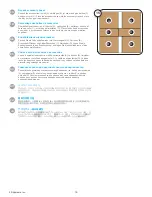
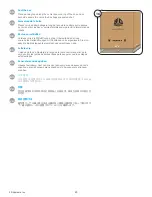
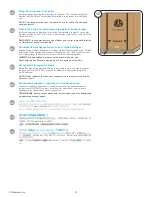
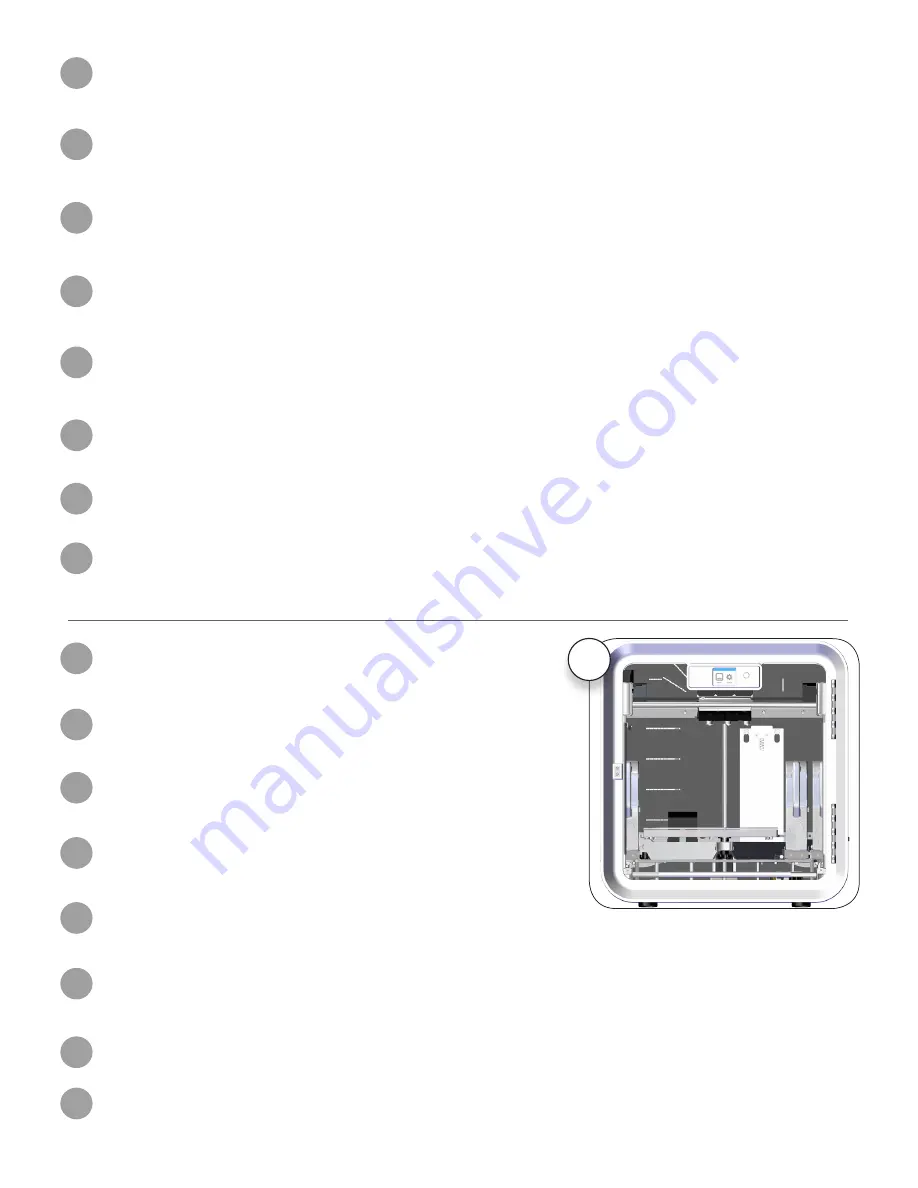
Repack your CubePro

USE ALL PACKING MATERIAL FROM THE ORIGINAL PACKAGING. SHIPPING WITHOUT THE ORIGINAL PACKING MATERIAL MAY CAUSE 

DAMAGE TO THE PRINTER.

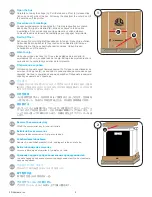
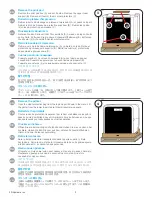
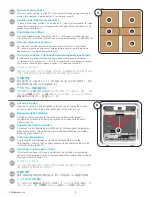
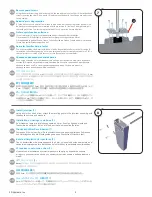
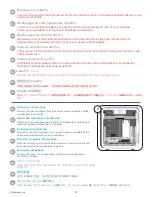
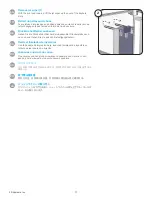
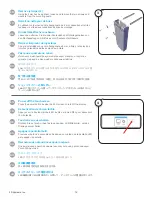
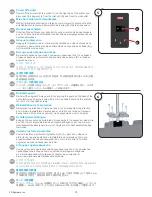
Remove print cartridges

Remove the print cartridge(s) from the printer and any remaining printing 

material from the print pad.

1

Wiederverpacken Ihres CubePro

VERWENDEN SIE DAS GESAMTE VERPACKUNGSMATERIAL DER ORIGINALVERPACKUNG. WIRD DER DRUCKER OHNE DAS 

ORIGINALVERPACKUNGSMATERIAL VERSENDET, KANN ES ZU SCHÄDEN AM GERÄT KOMMEN.

Druckpatronen ausbauen

Entnehmen Sie die Druckpatrone(n) aus dem Drucker, und entfernen Sie 

verbliebene Bedruckstoffe von der Druckplatte.

Vuelva a embalar su CubePro.

UTILICE TODO EL MATERIAL DE EMBALAJE DEL EMBALAJE ORIGINAL. EL ENVÍO SIN EL MATERIAL DE EMBALAJE ORIGINAL PUEDE 

DAÑAR LA IMPRESORA.

Retire los cartuchos de impresión.

Retire los cartuchos de impresión de la impresora y cualquier material de 

impresión restante de la bandeja de impresión.

Remballage de votre imprimante CubePro

UTILISEZ TOUS LES MATÉRIAUX D’EMBALLAGE D’ORIGINE. L’EXPÉDITION DE L’IMPRIMANTE SANS UTILISER LE MATÉRIEL 

D’EMBALLAGE D’ORIGINE PEUT PROVOQUER DES DOMMAGES À L’IMPRIMANTE.

Retrait des cartouches d’impression

Retirez la ou les cartouches d’impression de l’imprimante et nettoyez tout 

résidu de matériau d’impression sur le plateau.

Запаковывание CubePro

ИСПОЛЬЗУЙТЕ УПАКОВОЧНЫЙ МАТЕРИАЛ ОТ ОРИГИНАЛЬНОЙ УПАКОВКИ. ТРАНСПОРТИРОВКА БЕЗ ОРИГИНАЛЬНОЙ 

УПАКОВКИ МОЖЕТ ВЫЗВАТЬ ПОВРЕЖДЕНИЕ ПРИНТЕРА.

Удаление картриджей

Удалите картридж (-и) из принтера и любой печатный материал с 

печатной площадки.

CubePro 

재포장

원래


포장의


모든


포장


재료를


사용합니다

원래의


포장


재료


없이


배송하면


프린터가


손상될


있습니다

.

프린트


카트리지


제거

프린터에서


프린트


카트리지를


제거하고


프린트


패드에서


나머지


프린트


재료를


제거합니다

.

重新包装


CubePro

全部使用原始包装中的包装材料。不使用原始包装材料进行运输可能会损坏打印机。

取出打印盒

从打印机中取出打印盒,并从打印垫上取下所有剩余打印材料。

CubePro

の再梱包

元のパッケージに入っていたすべての梱包材を使用します。元の梱包材を使わずに搬送すると、プリンターに損傷を与えることがあり
ます。

プリントカートリッジの取り外し

プリンターからプリントカートリッジを取り外し、プリントパッドから残っているプリント材料を取り外します。

EN

FR

ES

DE

RU

KO

ZH

JA

EN

FR

ES

DE

RU

KO

ZH

JA

Summary of Contents for CubePro

Page 1: ...CubePro Setup and Repacking Guide Guide de configuration et d emballage Anleitung zur Ersteinrichtung und zum Wiederverpacken Gu a de configuraci n y reembalaje...

Page 2: ......

Page 3: ...ROVOQUER DES DOMMAGES L IMPRIMANTE FR Consulte la Gu a del usuario de CubePro para ver las instrucciones completas de funcionamiento y seguridad Puede encontrar la Gu a del usuario CubePro en Cubify c...

Page 4: ...ture de l emballage Coupez soigneusement les sangles A Tirez les languettes sur chacun des quatre 4 clips de maintien B situ s de chaque c t du carton d emballage Tirez sur les clips pour les enlever...

Page 5: ...te Heben Sie den Drucker aus dem unteren Schaumstoffrahmen Hierzu sind zwei Personen notwendig DE c RU KO ZH 2 JA Remove the print pad Remove the print pad box A and set it aside Remove the upper foam...

Page 6: ...haumstoffh lse von beiden Seiten der Druckd sen A DE A RU A KO A ZH A JA Open accessory boxes Accessory boxes contain tool kit A 1 3 cartridges B depending on the printer model jet wiper and two glue...

Page 7: ...m hex head screws securing the clear Z Axis guard A and remove the guard Save the guard and screws for repacking EN Retrait des vis de protection l aide du tournevis de 4 mm fourni avec le kit d outil...

Page 8: ...sche A der Druckstrahl Wischer an dem Schlitz im Boden B aus und schieben sie die Druckstrahl Wischer nach unten DE 3 A B RU 3 A B KO 3 A B ZH 3 A B JA Install jet wiper 2 Mount the jet wiper mounting...

Page 9: ...onde situ en bas du plateau dans l ouverture triangulaire de la plateforme FR Instale la bandeja de impresi n Coloque la bandeja de impresi n con el lado blanco hacia arriba en la plataforma de impres...

Page 10: ...nd to a wall outlet Press the on off switch B to power on your CubePro EN Branchement du cordon d alimentation Raccordez le cordon d alimentation la prise A sur le c t droit de l imprimante et branche...

Page 11: ...r www Cubify com en cubepro activate Geben Sie w hrend des Einschaltens den 4 stelligen Aktivierungscode im Druckerdisplay ein Ihre Seriennummer finden Sie auf der rechten Seite Ihres CubePro Druckers...

Page 12: ...ne Bedruckstoffe von der Druckplatte Vuelva a embalar su CubePro UTILICE TODO EL MATERIAL DE EMBALAJE DEL EMBALAJE ORIGINAL EL ENV O SIN EL MATERIAL DE EMBALAJE ORIGINAL PUEDE DA AR LA IMPRESORA Retir...

Page 13: ...soulevez le nettoyeur de jet puis d gagez le des fentes en forme de trou de serrure FR Retire el limpiador de inyectores Con la bandeja de impresi n baja levante el limpiador de inyectores y ret relo...

Page 14: ...uszuschalten DE RU LED KO LED ZH LED JA Remove jet wiper 2 Using the 4mm hex head driver loosen and remove the two screws and washers from the mounting posts EN Retrait du nettoyeur de buse En utilisa...

Page 15: ...n Z Achsenschutz A wieder an indem Sie den Schutz im hinteren Bereich des Druckers auflegen und mit dem 4 mm Sechskantschraubendreher die vier 4 Original 4 mm Sechskantschrauben festziehen DE Z A 4 4...

Page 16: ...ties Reinstall the foam tubing on either side of the print jets Secure the tubing with zip ties A Ensure that the belts are not bound to the foam with the ties EN R installation des gaines de mousse e...

Page 17: ...B RU A B KO A B ZH A B JA A B 10 Install the clips Install the clips on all four sides Make sure the clips secure the outer box to the lower box EN Installation des c Installez les d coupes sur les qu...

Page 18: ...n des coins de protection en mousse Ins rez les quatre coins de protection en mousse chaque coin de l imprimante Veillez ce que les protections en mousse soient ins r es dans le berceau inf rieur en m...

Page 19: ...sse de maintien sup rieur dans le carton au dessus de l imprimante FR Inserte la gomaespuma superior y la bandeja de impresi n Embale la bandeja de impresi n en la gomaespuma original y col quela en l...

Page 20: ...ccessoires Placez le bac accessoires dans le carton au dessus du bloc de mousse de maintien sup rieur FR Inserte la bandeja de accesorios Coloque la bandeja de accesorios en la caja sobre el protector...

Page 21: ...c de mousse de maintien sup rieur FR Vuelva a embalar las cajas de accesorios Vuelva a embalar los accesorios kit de herramientas A cartuchos B limpiador de inyectores y botellas de pegamento C y cabl...

Page 22: ...ur les deux coutures lat rales pour garantir la fermeture des rabats FR Selle la caja Coloque cinta de embalaje a lo largo de la junta central superior de la caja y sobre las juntas de ambos lados par...

Page 23: ...ndant l exp dition FR Ate la caja de la impresora al pal Instale dos tiras para amarrar la caja de la impresora al pal Las tiras requeridas n mero de pieza 403198 00 no est n incluidas pero se pueden...

Page 24: ...22 3D Systems Inc...
Page 25: ...effectuer correctement la mise niveau du plateau d impression WICHTIGE INFORMATIONEN Bevor Sie mit Ihrem ersten Druck beginnen m ssen Sie den Abstand zwischen Druckerplatte und den Druckstrahlen pr fe...

Page 26: ...Systems Inc 333 Three D Systems Circle Rock Hill SC 29730 www 3dsystems com 2014 3D Systems Inc All rights reserved PN 401648 00 Rev B Support cubify cubify com Connect facebook com cubify Follow cubi...

Reviews: