


114
C
HAPTER
5: P
LANNING
THE
3C
OM
M
OBILITY
S
YSTEM
5
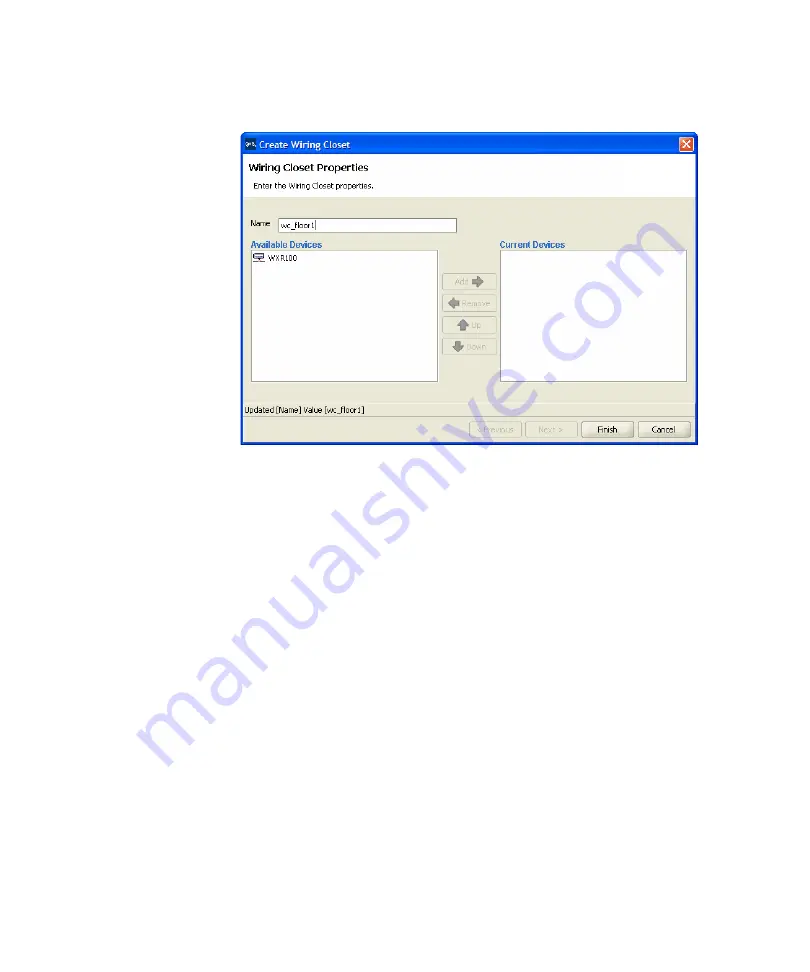
In the Name box, type the name of the wiring closet (1 to 60 characters,
with no tabs).
6
If you have not defined a WX switch in 3WXM, click
Finish
to save the
changes. Otherwise, go to step 7.
3WXM determines how many WX switches are needed when it
computes how many MAP access points are required and automatically
creates them.
7
To add a WX switch you previously created to the wiring closet, click the
WX switch in the Available Devices box, then click the
Add
button to
move it to the Current Devices box.
To remove a WX switch from the wiring closet, click the WX switch in the
Current Devices box, then click the
Remove
button to move it to the
Available Devices box.
If there are two or more WX switches in the wiring closet, you can
change the order in which 3WXM checks switches for free ports. If there
are no free ports on the switches listed, 3WXM creates and inserts a new
switch in the wiring closet. Select a WX switch and click the Up or Down
buttons to change the order of the switches.
8
Click
Finish
to save the changes.
Summary of Contents for OfficeConnect WX1200
Page 16: ......
Page 48: ...48 CHAPTER 2 WORKING WITH THE 3WXM USER INTERFACE ...
Page 236: ...236 CHAPTER 6 CONFIGURING WX SYSTEM PARAMETERS ...
Page 288: ...288 CHAPTER 7 CONFIGURING WIRELESS PARAMETERS ...
Page 332: ...332 CHAPTER 8 CONFIGURING AUTHENTICATION AUTHORIZATION AND ACCOUNTING PARAMETERS ...
Page 364: ...364 CHAPTER 10 MANAGING WX SYSTEM IMAGES AND CONFIGURATIONS ...
Page 476: ...476 CHAPTER 17 DETECTING AND COMBATTING ROGUE DEVICES ...
Page 492: ...492 CHAPTER A CHANGING 3WXM PREFERENCES ...
Page 514: ...514 APPENDIX C OBTAINING SUPPORT FOR YOUR 3COM PRODUCTS ...
Page 520: ...520 INDEX ...


