Management and Diagnostic Console
116
f.
If required, reboot the system for the changes to take effect.
2.
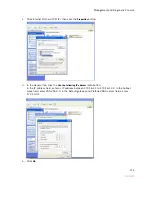
Attach the computer to the Local Network port of the 2Wire gateway.
3.
In the Web browser address bar, enter 172.16.0.1/management.
4.
Click Configure Services.
5.
Click the
Enable Routing
checkbox.
6.
Click the
Submit Settings
button.
The gateway PPP, routing, and TCP/IP functions are now re-enabled, and the Local Network LED will turn
Green. The computer can now be reset to a DHCP-assigned IP address, or left to obtain it statically.
Changing Timeout Parameters
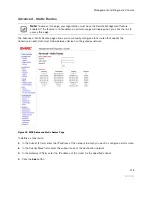
By default, TCP and UDP are configured to timeout in 1,440 and 10 minutes, respectively. You can change
the parameters by entering different values in the TCP Timeout and UDP Timeout fields, and then clicking
the
Submit
button.
Enabling Broadband Status Notification
To receive a notification message that the gateway has lost broadband connectivity and cannot access the
Internet, check the
Enable
checkbox.
Enabling Missing DSL Filter Notification
To receive a notification message that the gateway has detected a missing DSL filter, check the
Enable
checkbox.
Enabling SIP Application Layer Gateway
To enable the SIP ALG on the gateway firewall, check the
Enable
checkbox.
Changing the Upstream MTU
The MTU (Maximum Transmission Unit) is the largest size packet or frame, specified in octets (eight-byte
bits), that can be sent from a computer to the network. The 2Wire gateway’s MTU varies, depending on the
connection type used (for example, PPP or direct IP).
Note:
This field will display only if the CMS organization has the Broadband Status Notification
feature enabled.
Note:
This field will display only if the CMS organization has the Missing DSL Filter Notification
feature enabled.
Summary of Contents for Gateway None
Page 1: ...2Wire Gateway User Guide ...


