CONTOUR CT28 WALL & CEILING INSTALLATION
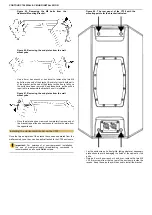
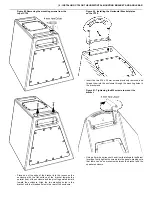
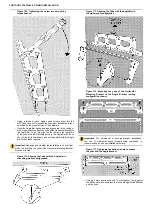
Figure 85. Removing the M6 bolts from the
Horizontal Mounting Bracket.
Figure 86. Removing the end plates from the wall-
mount yoke.
•
Use a 4 mm hex wrench or hex driver to remove the two M6
bolts from one end of the bracket. Be careful to hold both parts
of the bracket, as the end of the bracket will be free to fall once
the bolts have been removed. Keep these bolts, as the will be
required to reassemble the bracket once it is installed.
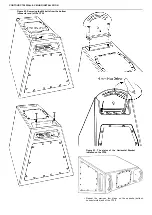
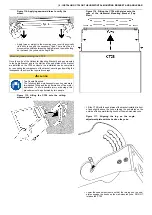
Figure 87. Removing the end plates from the wall-
mount yoke .
•
Once the plate has been removed completely from one end of
the bracket, repeat the above process to remove the plate from
the opposite end.
Installing the Horizontal Bracket on the CT28
Once the two end-plates of the bracket have been separated from the
wall-mounted yoke, they can be easily attached to the CT28 enclosure.
Important: For permanent or semi-permanent installation,
the use of medium-strength thread-locking compound is
recommended on all user-installed screws.
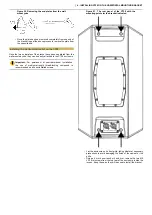
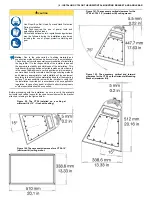
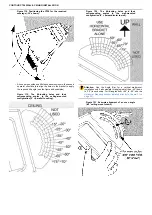
Figure 88. The rear panel of the CT28 with the
mounting points for the bracket indicated.
•
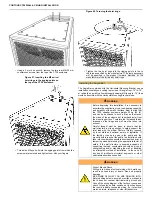
Lay the enclosure on its front grille, taking whatever necessary
precautions to avoid damaging the finish of the cabinet or the
grille.
•
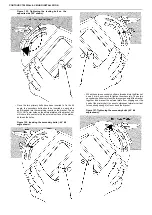
Using a 4 mm hex wrench or hex driver, remove the two M6
× 25 mm screws from the top rear of the enclosure, inside the
recess. Keep these, as they will be used to install the bracket.
Summary of Contents for Contour CT28
Page 1: ...Contour CT28 Wall Ceiling Installation...
Page 50: ......

