CONTOUR CT28 WALL & CEILING INSTALLATION
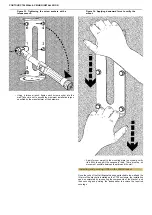
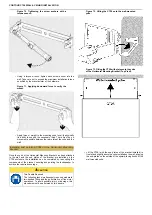
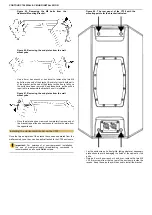
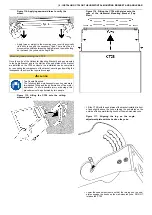
Figure 70. Tightening the screw anchors with a
torque wrench.
•
Using a torque wrench, tighten each screw anchor into the
wall. Take care not to exceed the maximum installation torque
specified by the manufacturer of the hardware.
Figure 71. Applying downward force to verify the
mount.
•
Apply force or weight to the mounting yoke to verify physically
its ability to support the necessary load. There must be no
movement possible between the rear plate of the yoke and the
wall.
Installing and pointing CT28 on the Horizontal Mounting
Bracket
Once the yoke of the Horizontal Mounting Bracket has been attached
to the wall and the end plates of the bracket are installed on the
CT28 enclosure, the installation can be completed by re-coupling the
components of the bracket, securing and pointing the loudspeaker to
achieve the required coverage.
CAUTION
Two People Required
The following task simultaneously requires moderate
two-handed lifting and the performance of fine motor
operations. To avoid possible injury or damage, this
procedure must be performed by two people
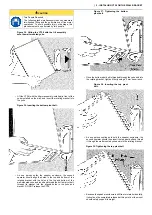
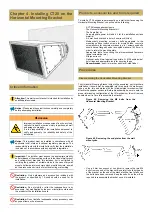
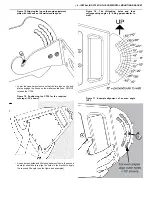
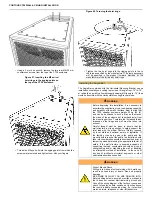
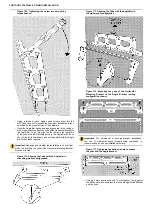
Figure 72. Lifting the CT28 onto the wall-mounted
yoke.
Figure 73. Fitting the CT28 with plates onto the yoke
of the Horizontal Mounting Bracket (Top View).
•
Lift the CT28 (with the end plates of the bracket installed) in
front of and slightly above the yoke installed on the wall, aligning
the end-plates on the outside of the upward-facing hooks of the
wall-mounted yoke.
Summary of Contents for Contour CT28
Page 1: ...Contour CT28 Wall Ceiling Installation...
Page 50: ......

