


Chapter 7 Advanced Settings
NXC-8160 User’s Guide
89
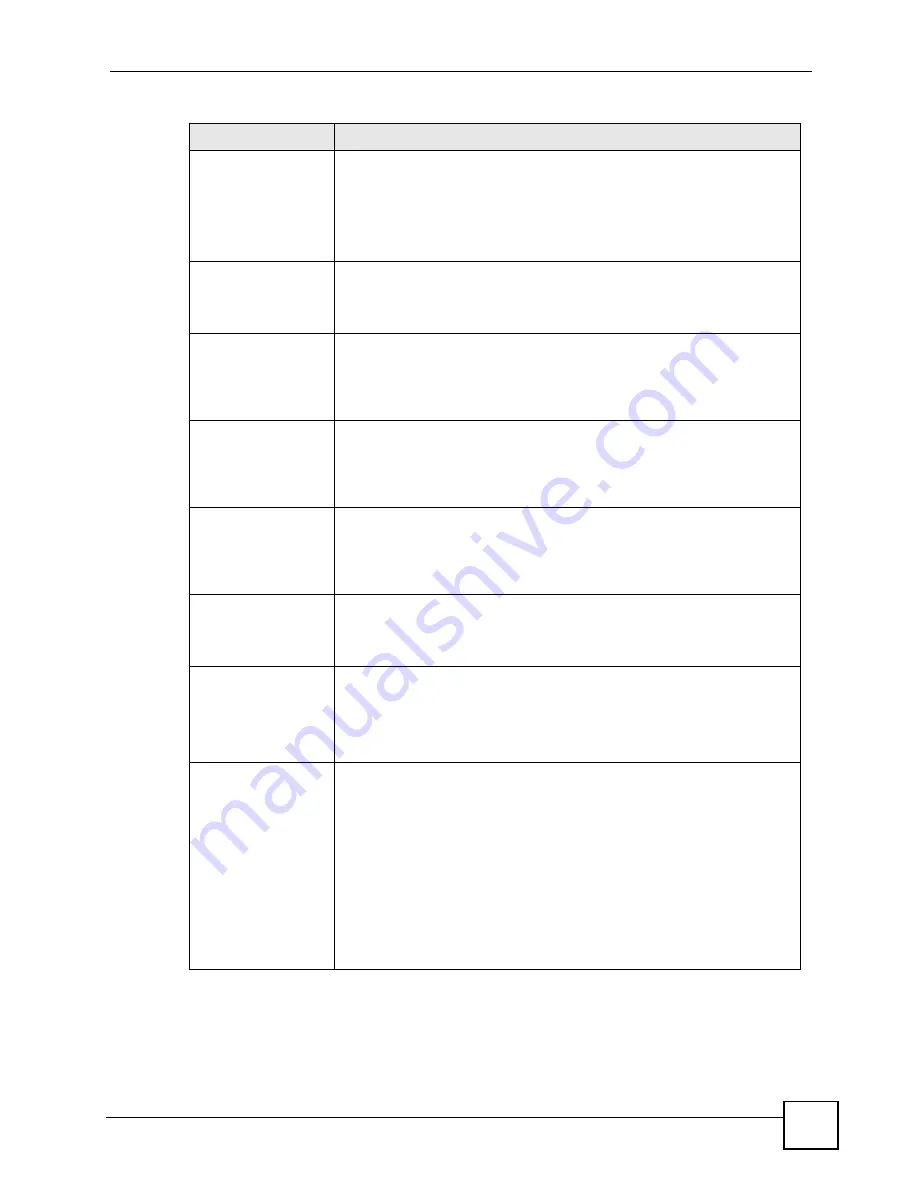
Picture #1
Click the
Browse
button to locate an image file on your computer that you
want to upload to the NXC-8160. This image functions as a graphical
header.
Note: You can upload any image type supported by the HTML
4.0 standard (PNG, JPG, or GIF, for example).
Text #1
Type your captive portal web page’s welcome sentence here. This is the
sentence that is superimposed over
Picture #1
on the web page above the
Username
and
Password
fields.
You can enter up to 80 characters.
Username
Enter the text you want to appear in association with the
Username
field. By
default this is “Username” but you can customize it how you see fit. For
example, if your captive portal web page is for your Shanghai office, you may
want to use the localized version of the word “username”.
You can enter up to 80 characters.
Password
Enter the text you want to appear in association with the
Password
field. By
default this is “Password” but you can customize it how you see fit (for
example, if your captive portal web page is for your Shanghai office, you may
want to use the localized version of the word “password”.)
You can enter up to 80 characters.
Login Button
Enter the text you want to appear in association with the
Login
button. By
default (and if left blank) this is “Login” but you can customize it how you see
fit (for example, if your captive portal web page is for your Shanghai office,
you may want to use the localized version of the word “login”.)
You can enter up to 10 characters.
Text #2
Type any additional information that you want to place on your captive portal
web page’s here. This is the sentence that is superimposed over
Picture #1
on the web page below the
Username
and
Password
fields.
You can enter up to 153 characters.
Picture #2
Click the
Browse
button to locate an image file on your computer that you
want to upload to the NXC-8160. This image functions as a graphical body.
Note: You can upload any image type supported by the HTML
4.0 standard (PNG, JPG, or GIF, for example).
Background Color
Select this option to set a custom background color for the web page. By
default, it is left unchecked and the background is set to white.
Use the mini-color palette to choose a color on the fly, or enter an HTML 4.0-
compliant hexadecimal color designation in the provided field.
Note: If you are unsure of a color’s HTML 4.0-compliant
hexidecimal color designation, you can use any one of a
number of popular image editing programs to figure it
out. Simply use the image editor’s color picker tool or its
built-in color palette. Both methods should provide you
with a means to determine hexidecimal color values.
Table 37
Advanced > Portal (continued)
LABEL
DESCRIPTION
Содержание NXC-8160
Страница 1: ...www zyxel com NXC 8160 Business WLAN Controller User s Guide Version 1 0 12 2008 Edition 2...
Страница 2: ......
Страница 8: ...Safety Warnings NXC 8160 User s Guide 8...
Страница 10: ...Contents Overview NXC 8160 User s Guide 10...
Страница 21: ...21 PART I Introduction Getting to Know Your NXC 8160 23 Introducing the Web Configurator 27...
Страница 22: ...22...
Страница 32: ...Chapter 2 Introducing the Web Configurator NXC 8160 User s Guide 32...
Страница 34: ...34...
Страница 64: ...64...
Страница 74: ...74...
Страница 100: ...Chapter 8 Events Reports NXC 8160 User s Guide 100...
Страница 101: ...101 PART V Troubleshooting and Specifications Troubleshooting 103 Product Specifications 107...
Страница 102: ...102...
Страница 110: ...Chapter 10 Product Specifications NXC 8160 User s Guide 110...
Страница 112: ...112...
Страница 136: ...Appendix A Setting Up Your Computer s IP Address NWD271N User s Guide 136...
Страница 160: ...Appendix B Importing Certificates Document Title 160...
Страница 178: ...Appendix D Pop up Windows JavaScripts and Java Permissions NXC 8160 User s Guide 178...
Страница 196: ...Appendix F Legal Information NXC 8160 User s Guide 196...
Страница 202: ...Appendix G Customer Support NXC 8160 User s Guide 202...


