background image

Page | 6  


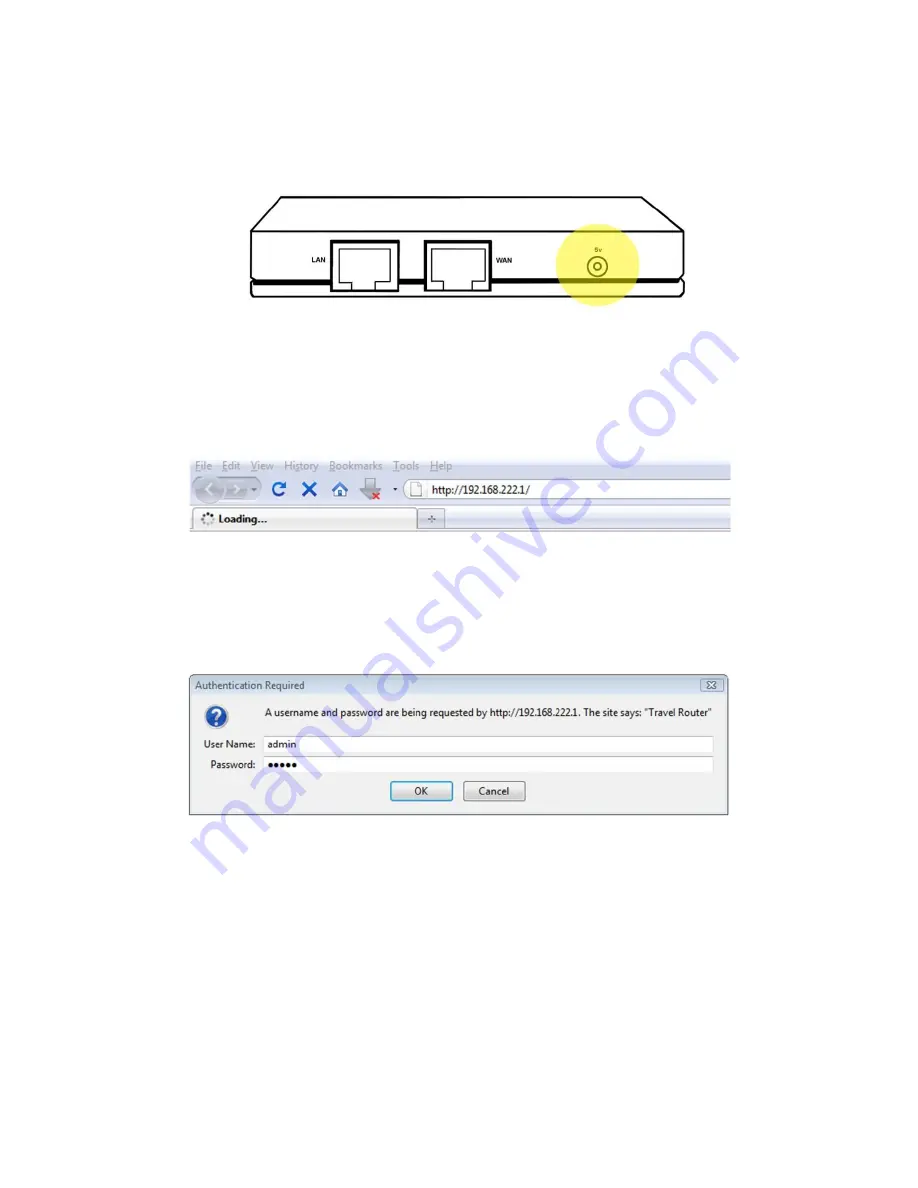
Step 2 - Attach Power Cable


Plug the AC adapter into a wall socket and plug the power tip into the Travel Router’s 5v power port.  Please 
wait 30 seconds for the router to fully boot up before continuing to the next step. 


Step 3 - Access Web Configuration


From your computer, open a Web browser (Internet Explorer, Firefox, Safari, etc.) then type 192.168.222.1 into 
the address bar and press the “

ENTER"

 key. 


Step 4 - Setup Login 

In the login window key in the default User Name (

admin

) / Password (

admin

) and click the OK button. 


Содержание Travel Connect ZTRP150

Страница 1: ...Page 1 ZuniDigital Travel Connect Portable Wireless Router with USB Charging Station User s Guide ZTRP150 ...

Страница 2: ...ion 26 FCC Certification Information 27 Introduction Congratulations on your purchase of the ZuniDigital Travel Connect Before installing and using this innovative product please read this user s guide thoroughly and retain it for future use This user s guide will explain how to setup and use the travel router USB charging station Retail Package Contents ZuniConnect Travel Router PREMIUM Power Ada...

Страница 3: ...nce most of these products lack a traditional RJ 45 Ethernet port needed to plug in a network cable Utilizing patent pending Intelli IP technology this device easily creates a reliable and secure wireless network from a wired Broadband connection Once established users can connect multiple devices to a personal Wi Fi Hotspot which is useful for tradeshows hotel rooms or anywhere multiple users nee...

Страница 4: ... WEP data encryptions with dual active firewalls provide a safe and secure network connection Travel Friendly Design Small and lightweight this travel router packs neatly into luggage and lets you keep bulky heavy wall charger transformers at home Router AP Mode or Wireless ISP Function User selectable standard routing AP or Wi Fi IN OUT modes Other Features Compatible with IEEE 802 11N and 802 11...

Страница 5: ...Travel Connect for use in ROUTER Mode For the best results do not place the ZuniDigital Travel Connect near any large metal objects or magnets like those found in speakers Also note that elevating the travel router from the floor will increase wireless broadcast signal performance and range THE SWITCH ON THE TRAVEL ROUTER IS SET TO ROUTER Step 1 Attach LAN Ethernet Cable Attach one side of an RJ 4...

Страница 6: ...s for the router to fully boot up before continuing to the next step Step 3 Access Web Configuration From your computer open a Web browser Internet Explorer Firefox Safari etc then type 192 168 222 1 into the address bar and press the ENTER key Step 4 Setup Login In the login window key in the default User Name admin Password admin and click the OK button ...

Страница 7: ...exit the Setup Wizard click the Cancel button Step 7 Configure LAN Ethernet Parameters The pre entered default values should work for most networks but if they need to be modified you can do so now Unless you are an advanced user we recommend that you use these default settings when creating your Local Area Network LAN because changing the default values listed may interfere with the router s oper...

Страница 8: ...ons but if you have any questions on which settings to use please contact the Internet Service Provider or the local network administrator Step 9 Configure Basic Wi Fi Settings Use this page to personalize the name of the wireless network SSID to be broadcast by the ZuniDigital Travel Connect If desired changes can be made to these settings but it is recommended that only experienced users do so O...

Страница 9: ... may begin using it as a wireless access point Step 11 Using the Travel Router Attach the Ethernet cable that provides the Internet connection into the WAN Internet port then power the travel router ON and wait for it to fully boot The router will broadcast the SSID setup in step 9 which you can connect wireless devices to RESTORE FACTORY DEFAULT SETTINGS Should you at any time with to restore the...

Страница 10: ...e instructions to setup the ZuniDigital Travel Connect for use in Wireless ISP WISP Mode For the best results do not place the ZuniDigital Travel Connect near any large metal objects or magnets like those found in speakers Also note that elevating the travel router from the floor will increase wireless broadcast signal performance and range THE SWITCH ON THE TRAVEL ROUTER IS TO SET TO WISP Step 1 ...

Страница 11: ...s for the router to fully boot up before continuing to the next step Step 3 Access Web Configuration From your computer open a Web browser Internet Explorer Firefox Safari etc then type 192 168 222 1 into the address bar and press the ENTER key Step 4 Setup Login In the login window key in the default User Name admin Password admin and click the OK button ...

Страница 12: ...Fi Network to Connect With Select the wireless network from the table that you want to connect the Travel Router with and click the Next button If the desired network is not listed click the Refresh button Step 7 Enter Password Connect If prompted type the password used to access the wireless network and then click the Next button ...

Страница 13: ...ard and verify the password you are using is correct Step 9 Configure LAN Ethernet Parameters The pre entered default values should work for most networks but if they need to be modified you can do so now Unless you are an advanced user we recommend that you use these default settings when creating your Local Area Network LAN because changing the default values listed may interfere with the router...

Страница 14: ...ions but if you have any questions on which setting to use please contact the Internet Service Provider or the local network administrator Step 11 Configure Basic Wi Fi Settings Use this page to personalize the name of the wireless network SSID to be broadcast by the ZuniDigital Travel Connect If desired changes can be made to these settings but it is recommended that only experienced users do so ...

Страница 15: ...nt Step 13 Using the Travel Router Power the travel router ON and wait for it to fully boot and connect to the selected wireless network It will broadcast the SSID setup in step 9 which you can connect wireless devices to Also be aware that each time you relocate the travel router you will need to re configure it to connect with the wireless network at the new location RESTORE FACTORY DEFAULT SETT...

Страница 16: ...tal cameras and portable gaming devices Step 1 Power the USB charging station ON by connecting the power tip to the 5V port on the ZuniConnect Travel and by plugging the AC adapter into a wall socket Step 2 For standard charging devices such as smart phones and MP3 players connect one end of the USB charging cable into either of the two USB charging ports and then plug the other end into the devic...

Страница 17: ...puters and e readers connect one end of the USB charging cable into the USB charging port labeled Turbo and then plug the other end into the device in need of charge Step 4 When the charging process is completed unplug the device s from the USB Charging Station ...

Страница 18: ...eless network when they travel Utilizing the two USB charging ports travelers only need to carry the USB charging cable for their smart phone tablet PC e reader portable gaming device or MP3 player These cables take up very little space and weigh next to nothing In addition this travel router also lets users create a personal Hot Spot from an existing broadband connection providing a safe reliable...

Страница 19: ...USB ports that can be used to recharge a wide range of personal electronic devices cell phones tablet computers e readers etc Instead of using the wall transformer plug that came with your device simply plug one end of the USB cable into the charging station and the other into the device Recharging times will vary on the type of device being charged how low the battery currently is and if the Quic...

Страница 20: ...the wired Ethernet adapter on the setup computer is set to receive an IP address automatically Reboot the setup computer with the RJ 45 Ethernet cable from the ZuniConnect Bridge attached Be sure you are typing the correct IP address into your Web browser 192 168 222 1 There is no RJ 45 Ethernet port on my setup device to access the travel router with If the device you are using to configure the t...

Страница 21: ...ed Be sure you are typing the correct IP address into your Web browser 192 168 222 1 There is no RJ 45 Ethernet port on my setup device to access the travel router with If the device you are using to configure the travel router does not have an Ethernet port available for example when using a tablet PC you will have to use the default factory settings or download an application for your device tha...

Страница 22: ...ng Ports WPS Wi Fi Protected Setup Button RESET Factory Reset Button Wireless Security 64 Bit 128 Bit WEP WPA WPA2 Receiver Sensitivity 802 11N 69dBm 802 11G 70dBm 802 11B 85dBm Transmit Power 802 11N 13dBm 802 11G 14dBm 802 11B 16dBM Broadcast Channel USA 11 EUROPE 13 Range Coverage max Indoor 100 300 Feet Outdoor 300 1000 Feet LED Display POWER WAN WLAN LAN WPS CHARGING STATION Standard Charging...

Страница 23: ...ONS Mechanical Dimensions 3 86 x 2 37 x 0 65 Weight 2 2 oz Environmental Ranges Operating Temperature 32 104 F Storage Temperature 14 158 F Operating Humidity 10 90 RH non condensing Storage Humidity 5 95 RH non condensing Power AC to DC Adapter 100 240V Output 5V 2 5A ...

Страница 24: ...ning provisions In case of any inconsistency between the English and other versions of this Limited Warranty the English version shall prevail Sole Warranty This warranty contains the sole warranty of ZuniDigital there are no other warranties expressed or except as required by law implied including implied warranty or condition of quality merchantability or fitness for a particular purpose and suc...

Страница 25: ...ent or relocate the receiving antenna Increase the separation between the equipment and receiver Connect the equipment into an outlet on a circuit different from that to which the receiver is connected Consult the dealer or an experienced radio TV technician for help This device complies with Part 15 of the FCC Rules Operation is subject to the following two conditions 1 This device may not cause ...

Отзывы: