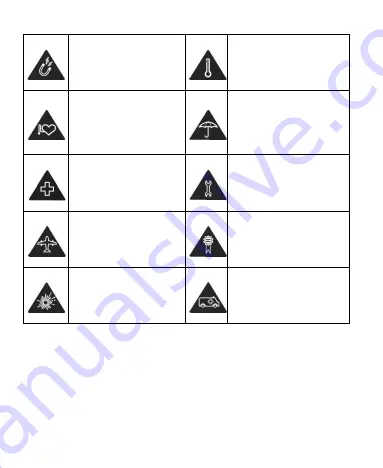
background image


158 


Avoid contact with 
anything magnetic. 


Avoid extreme 
temperatures. 


Keep away from 
pacemakers and other 
electronic medical 
devices. 


Avoid contact with 
liquids. Keep your 
phone dry. 


Power off when asked 
to in hospitals and 
medical facilities. 


Don’t take your phone 
apart. 


Power off when told to 
in aircrafts and 
airports. 


Only use approved 
accessories. 


Power off when near 
explosive materials or 
liquids. 


Don’t rely on your 
phone for emergency 
communications.   

Radio Frequency (RF) Energy 

This phone is designed and manufactured not to exceed the 
emission limits for exposure to radio frequency (RF) energy set 
by the Federal Communications Commission of the United 
States. 

Содержание Visible R2

Страница 1: ...1 Visible R2 User Guide BC ...

Страница 2: ... modifications on print errors or update specifications in this manual without prior notice This manual has been designed with the utmost care to ensure the accuracy of its content However all statements information and recommendations contained therein do not constitute a warranty of any kind either expressed or implied Please refer to For Your Safety to be sure to use your phone properly and saf...

Страница 3: ...f Mondelez International Inc group The Bluetooth word trademark and logos are owned by the Bluetooth SIG Inc and any use of such trademarks by ZTE Corporation is under license Manufactured under license from Dolby Laboratories Dolby Dolby Audio and the double D symbol are trademarks of Dolby Laboratories The microSDXCTM logo is a trademark of SD 3C LLC Qualcomm Snapdragon processors are products o...

Страница 4: ...4 Other trademarks and trade names are those of their respective owners Version No R1 0 Edition Time October 21 2018 ...

Страница 5: ...e for the First Time 18 Locking Unlocking the Screen and Keys 19 Using the Touch Screen 20 Getting to Know the Home Screen 21 Personalizing 24 Changing the System Language 24 Setting the Date and Time 24 Changing the Ringtone Notification Sound and Alarm Sound 25 Turning System Sounds On Off 25 Adjusting Volumes 26 Switching to Silent or Vibration Mode 26 Using Do Not Disturb Mode 27 Applying New ...

Страница 6: ... ok 42 Entering Text 43 Editing Text 47 Opening and Switching Apps 48 Using Two Apps in Split Screen Mode 49 Uninstalling or Disabling an Application 50 Connecting to Networks and Devices 51 Connecting to Mobile Networks 51 Connecting to Wi Fi 53 Connecting to Another Device via Wi Fi Direct 57 Connecting to Bluetooth Devices 57 Connecting to Your Computer via USB 60 Using the microSDXC Card as Po...

Страница 7: ... Adjusting Your Call Settings 78 Contacts 84 Checking Contact Details 84 Adding a New Contact 84 Setting Up Emergency Contacts 85 Importing Exporting and Sharing Contacts 86 Working With Favorite Contacts 87 Working With Groups 88 Searching for a Contact 89 Editing Contacts 90 Accounts 92 Adding or Removing Accounts 92 Configuring Account Sync 93 Email 95 Setting Up the First Email Account 95 Chec...

Страница 8: ...101 Changing Message Settings 102 Calendar 103 Viewing Your Calendars and Events 103 Creating a Goal a Reminder or an Event 104 Changing Calendar Settings 104 Browser 106 Opening the Browser 106 Using Multiple Browser Tabs 106 Downloading Files 107 Changing Browser Settings 107 Camera 108 Capturing a Photo 108 Using Manual Camera Mode 110 Using Other Camera Modes 111 Recording a Video 112 Customiz...

Страница 9: ...usic 122 Viewing Your Music Library 122 Setting a Song as the Default Ringtone 123 Playing Music 123 Managing Playlists 125 Video 127 Opening the Video Library 127 Playing and Controlling Videos 127 Managing Video Files 129 Voice Recorder 131 Recording a Voice Memo 131 Playing a Voice Memo 131 More Apps 132 Calculator 132 Clock 132 Downloads 134 File Manager 134 ...

Страница 10: ...ttery 142 Display 142 Sound 143 Storage 143 Security Location 144 Accounts 147 Accessibility 147 Google 147 System 148 System Updates 150 Upgrading the Phone Software 151 Troubleshooting 152 For Your Safety 157 General Safety 157 Radio Frequency RF Energy 158 FCC Regulations 160 Hearing Aid Compatibility HAC Regulations for Mobile ...

Страница 11: ...11 Phones 162 CTIA Requirements 164 Distractions 165 Product Handling 166 Electrical Safety 170 Radio Frequency Interference 171 Explosive Environments 172 Specifications 174 ...

Страница 12: ...12 Getting Started Getting to Know Your Phone Earpiece Touch screen Auxiliary microphone Proximity light sensor Front camera nano SIM microSDXC card tray Headset jack ...

Страница 13: ...13 Flash Back camera Speaker Charging USB Type C jack Power key Volume key Main microphone Fingerprint sensor ...

Страница 14: ... see recently used applications Double tap to switch to the most recent application Back key Touch to go to the previous screen Volume key Press or hold either end of the key to turn the volume up or down NOTE You can switch the positions of the Back key and the Recent apps key Swipe up on the home screen and touch Features Navigation keys to select one option Installing the nano SIM Card and the ...

Страница 15: ...e phone do not use any other kind of SIM cards or any non standard nano SIM card cut from a SIM card You can get a standard nano SIM card from your service provider 1 Insert the tip of the tray eject tool into the hole next to the card tray 2 Pull out the card tray and place the nano SIM card and the microSDXC card on the tray as shown Carefully slide the tray back into place ...

Страница 16: ...he battery as soon as possible WARNING Use only ZTE approved chargers and USB Type C cables The use of unapproved accessories could damage your phone or cause the battery to explode WARNING Do not remove the back cover The battery is not removable Removal may cause fire or explosion 1 Connect the adapter to the charging jack nano SIM card microSDXC card ...

Страница 17: ... bar 3 Disconnect the charger when the battery is fully charged NOTE If the battery is extremely low you may be unable to power on the phone even when it is being charged In this case try again after charging the phone for at least 20 minutes Contact customer service if you still cannot power on the phone after prolonged charging ...

Страница 18: ...s using this function will periodically query the GPS satellites for your current location each query drains your battery Use the Battery saver feature Powering Your Phone On Off Press and hold the Power key to turn on your phone To turn it off press and hold the Power key to open the options menu and touch Power off Setting Up Your Phone for the First Time When you first power on your phone after...

Страница 19: ...ck the keys press the Power key NOTE To save battery power the phone automatically turns off the screen after a certain period of time when you leave it idle You will still be able to receive messages and calls while the phone screen is off Unlock the Screen and Keys 1 Press the Power key to turn the screen on 2 Swipe up on the screen or Swipe from to use voice assistant or swipe from to open the ...

Страница 20: ... as application and settings icons or press on screen buttons simply touch them with your finger Touch and Hold To open the available options for an item for example a message or link in a web page touch and hold the item Swipe or Slide To swipe or slide means to quickly drag your finger vertically or horizontally across the screen Drag To drag press and hold your finger with some pressure before ...

Страница 21: ... for the screen orientation to automatically change Swipe up on the home screen and touch Settings Display and switch on Auto rotate screen You can also access the screen rotation control by sliding down the status bar twice and touching Auto rotate or Portrait Getting to Know the Home Screen The home screen is the starting point for your phone s applications functions and menus You can customize ...

Страница 22: ...ortcuts widgets and more Simply swipe left or right on the home screen to see the extended panels You can add or remove home screen panels or adjust their order To add a new home screen panel 1 Touch the Home key to access the home screen Primary shortcuts Status bar Wallpaper Folder Widget Application ...

Страница 23: ... the item To move a home screen panel 1 Touch and hold an empty area of the home screen and slide left or right to view the home screen thumbnails 2 Touch and hold a thumbnail and drag it left or right to the place you need To delete a home screen panel 1 Touch and hold an empty area of the home screen and slide left or right to view the home screen thumbnails 2 Touch on the top right corner of a ...

Страница 24: ...ve it to the top to switch to that language NOTE To remove languages from the list touch Remove and select the languages you want to delete and then touch OK Setting the Date and Time 1 Swipe up on the home screen and touch Settings System Date time 2 Set the date time time zone and time format To adjust the date and time automatically touch to turn on Automatic date time To adjust the date and ti...

Страница 25: ...ication Sound and Alarm Sound You can customize the default ringtone for incoming calls the default notification sound and the default alarm sound 1 Swipe up on the home screen and touch Settings Sound Ringtones 2 Touch Phone ringtone Default notification sound or Default alarm sound 3 Scroll through the list and select the ringtone you d like to use You can touch Add ringtone to add additional au...

Страница 26: ...ent or vibration mode by using one of the following methods Press the Volume key when no media application is active to show the volume management window Drag the slider to the left or keep pressing the Volume down key to switch the phone to vibration mode Press the key again in vibration mode to switch the phone to silent mode Swipe up on the home screen and touch Settings Sound Notification mode...

Страница 27: ...Not Disturb Mode 1 Swipe down from the top of the screen with two fingers to access the Quick Settings 2 Touch Do not disturb NOTES Press the Volume key when no media application is active to show the volume bar Drag the slider to the left or keep pressing the Volume down key to turn on vibration Press the key again to turn on Alarms only To turn off Do not disturb mode quickly press either end of...

Страница 28: ...blocking notifications on the screen Applying New Wallpapers You can set the wallpaper for the home screen and the lock screen 1 Touch and hold an empty area on the home screen and then touch WALLPAPERS 2 Slide left or right to select an image as the wallpaper You can also touch My photos to choose a picture as the wallpaper Touch HOME or LOCK to preview the wallpaper 3 Touch Select Home screen Lo...

Страница 29: ...nlock the phone s screen and keys 1 Swipe up on the home screen and touch Settings Security location Screen lock 2 Touch None Swipe Pattern PIN or Password Touch None to disable screen lock protection Touch Swipe to enable screen lock and allow unlocking with a swipe gesture You can unlock the screen by touching the display and sliding up Touch Pattern to create a pattern that you must draw to unl...

Страница 30: ...ement 3 Draw the pattern or enter the PIN password if you have already set the screen lock method 4 Touch REGISTER in the Add fingerprint message box when it prompts 5 Press one of your fingers on the fingerprint sensor at the back of your phone After feeling the slight vibration raise your finger and then press your finger on the sensor again 6 Repeat step 5 until your fingerprint has been regist...

Страница 31: ...to set waking up or unlocking your device via a fingerprint NOTE If the screen is off or locked press one of your registered fingers on the fingerprint sensor to quickly turn on unlock the screen Touch Quick launch app Touch Fingerprint1 for instance Swipe up and down to choose one app Touch next to the app You can set more fingerprints to quick open your desired apps NOTE If the screen is off or ...

Страница 32: ...ered or not on the fingerprint sensor to quickly answer an incoming call View notification drawer If you slide on the switch you can swipe down on the fingerprint sensor from any screen to unfold notification drawer swipe up to fold it View recent apps If you slide on the switch you can swipe up on the fingerprint sensor for recent apps when viewing the home screen View pictures If you slide on th...

Страница 33: ... is neither too bright nor too dim Touch CREATE NOW 4 Keep your face 20 cm to 50 cm away from the screen Wait for a moment until the phone has created the face successfully NOTES You can touch Attemptation of verification in the Face Verify screen and put your face in front of the screen to confirm whether the created face works or not Touch Create again in the Face Verify screen to recreate your ...

Страница 34: ...ou can use the screen pinning feature to keep an app in view so others cannot switch to other apps or access your personal information Turn On Screen Pinning 1 Swipe up on the home screen and touch Settings Security location Screen pinning 2 Touch the On Off switch 3 To add security for unpinning switch on Lock device when unpinning select a security option with or without your fingerprint and fol...

Страница 35: ...turned on 2 Open the app you want to keep in view 3 Touch the Recent apps key 4 If there are many app tabs swipe up to find on the front most tab 5 Touch Unpin the Screen 1 To unpin the screen and return to normal use touch and hold the Back key 2 If the screen is locked press your registered finger on the fingerprint sensor or swipe up on the lock screen and draw the pattern or enter the PIN pass...

Страница 36: ...right side Below are some of the icons you may see Indicators and Icons Indicator What it means Indicator What it means 4G LTE connected No signal Vibration on Signal strength Ringer off Mobile data in use Battery full Airplane mode Battery low Bluetooth on Battery charging Connected to a Wi Fi network Alarm set GPS on Wired headset connected ...

Страница 37: ...en Close the Notification Panel Notifications report the arrival of new messages calendar events and alarms as well as ongoing events You can open the notification panel to view the details of notifications To open the notification panel swipe your finger down on the home screen or from the top of the screen To close the notification panel swipe your finger up on the screen or touch the Back key R...

Страница 38: ... notification You can touch MORE SETTINGS to configure notification options for this app Use Quick Settings The quick settings in the notification panel make it convenient to view or change the most common settings for your phone Swipe down with two fingers from the top of the screen or open the notification panel and drag the panel downward to view the following quick settings Brightness Uncheck ...

Страница 39: ...ch to turn on or off the auto rotate screen feature Power saver Touch to turn on or off Power saver Ultra Power saver Touch to turn on or off Ultra Power saver Mobile Hotspot Touch to enable the mobile hotspot feature and create a mobile hotspot Touch and hold to access the Mobile Hotspot menu See Sharing Your Mobile Data Connection Do not disturb Alarms only Touch to turn on Do not disturb mode a...

Страница 40: ... device You need to turn on Wi Fi first For detailed introduction please refer to the device manual Screenshot Touch to take a screenshot NOTE In the quick settings screen touch at the bottom right to access the Settings menu touch to change control switch position Managing Shortcuts and Widgets Add a Shortcut 1 Swipe up on the home screen 2 Drag an application to a home screen panel to add a shor...

Страница 41: ... you need Remove Shortcuts or Widgets 1 Touch and hold a shortcut or a widget on the home screen 2 Drag it to to remove it NOTE When there are more than two home screen panels no panel can be left empty If the shortcut widget or folder is the only item on the current home screen panel the panel will be deleted as you remove the item Adjust Widget Size 1 Touch and hold a widget on the home screen a...

Страница 42: ...will be created and the shortcut is added into the folder 3 To add more shortcuts into the folder touch and hold each shortcut and drag it over the folder before releasing it NOTES To remove a shortcut from a folder touch the folder to open it Touch and hold the shortcut and drag it to the home screen Touch the folder and then touch the Folder field to rename the folder Rearranging the Primary Sho...

Страница 43: ... on screen keyboard You can also enter text by speaking with the Google voice typing feature Enable or Disable Input Methods 1 Swipe up on the home screen and touch Settings System Languages input Virtual keyboard Manage keyboards 2 Touch a keyboard in the list to enable disable it as an option for entering text NOTE Some default input methods may not be disabled Change Input Methods 1 When you us...

Страница 44: ...portrait to landscape The landscape keyboard is not supported in all applications Touch the alphabetic keys to enter letters Touch and hold some specific keys to enter associated accented letters or numbers For example to enter È touch and hold and the available accented letters and number 3 appear Then slide to choose È As you enter a word candidates appear above the keyboard Touch the correct on...

Страница 45: ...er one handed typing Touch to switch to the left hand or right hand keyboard respectively Touch to switch back to the full sized keyboard Touch and hold and slide to to manage the Gboard settings Glide Typing The Gboard supports the glide typing feature You use this feature to input a word by sliding through the letters To enable and use glide typing 1 On the Gboard touch and hold Or swipe up on t...

Страница 46: ... you want to enter a single letter simply touch the key once Lift your finger at the end of the word A space is added automatically when you begin to input the next word Google Voice Typing Google voice typing uses the Google voice recognition service to convert speech to text You must have a data connection on a mobile or Wi Fi network to use it Start of the word End of the word ...

Страница 47: ...uages input Virtual keyboard Touch an option to choose the settings for that input method Editing Text Move the insertion point Touch where you want to type The cursor blinks in the new position and a tab appears below it Drag the tab to move the cursor Select text Touch and hold or double tap within the text The nearest word highlights with a tab at each end of the selection Drag the tabs to chan...

Страница 48: ... the right side of the screen to the initial letter of the app you need or touch the search box at the top to search for apps Touch in the search box to sort the apps alphabetically by frequency or by time Switch Between Recently Opened Apps 1 Touch the Recent apps key A list of the names and thumbnails of apps you ve recently used opens If you ve been using more apps recently than can fit on the ...

Страница 49: ...nd then touch and hold the Recent apps key The screen is divided into two or Touch the Recent apps key to view your recently used apps touch and hold the tab of the app you want to use and drag it to the Drag here to use split screen area 2 If the app you need is in the recent apps list touch it to set it as the second app Or touch the Home key and swipe up on the home screen to find the app you n...

Страница 50: ...o Uninstall or Disable at the top of the screen 3 Touch OK to uninstall or disable the app NOTES Preinstalled apps cannot be uninstalled and not all apps can be disabled To find the disabled applications touch Settings Apps notifications Touch See all 32 apps for instance Touch and select Disabled apps You can then touch an application and touch ENABLE to enable it ...

Страница 51: ... disable mobile data use To get data services when roaming 1 Swipe up on the home screen and touch Settings Network Internet Mobile network 2 Slide the Data roaming access switch to enable or disable roaming NOTE Data roaming may incur significant roaming charges Select Preferred Network Type 1 Swipe up on the home screen and touch Settings Network Internet Mobile network Preferred network type 2 ...

Страница 52: ...twork Internet Mobile network Access Point Names to check the default APN NOTE To set the APN to default settings touch Reset to default Select Network Operator 1 Swipe up on the home screen and touch Settings Network Internet Mobile network Network operators to search for all available networks NOTE Touch SEARCH NETWORKS to search for all available networks again 2 Touch a network in the network ...

Страница 53: ...et Wi Fi 2 Slide the Wi Fi switch to the On position to turn on Wi Fi 3 Touch a network name to connect to it 4 If the network is secured enter the password and touch CONNECT NOTE Your phone automatically connects to previously used Wi Fi networks when they are in range Get Notified of Open Networks 1 Swipe up on the home screen and touch Settings Network Internet Wi Fi 2 Slide the Wi Fi switch to...

Страница 54: ... the security details from the network s administrator 1 Swipe up on the home screen and touch Settings Network Internet Wi Fi 2 Slide the Wi Fi switch to the On position 3 Touch Add network 4 Enter the network SSID name If necessary enter security or other network configuration details 5 Touch SAVE Forget a Wi Fi Network You can make your phone forget about the details of a Wi Fi network that you...

Страница 55: ... a wireless network using WPS Method one WPS button Recommended 1 Swipe up on the home screen and touch Settings Network Internet Wi Fi 2 Slide the Wi Fi switch to the On position 3 Touch Wi Fi preferences Advanced WPS Push Button 4 Press the WPS button on the wireless router and the access point will recognize your phone and add it to the network Method two PIN 1 Swipe up on the home screen and t...

Страница 56: ... Wi Fi Wi Fi preferences Advanced 2 Touch to adjust the following settings Show Wi Fi popups When opening apps show popups of Wi Fi availability Avoid bad Wi Fi connections Use the mobile network whenever the Wi Fi network you re connected to has no Internet connection Install certificates Install certificates needed for connecting to certain Wi Fi networks Network rating provider Select the provi...

Страница 57: ...Fi switch to the On position 3 Touch Wi Fi preferences Advanced Wi Fi Direct Your phone will search for other devices enabled with Wi Fi Direct connections 4 Touch a device name below Peer devices to connect with it The other device will receive a connection prompt and need to accept the request for connection Both devices may need to enter a common PIN 5 Once connected the device is displayed as ...

Страница 58: ...position When Bluetooth is on the icon will appear in the status bar Change the Device Name 1 Swipe up on the home screen and touch Settings Connected devices Bluetooth 2 Slide the Bluetooth switch to the On position if Bluetooth is off 3 Touch Device name 4 Edit the name and touch RENAME Pair With Another Bluetooth Device 1 Swipe up on the home screen and touch Settings Connected devices Bluetoot...

Страница 59: ...TE The Bluetooth passkey may be fixed for certain devices such as headsets and hands free car kits You can try entering 0000 or 1234 the most common passkeys or refer to the documents for that device Forget a Bluetooth Device You can make your phone forget its pairing connection with another Bluetooth device To connect to the device again you need to search for it and enter or confirm a passkey ag...

Страница 60: ...en prompted touch ACCEPT to start receiving the data If necessary swipe down on the Status Bar to locate the prompt Received files are stored automatically in a dedicated folder Bluetooth for instance in the phone storage or microSDXC card You can access them in the File Manager app Connecting to Your Computer via USB You can connect your phone to a computer with a USB cable and transfer music pic...

Страница 61: ... driver on your PC Disconnect Your Phone From the Computer To disconnect the phone from the computer simply unplug the USB cable when you re finished Using the microSDXC Card as Portable or Internal Storage You can use your microSDXC card as portable storage to save photos music videos downloaded files and more If your microSDXC card is new or doesn t have content you want to keep you can also set...

Страница 62: ...portable storage while the phone is on you must unmount it first 1 Swipe up on the home screen and touch Settings Storage 2 Touch next to the SD card name in the Portable storage section 3 When the screen prompts the card is safely ejected you can remove it from the phone To erase and format the microSDXC card 1 Swipe up on the home screen and touch Settings Storage 2 Touch the SD card name in the...

Страница 63: ... FORMAT CAUTION The formatting procedure erases all the data on the microSDXC card after which the files CANNOT be retrieved 5 The phone will prompt you to move your photos files and other data from the phone to the microSDXC card Select Move now or Move later and touch NEXT Follow the onscreen instructions to continue To move data between the phone and the microSDXC card With the microSDXC card a...

Страница 64: ...d touch Settings Storage 2 Touch your SD card name below Device storage 3 Touch Eject Touch EJECT NOTE Before ejecting the card ensure that you have moved data and apps to the phone 4 When the screen prompts the card is safely ejected you can remove it from the phone To reformat the microSDXC card as portable storage If you no longer want to use your microSDXC card as internal storage you can refo...

Страница 65: ...create a Wi Fi hotspot Share Your Mobile Data Connection via USB You can access the Internet on your computer via the USB tethering feature of your phone The feature needs data connection on a mobile network and may result in data charges NOTE You cannot transfer files between your phone and your computer when the phone is USB tethered 1 Connect your phone to your computer with a USB cable 2 Swipe...

Страница 66: ...twork connection via Bluetooth For more information please see your computer s documentation 3 Swipe up on the home screen and touch Settings Network Internet Tethering Mobile Hotspot 4 Switch on Bluetooth tethering Your computer is now sharing your phone s data connection NOTE To stop sharing your data connection switch off Bluetooth tethering Share Mobile Data via Mobile Hotspot You can share yo...

Страница 67: ...ing its Wi Fi network name SSID 3 On another device locate your phone via Wi Fi and connect with it to start using the phone s mobile data NOTE To stop sharing your data connection slide the switch to the Off position Set Up Your Mobile Hotspot You can change your phone s Wi Fi network name SSID secure your mobile hotspot and set other options 1 Swipe up on the home screen and touch Settings Netwo...

Страница 68: ...need to know your network SSID to find the mobile hotspot Show advanced options Check to select an 802 11 mode Manage users Block or unblock users or set the maximum number of devices that can connect to the hotspot simultaneously Sleep policy Set hotspot sleep policy and notification Connecting to Virtual Private Networks Virtual private networks VPNs allow you to connect to the resources inside ...

Страница 69: ... VPN 2 Touch and enter the VPN name 3 Select the VPN type enter the server address and other information provided by your network administrator Check Show advanced options to fill out additional details 4 Touch SAVE The VPN is added to the list on the VPN screen Connect to a VPN 1 Swipe up on the home screen and touch Settings Network Internet VPN 2 Touch the VPN that you want to connect to 3 When...

Страница 70: ...70 Internet VPN 2 Touch beside the VPN that you want to modify 3 Edit the VPN settings and then touch SAVE ...

Страница 71: ...igits or symbols NOTE As you enter the phone number or contact name your phone searches for matching information in your contacts If you see the number and contact you want to call touch it to place the call immediately 3 Touch below the keypad to dial You can also touch the search box at the top of the Phone app screen and enter the phone number or contact name you want to call Touch the matching...

Страница 72: ...coming call screen opens displaying the Caller ID or the information about the caller that you ve entered in the Contacts app You can answer or reject the call or reject it with a text message Answer a Call To answer an incoming call If the phone screen is active touch If the phone screen is locked slide up NOTE To silence the ringer before answering the call press the Volume key or the Power key ...

Страница 73: ...s from within the Phone app touch Settings Quick responses Working With the Call History The call history is a list of all the calls you ve placed received or missed It provides a convenient way to redial a number return a call or add a number to your Contacts To open the call history touch the Home key in the top search field Call history Place a Call From the Call History 1 Open the call history...

Страница 74: ...ouch a number or a contact and then touch Call details to view more call information While viewing the call details you can Touch to delete the entry Touch to copy the phone number Touch Edit number before call to edit the number in the dialer before calling it Touch the circle in front of the entry to open the contact information tab from the bottom of the screen If the number is in your Contacts...

Страница 75: ...our full contact list is displayed Touch beside a contact to place a call Checking Voicemail If you have set the phone to divert calls to voicemail callers can leave voicemail messages when they cannot reach you Here s how to check the messages they left 1 Touch the Home key 2 Touch and hold the 1 key in the dialer If prompted enter your voicemail password 3 Follow the voice prompts to listen to a...

Страница 76: ...ur voicemail or bank account during the call Touch to mute or unmute your microphone Touch to turn the speaker on or off Touch to open the Contacts app Touch to put the caller you are speaking to on hold and switch to the other call that has been put on hold Touch to merge the separate calls into a single conference call Touch to show the keyboard and the message screen to send and receive text me...

Страница 77: ...ervice provider for more information Switch Between Current Calls When you re on a call and another call comes in your phone screen informs you and displays the caller ID To respond to an incoming call while you re on a call Touch or slide up to answer the call This places the first caller on hold and answers the second call Touch or slide down to reject the second call Touch or slide up to reject...

Страница 78: ...he call and are the first to hang up all callers are disconnected To end the conference call touch Adjusting Your Call Settings You can configure a number of settings for the Phone application NOTE Some call options are displayed only when these features are available and some features require network support and may result in additional charges Please contact your service provider for more inform...

Страница 79: ...r incoming call notification Check Also vibrate for calls to enable vibration for incoming call notification Check Dialpad tones to play sounds when you touch the dial pad keys Set Options for Answering and Ending Calls When enabled the options allow you to end a call by pressing the Power key or make the phone vibrate when a call is answered 1 Touch the Home key Settings Answer and end calls 2 To...

Страница 80: ... key 3 Select one from the contact list Edit Quick Response to Rejected Callers 1 Touch the Home key Settings Quick responses 2 Touch a text message to edit it 3 Touch OK to save the message Set Voicemail 1 Touch the Home key Settings 2 Touch Voicemail to configure voicemail settings Touch Advanced Settings Service to select the voicemail service provider Your carrier is the default Touch Advanced...

Страница 81: ...2 Touch Always forward Forward when busy or Forward when no answer as you need and touch Activate 3 Enter the number that you want to forward to Touch TURN ON to enable it Block Certain Numbers The call blocking feature allows you to block calls and messages from certain numbers 1 Touch the Home key Settings Call blocking 2 Touch ADD A NUMBER 3 Enter a phone number or touch to select one from the ...

Страница 82: ...for voice telephony 1 Touch the Home key Settings Accessibility Real Time Text 2 Slide the switch to the On position 3 Touch RTT mode 4 Touch the option you want to configure Visible During Calls During a call you can touch to show the keyboard and the message screen to send and receive text messages Always Visible During a call the keyboard and the message screen is always visible for you to send...

Страница 83: ... Hearing aids to turn on hearing aid compatibility CAUTION Do not turn on the Hearing aids option unless you use a hearing aid with a telecoil Using this setting without a hearing aid or with a hearing aid without a telecoil may be harmful to your hearing ...

Страница 84: ...ontacts touch the Home key Checking Contact Details 1 Touch the Home key 2 Scroll through the list to view all your contacts 3 Touch a contact to view its details Adding a New Contact 1 Touch the Home key 2 Touch to add a new contact 3 Enter the contact name phone numbers and email addresses Touch More fields to enter other information 4 Touch SAVE to save the contact ...

Страница 85: ... ICE Contacts will be available for use even when your phone is locked To set up My Emergency Information 1 Touch the Home key In Case of Emergency contacts 2 Touch My Emergency Information Edit your emergency information 3 Touch to save NOTE If a profile has been set up touch My Emergency Information and touch Edit to modify the information To set up emergency contacts 1 Touch the Home key In Cas...

Страница 86: ...ch EMERGENCY Importing Exporting and Sharing Contacts You can import export contacts This is especially useful when you need to transfer contacts between different devices You can also quickly share your contacts using Bluetooth Email Gmail Google Drive or Messages Import Contacts 1 Touch the Home key Settings 2 Touch Import vcf file 3 Choose the vCard file s you would like to import Export Contac...

Страница 87: ...ded and then touch 4 Choose how to share the contacts The options available depend on the applications and services installed NOTE You can also share your contacts by choosing Share all contacts in the Export contacts menu Working With Favorite Contacts You can add the contacts you use frequently to FAVORITES so that you can find them quickly Add a Contact to Favorites 1 Touch the Home key 2 Touch...

Страница 88: ...l name field and enter a name Touch OK 3 Touch ADD CONTACTS and select the contacts you wish to be the group members Touch ADD NOTES Touch to add contacts to an existing group Touch Remove contacts and touch next to the contact that you want to remove from the group View Your Contact Groups 1 Touch the Home key 2 View the labels for groups 3 Touch a label to view the group members NOTE ...

Страница 89: ...to disband the group The contacts in the group will not be deleted Rename a Group 1 Touch the Home key 2 Touch a label and then touch Rename label to edit the group name 3 Touch OK Searching for a Contact 1 Touch the Home key and then touch to search 2 Enter the contact name or other information such as phone number you want to search for The contacts matched will be listed ...

Страница 90: ...ete 3 Check more contacts if needed and then touch 4 Touch OK to confirm Link Contacts As your phone synchronizes with multiple online accounts you may see duplicate entries for the same contact You can merge all the separate information of a contact into one entry in the Contacts list 1 Touch the Home key 2 Touch a contact 3 Touch Link 4 Touch the contact whose information you want to link with t...

Страница 91: ...by touching View linked contacts ADD and choosing a contact you want to link with the main contact Unlink Contact Information If contact information from different sources was linked by mistake you can separate the information back into individual contacts on your phone 1 Touch the Home key 2 Touch a linked contact you want to unlink 3 Touch View linked contacts UNLINK 4 Touch UNLINK to confirm ...

Страница 92: ...t to add 3 Follow the on screen steps to enter the information about the account Most accounts require a username and password but the details may vary You may also need to obtain some information from IT support or your system administrator When the account is successfully added it is displayed by categories in the Accounts menu in Settings Remove an Account Removing an account will delete it and...

Страница 93: ...ccounts 2 Switch on or off Automatically sync data to enable or disable automatic sync When automatic sync is turned on changes you make to information on your phone or on the web are automatically synced with each other When automatic sync is turned off you need to sync manually to collect emails updates or other recent information Sync Manually 1 Swipe up on the home screen and touch Settings Ac...

Страница 94: ...o sync 3 Touch Account sync The screen shows a list of information the account can sync 4 Touch a listing to sync that type of information between the phone and the web Or touch Sync now to sync all the types of information as you need ...

Страница 95: ...NEXT to let the phone retrieve the network parameters automatically NOTE You can also enter these details manually by touching MANUAL SETUP or if automatic setup fails 4 Follow the on screen instructions to finish setup Your phone will show the inbox of the email account and start to download email messages Checking Your Emails Your phone can automatically check for new emails at the interval you ...

Страница 96: ...he To field Separate each recipient with a comma You can also touch to select recipients from CONTACTS GROUPS or HISTORY NOTE To send a carbon copy or a blind carbon copy to other recipients touch beside the To field to open the Cc Bcc fields and enter contact names or email addresses 3 Enter the email subject and compose the email text 4 Touch to add audio files images videos and other types of f...

Страница 97: ...and all recipients of the original message touch To forward the email to someone else touch 3 Edit your message and touch Mark an Email as Unread You can return a read email to the unread state for example to remind yourself to read it again later You can also mark a batch of emails as unread While reading a message touch Mark unread While in a message list for instance the inbox touch the sender ...

Страница 98: ... a few lines of plain text as a signature for every outgoing email message from an account such as your name and contact information 1 Open the Email app 2 Touch Settings and select the account you want to add a signature to 3 Touch Signature and enter the text 4 Touch OK Adding and Editing Email Accounts Add an Email Account After setting up your first email account see Setting Up the First Email...

Страница 99: ...he Email app 2 Touch Settings and touch the account whose settings you want to change 3 Make the changes you want and touch or the Back key when you re finished Remove an Email Account 1 Open the Email app 2 Touch Settings and touch the account you want to remove 3 Touch Remove account from this device OK Changing General Email Settings General settings apply to all email accounts you add 1 Open t...

Страница 100: ...100 3 Make the changes you want and touch or the Back key when you re finished ...

Страница 101: ...rson you re sending a message to 4 Type your message If you want to send a multimedia message touch to attach photos audio files video files etc to the message 5 Touch NOTE Do not add any attachment if you want to send a text message Otherwise you may be charged for a multimedia message Replying to a Message Messages you receive are appended to existing threads of the same number If the new messag...

Страница 102: ...uch the thread that has the message you want to reply to 2 Type your reply in the Text message field at the bottom You can touch if you want to reply with an MMS 3 Touch Changing Message Settings Touch Settings in the Messages screen to change the settings ...

Страница 103: ... Change Calendar Views You can view your calendars in different forms The app offers five view types Month Week 3 Day Day and Schedule To change calendar views touch at the top left and select the view you prefer In Month Week 3 Day or Day view swipe horizontally to see previous and future months weeks or days In Schedule view swipe vertically to see all your events When you are viewing past or fu...

Страница 104: ... can also touch a spot in 3 Day Day or Week view twice to add an event to that time spot You can open the Goal Reminder Event details screen and touch to change the details Changing Calendar Settings To change the calendar settings touch Settings You can touch General to change general settings which apply to all accounts Or touch other settings that only apply to specific accounts To be updated w...

Страница 105: ...105 If you ve saved events on Gmail like birthdays or holidays the information can be added automatically to your calendar after you manage the Birthdays settings or the Holidays Settings ...

Страница 106: ...app and touch the Search or type web address field 2 Enter the address URL of a web page or enter terms you want to search for 3 Touch a URL or search suggestion or touch the enter key on the keyboard to open the web page or search results Using Multiple Browser Tabs You can open several web pages at the same time one page in each tab and switch between them freely Open a New Browser Tab Touch The...

Страница 107: ...ld an image or a link to a file or to another web page 2 In the menu that opens touch Download image or Download link The downloaded files are saved to your phone or the microSDXC card You can view or open them in the Downloads app Changing Browser Settings You can configure a number of settings to customize the way you browse the web including several that you can use to control your privacy To o...

Страница 108: ... Gallery app Capturing a Photo 1 Touch the Home key 2 Aim the camera at the subject and make any necessary adjustment PHOTO automatic camera mode is used by default 3 Touch the area on the screen where you want the camera to focus or let the camera autofocus on the center of the image 4 Touch to take a photo WARNING Keep a safe distance when using the flash Do not point the flash toward the eyes o...

Страница 109: ...ge the HDR setting back camera only 2 Change the camera video settings 3 Switch among PHOTO mode VIDEO mode and MANUAL mode 4 View pictures and videos you have taken 5 Capture a photo 6 Switch between the front and back cameras ...

Страница 110: ...the exposure bar appears beside the focus point You can drag up or down to adjust the exposure Using Manual Camera Mode You can use Manual camera mode to adjust more camera options for your photo 1 Touch the Home key MANUAL 2 Aim the camera at the subject You can make the following adjustments Drag the green square to any area on the screen that you want to focus on Touch and hold it to lock the f...

Страница 111: ... lapse pictures 3 Touch to take the photo Using Other Camera Modes Besides capturing photos and videos in the traditional way your Camera app offers other powerful and interesting camera modes Touch in the viewfinder screen to find them PANORAMA Capture panorama pictures TIMELAPSE Set the time interval between each frame when you record time lapse videos with the back camera COLLAGE Capture two pi...

Страница 112: ...oto 4 Touch to stop recording NOTES You can pinch or spread on the screen or press the Volume key to zoom in or out before and during recording When you touch the screen to focus during recording the exposure bar appears beside the focus point You can drag up or down to adjust the exposure Touch and hold the focus point to lock the focus To capture a time lapse video touch TIMELAPSE Drag the slide...

Страница 113: ...elay before the camera takes a picture automatically after you touch the shutter icon Water mark Apply a watermark to your photo Composition Show or hide the grid or golden spiral to help with balanced photo composition Gradienter Show or hide the gradienter Point and shoot front camera only When this feature is enabled you can touch the viewfinder screen to take a photo in SELFIE mode Smile front...

Страница 114: ...and videos Anti banding Set the anti banding value when you take pictures of TV or computer screens to avoid stripes on the screen Save location Change the storage location for captured photos and videos Help Enable the Help icon on the viewfinder screen or touch More to view help details Restore defaults Restore default camera and video settings Video quality Set the quality for your video Meteri...

Страница 115: ...um Working With Albums View Album Contents Touch ALBUMS and then touch an album to view the pictures and videos it contains Share Albums Pictures or Videos 1 Touch and hold an item in the album view to select an album or after you open an album to select a picture or a video 2 Touch more items that you want to share 3 Touch and select how you want to share the items NOTE Album sharing may not be a...

Страница 116: ... to hide The default albums such as Camera and My videos albums cannot be hidden NOTE To show the hidden albums again touch Settings Album filter Touch the filtered albums you want to restore Working With Pictures Touch a picture in an album to view the picture in full screen Pinch two fingers together on the picture to zoom out Double tap the picture or spread fingers apart to zoom in Double tap ...

Страница 117: ...where all its contents are displayed in a grid 2 Share the picture 3 Delete the picture 4 Touch to rename print or rotate the picture set it as wallpaper contact photo etc check file details or browse the album contents in a slideshow 5 Edit the picture ...

Страница 118: ... available for certain albums or pictures Retouching Your Pictures You can edit any photos you took and some other pictures in Gallery with Photo Editor The changed picture is saved in the same album as the original one while the original is never affected 1 While viewing a picture in full screen touch the screen and touch to open Photo Editor 2 Touch the icons along the bottom of the screen to ed...

Страница 119: ...e made and undo or redo them Making a GIF or a Collage You can put together a few pictures in the same album to make an animated GIF or a collage of pictures 1 Open the Gallery app and touch GIF maker or Collage maker 2 Touch an album 3 Touch the pictures you want You can exit the album and open other albums to add more pictures To make a GIF touch 2 to 50 pictures in the order or reverse of the o...

Страница 120: ...res or adjust their order For collage touch TEMPLATE FREE or COLLAGE and then select a border shading and style 6 When you are satisfied with the final picture touch to save the GIF or touch to save the collage Depending on your storage setting the picture is saved in the picture_editor GIF folder or picture_editor Collage folder in your phone storage or your microSDXC card Playing Videos 1 Touch ...

Страница 121: ... touch the following options Touch to share the video via Bluetooth Gmail Messages etc Touch to stabilize or rotate the video Touch to view the details such as video size storage location etc Touch to move the video to trash Touch or to pause or resume playback ...

Страница 122: ...gs to view all music files on your phone Your music is organized by ALL SONGS ARTISTS ALBUMS and GENRE Touch Favorites to browse music files you have marked as favorites Touch Recently played to view the music files you have recently played Touch Folders to find music files through the folders they are stored in All music playlists you have created are listed under My playlist NOTE If an audio fil...

Страница 123: ...u that opens touch Set as ringtone 4 Touch Phone ringtone or Notification ringtone You can set a part of the song duration 40 s or the whole song as the ringtone Touch SET AS RINGTONE NOTE If the song is being played and you re in the playback screen you can touch Set as ringtone Playing Music Touch a song in the music library to listen to it Touch the playback bar at the bottom of the screen to o...

Страница 124: ...2 Song album and artist information 3 Add the song to your favorites or remove it from favorites 4 Turn shuffle on or off 5 Drag the slider to jump to any part of the song 6 Playback control Skip songs or pause resume playback 7 Turn on or off Dolby sound effect ...

Страница 125: ...back or skip songs When the screen is locked the song information album cover and playback controls are displayed on the lock screen Touch the song title to restore the playback screen or you can pause resume playback or skip songs Managing Playlists Create playlists to organize your music files into sets of songs so that you can play the songs you like in the order you prefer To create a new play...

Страница 126: ...ch a playlist and touch Delete To rename a playlist Touch a playlist and touch Rename To view a playlist Touch a playlist to view its content To remove songs from a playlist Touch and hold the song Touch additional songs to select multiple songs for removal and then touch To play a playlist Touch next to a playlist ...

Страница 127: ... library Swipe up or down to find the video you want You can also touch Search to search for video files or touch View or Sort to change the display mode or sort the list Playing and Controlling Videos Touch a video in the video library to play it Touch the screen to show the playback controls You can control the video and audio or carry out other operations ...

Страница 128: ...playback controls and lock the touch screen 3 Drag the slider to jump to any part of the video 4 Change the video size fit to screen or full screen 5 Playback control Skip videos or pause and resume playback 6 Touch to turn into a small floating window for video playing ...

Страница 129: ... vertically on the right or left part of the screen to adjust volume or brightness respectively Touch or to skip to the previous or the next video Managing Video Files Delete Videos 1 In the video library touch and hold a video 2 Touch the videos you want to delete 3 Touch OK Share Videos 1 In the video library touch and hold a video 2 Touch the videos you want to share 3 Touch and select how you ...

Страница 130: ...review the selected portion 4 Stop the preview and touch The trimmed video is saved as a new video file Rename a Video 1 In the video library touch a video you want to rename 2 Touch Rename 3 Type the new video name and touch OK View Details of a Video 1 In the video library touch a video you want to view its details 2 Touch Details 3 Touch OK to close the window ...

Страница 131: ...3 Touch to start recording Touch to pause and to continue recording Touch to add flags as you need 4 Touch DONE to stop recording 5 Type the name and touch SAVE Playing a Voice Memo 1 Touch at the top right of the screen to see all recordings 2 Touch the title of a memo to play it NOTE You can also touch at the right of the memo to delete share rename edit check its file information or set it as y...

Страница 132: ... the phone to landscape view Clock Swipe up on the home screen and touch Clock The Clock app allows you to check local time in places around the world set alarms and use timers Set a New Alarm 1 Open the Clock app and touch 2 Touch a default alarm to configure it or touch at the bottom of the screen to create a new alarm Touch OK 3 Set up the alarm options such as time alarm days snooze and alarm ...

Страница 133: ...e countdown timer allows you to set a time and count down to zero To use stopwatch 1 Open the Clock app and touch 2 Touch NOTES Touch SHARE to share the stopwatch data in html format Touch LAP to record lap times Touch RESET to reset the stopwatch To use countdown timer 1 Open the Clock app and touch 2 Set a timer and touch to count down NOTE You can touch ADD TIMER to add more countdown timers an...

Страница 134: ...en and touch Downloads Touch a file to open it with the appropriate application Touch and hold a file to delete or share it File Manager Quickly access all of your images videos audio clips and other types of files on your phone or the memory card Swipe up on the home screen and touch File Manager Touch CATEGORY to find the file you need by category or touch LOCAL to browse folders and files on th...

Страница 135: ...services may not be available in your region Chrome Use the Chrome app to browse the Internet and get your bookmarks browsing history and more synced with your Google account Drive Store files on Google servers for free after you sign in to your Google account You can access them on your computers your phones and other devices share them or collaborate with others Duo Make a simple video call or a...

Страница 136: ...anage photos on the phone and your Google account Play Movies TV Purchase download and watch movies and TV shows Play Music Play music on the phone and on your Google account Play Store Purchase and download apps games and more from the Google Play store YouTubeTM Watch video clips from YouTube com or upload your own and share with the world ...

Страница 137: ...f All the phone s radios that transmit voice or data are turned off when airplane mode is on Network Internet Wi Fi Turn Wi Fi on or off and configure your Wi Fi connections see Connecting to Wi Fi Mobile Network Control mobile data use select network types or operators and configure access point names see Connecting to Mobile Networks Data Usage Check and manage mobile data use You can view and r...

Страница 138: ...rning Touch the Limit switch to turn on or off data usage limit Mobile data connection will be turned off when you ve used designated amount of data Touch Mobile data usage to check how much data has been used during the time cycle you set see what apps have been using mobile data restrict background data for individual apps or allow unrestricted data usage when Data saver is on for individual app...

Страница 139: ...ta Connection VPN Virtual private networks VPNs allow you to connect to the resources inside a secured local network See Connecting to Virtual Private Networks Call Settings Configure call forwarding See Forward Incoming Calls Roaming State In the Settings app Network Internet Roaming state shows the roaming state Emergency Alerts In the Settings app touch Network Internet Emergency alerts to mana...

Страница 140: ...le Play Store or your printer USB Select the USB connection mode between your phone and PC Chromebook Connect to your phone from your Chromebook Apps Notifications Notifications Set different notification options for individual apps Touch App notifications Notifications App notifications and touch an app to block or mute its notifications or allow its notification dot to show on the app icon ...

Страница 141: ... Keys You can swap the positions of the Back key and the Recent apps key Select an option to make the switch Scheduled Power On Off Set the day and time when the phone automatically powers on or off You can also touch the switches on the right to turn the features on or off Gesture Motion You can control the phone with special finger gestures or moving the phone in different ways Touch the switche...

Страница 142: ...n services and vibration Reduce brightness and the time the phone enters sleep Only basic functions such as phone call and messages are available App Power saver manager Set the power saving policy for individual apps Display Brightness level Set the brightness of the display Night Light Night light tints your screen amber to make it easier to look at your screen or read in dim light Adaptive brig...

Страница 143: ...ew notifications arrive Calibration Place the phone on a level surface and take a calibration test to calibrate the sensor Sound Adjust different types of volume set notification mode set Do not disturb options set up ringtone and notification sound turn on or off Dolby Audio set up default alarm sound or select system sounds Storage The Storage settings menu lets you check memory information for ...

Страница 144: ...ccess the phone see Protecting Your Phone With Screen Locks Touch beside Screen lock to set the following options Make pattern visible Show the pattern as you draw it This option is available when unlock pattern is set Automatically lock Set the time needed for the lock protection to be activated after the screen turns off except when the phone kept unlocked by Smart Lock This option is available ...

Страница 145: ...sing Fingerprints Face Verify You can use face detection to unlock the screen without entering the specific PIN password or drawing the pattern See Using Face Detection Smart Lock Keep the phone unlocked when connected to trusted devices in trusted places when recognizing a trusted voice or while being held or carried NOTE You must set a screen lock pattern PIN or password to use the Smart Lock fe...

Страница 146: ... request location Show pass words Display passwords as you enter them Device admin apps View or deactivate apps you have authorized to be device administrators Encryption credentials Encrypt your accounts settings downloaded apps and data media and other files Configure the settings of credential storage Storage type Check the credential storage type Trusted credentials Display trusted CA certific...

Страница 147: ...ge information Accounts Manage your accounts and synchronization Touch Add account to create accounts on your phone Touch an account to adjust its settings sync the account or remove the account Accessibility Configure the system accessibility options and accessibility plug ins on your phone such as using Color inversion or Font size for users with sight problems Google Manage settings for Google ...

Страница 148: ...Autofill service to choose the Autofill service provider such as Google and touch Add service to add more Autofill service providers Touch next to Autofill service to view the Autofill service provider s account and the contents that can be automatically filled in Personal dictionary Add new words to the phone s dictionary or remove words from the dictionary The words you add are used for spelling...

Страница 149: ...t Wi Fi mobile Bluetooth Reset all network settings including Wi Fi mobile networks and Bluetooth Reset app preference This will reset all preferences for disabled apps disabled app notifications default applications for actions background data restrictions for apps and any permission restrictions Erase all data factory reset Reset your phone to factory default settings All your personal data from...

Страница 150: ...150 System Updates Check for available software updates for your phone update history and update status ...

Страница 151: ...ss upgrade package offered by your mobile service provider 3 Use your PC to download an upgrade package to your microSDXC card and install it to your phone from the card NOTE Visit the ZTE official handset service support website Z Community https community zteusa com to learn more about the above upgrade methods as well as which phones and methods are supported ...

Страница 152: ...eak at your current location for example in a basement or near a tall building because wireless transmissions cannot effectively reach it Move to a location where the network signal can be properly received The network is busy at the current time for example during peak times there may be too much network traffic to handle additional calls Avoid using the phone at such times or try again after wai...

Страница 153: ...one line Unable to select certain features Your service provider does not support these features or you have not applied for services that provide these features Contact your service provider Cannot charge the battery The battery or battery charger is damaged Contact the dealer The phone s temperature is below 32 F 0 C or higher than 113 F 45 C Adjust the battery charging environment to avoid extr...

Страница 154: ... area where signaling is weak temporarily power off the phone The battery is depleted In high temperature environments battery life will be shortened Contact the dealer for a new battery If you are not able to connect to the network the phone will continue to send out signals as it attempts to locate a base station Doing so consumes battery power and will consequently shorten standby time Change y...

Страница 155: ... SIM card properly There is debris on the nano SIM card contacts Use a soft dry cloth to clean the nano SIM card contacts Unable to connect to the network The nano SIM card is invalid Contact your service provider You are not within the network s service area Check the service area with your service provider Poor signal Move to an open space or if you are inside a building move closer to a window ...

Страница 156: ...er provides the nano SIM card s PUK code use the PUK code to unlock the nano SIM card Phone crashes reboots freezes or cannot be powered on Some third party software is not compatible with your phone Uninstall the software that may be causing the problem See Uninstalling or Disabling an Application Upgrade the phone software Reset the phone to factory status See Reset Options ...

Страница 157: ... 4 in away from your body while making calls Your phone may produce a bright or flashing light Small parts may cause choking Don t dispose of your phone in fire Your phone can produce a loud sound To prevent possible hearing damage do not listen at high volume levels for long periods Exercise caution when holding your phone near your ear while the loudspeaker is in use ...

Страница 158: ...acilities Don t take your phone apart Power off when told to in aircrafts and airports Only use approved accessories Power off when near explosive materials or liquids Don t rely on your phone for emergency communications Radio Frequency RF Energy This phone is designed and manufactured not to exceed the emission limits for exposure to radio frequency RF energy set by the Federal Communications Co...

Страница 159: ...d for wireless devices employing a unit of measurement is known as the Specific Absorption Rate or SAR The SAR limit set by the FCC is 1 6 W kg This device is complied with SAR for general population uncontrolled exposure limits in ANSI IEEE C95 1 1992 and had been tested in accordance with the measurement methods and procedures specified in IEEE1528 The FCC has granted an Equipment Authorization ...

Страница 160: ...lic components to maintain a separation of 0 4 inches 10 mm between this device and your body RF exposure compliance with any body worn accessory that contains metal was not tested and certified and use of such body worn accessory should be avoided FCC Regulations This device complies with part 15 of the FCC Rules Operation is subject to the following two conditions 1 This device may not cause har...

Страница 161: ...d on the user is encouraged to try to correct the interference by one or more of the following measures Reorient or relocate the receiving antenna Increase the separation between the equipment and receiver Connect the equipment into an outlet on a circuit different from that to which the receiver is connected Consult the dealer or an experienced radio TV technician for help CAUTION Changes or modi...

Страница 162: ...devices are more immune than others to this interference noise and phones also vary in the amount of interference they generate The wireless telephone industry has developed a rating system for wireless phones to assist hearing device users in finding phones that may be compatible with their hearing devices Not all phones have been rated Phones that are rated have the rating on their box or a labe...

Страница 163: ...requirements and are likely to generate less interference to hearing devices than phones that are not labeled M4 is the better higher of the two ratings T Ratings Phones rated T3 or T4 meet FCC requirements and are likely to be more usable with a hearing device s telecoil T Switch or Telephone Switch than unrated phones T4 is the better higher of the two ratings Note that not all hearing devices c...

Страница 164: ...g system that has been qualified with the system per CTIA Certification Requirements for Battery System Compliance to IEEE 1725 Use of an unqualified battery or charger may present a risk of fire explosion leakage or other hazards Do not short circuit the phone or allow metallic conductive objects to contact the charging terminals Replace the battery only with another battery that has been qualifi...

Страница 165: ...tified adapters products that bear the USB IF logo or products that have completed the USB IF compliance program Distractions Driving Full attention must be given to driving at all times in order to reduce the risk of an accident Using a phone while driving even with a hands free kit can cause distraction and lead to an accident You must comply with local laws and regulations restricting the use o...

Страница 166: ... and camera lens clean An unclean screen or camera lens may slow down the phone s reaction to your operations or interfere with the image quality Clean your phone and its accessories with a soft material such as cleaning cloth for eyeglass lenses Do not use alcohol or other corrosive substances for cleaning or allow them to get inside Do not expose your phone or its accessories to open flames or l...

Страница 167: ...high pressure containers such as water heaters microwave ovens or hot cooking utensils Otherwise your phone may be damaged Please check local regulations for disposal of electronic products Do not carry your phone in your back pocket as it could break when you sit down Small Children Do not leave your phone and its accessories within the reach of small children or allow them to play with it They c...

Страница 168: ...l hold your phone to your ear with the bottom towards your mouth Airbags Do not place a phone in the area over an airbag or in the airbag deployment area as an airbag inflates with great force and serious injury could result Store the phone in a safe and secure area before driving your vehicle Seizures Blackouts The phone can produce a bright or flashing light A small percentage of people may be s...

Страница 169: ... Press the buttons lightly Use the special features which are designed to minimize the times of pressing buttons such as Message Templates and Predictive Text Take frequent breaks to stretch and relax Emergency Calls This phone like any other wireless phone operates using radio signals which cannot guarantee connection in all conditions Therefore you must never rely solely on any wireless phone fo...

Страница 170: ...Never puncture the surface of the phone with sharp objects Connection to Vehicles Seek professional advice when connecting a phone interface to the vehicle electrical system Faulty and Damaged Products Do not attempt to disassemble the phone or its accessories Only qualified personnel can service or repair the phone or its accessories If your phone or its accessories has been submerged in water pu...

Страница 171: ...nches 15 cm be maintained between a mobile phone and a pacemaker to avoid potential interference with the pacemaker To achieve this use the phone on the opposite ear to your pacemaker and do not carry it in a breast pocket Hearing Aids People with hearing aids or other cochlear implants may experience interfering noises when using wireless devices or when one is nearby The level of interference wi...

Страница 172: ...when boarding an aircraft Interference in Vehicles Please note that because of possible interference with electronic equipment some vehicle manufacturers forbid the use of mobile phones in their vehicles unless a hands free kit with an external antenna is included in the installation Explosive Environments Gas Stations and Explosive Atmospheres In locations with potentially explosive atmospheres o...

Страница 173: ...ain dust or metal powders Blasting Caps and Areas Power off your mobile phone or wireless device when in a blasting area or in areas where signs are posted to power off two way radios or electronic devices to avoid interfering with blasting operations ...

Страница 174: ...54 mm H x 72 45 mm W x 9 25 mm D Weight 160 g with battery Display 5 45 1440 720 Camera Front 5 MP Back 13 MP Internal memory ROM 16 GB RAM 2 GB Removable memory card Supports microSDXC card up to 256 GB Battery 3200 mAh non removable Continuous idle time Up to 182 hours Continuous talk time Up to 9 hours WAP browser version WAP 2 0 Bluetooth 4 2 ...

Страница 175: ...175 HAC M4 T3 NOTE The phone s talk time and idle time are based on ideal working environments The use of extended backlighting browser and network conditions can reduce battery life and talk idle time ...

Отзывы: