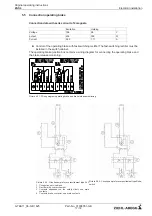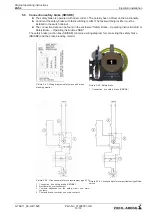
The following general rules apply:
"
The rope pull may be vertical or horizontal.
"
At lateral (horizontal) rope pull, the motor housing must be supported on the side. The
fi
xings scews of the motor must not be loaded with shearing force!
"
If the traction sheave should offer more grooves than the actual number of ropes, the ropes
must be applied on the sheave either centred or towards the motor side.
OK
OK
"
Do not install distorted.
"
Do not apply any force (levering, bending). Above all, do not expose the rotor to any heavy
mechanical shocks.
"
Carry out the electrical connection in accordance with the enclosed wiring diagram.
"
Before starting installation, the drive must be checked for transport damage, especially the
cables have to be checked.
"
No welding must be carried out on the drive. The drive must not be used as an earthing point for
welding. Magnets and bearings could be destroyed.
"
The cooling-air
fl
ow around the motor must not be obstructed.
"
To allow the accessibility to the safety brake, hand wheel and impulse encoder when necessary,
make sure the drive is installed far enough away from the wall.
4.2
Mounting the drive unit
"
Install the drive according to the machine drawing.
"
There are 4 through borings at the base
"
The elevator machine has to be
fi
xed with 4 screws M16 - 8.8 at the mounting plate.
Tightening torque M16 - 8.8: 195 Nm
"
Fasten the screws crosswise in at least two steps to the required tightening torque.
"
The permissible unevenness for the mounting surface is 0.3 mm.
"
The mounting surface has to be rigid and robust enough to withstand the forces.
"
For the installation, insulating elements should be used to absorb the vibration.
"
Align the rope pull of the traction sheave perpendicularly to the cabin
fi
xture or the cabin cable
pulley and the counterweight according to the machine drawing.
"
The drive should stand vertically aligned on its base with loaded cables. Compensate for any
unevenness by placing plates underneath the bottom.
Information
"
For the arrangement of the insulation elements it must be considered that the total centre of
gravity is within the insulation elements (even when the cabin is suspended on the de
fl
ector
roller side.
CAUTION!
Caution!
"
If a frame is provided, this must be installed with the enclosed fastening parts according to the
drawing. The strength speci
fi
cations and the corresponding tightening torques must be
observed.
Warning!
"
The drive must be
fi
xed at all four fastening points provided.
2ULJLQDORSHUDWLQJLQVWUXFWLRQV
ZAS0
Mechanical installation
A-TBA11_06-GB
Part.-No. 01008051-GB
9/72
Содержание ZAS0
Страница 1: ...6 OHYDWRU PDFKLQH ZLWK JHDU 2ULJLQDO RSHUDWLQJ LQVWUXFWLRQV 6WRUH IRU IXWXUH XVH 7 B 3DUW 1R 8...
Страница 36: ...9 2 Dimension sheets 2ULJLQDO RSHUDWLQJ LQVWUXFWLRQV ZAS0 Enclosure A TBA11_06 GB Part No 01008051 GB 36 72...
Страница 38: ...2ULJLQDO RSHUDWLQJ LQVWUXFWLRQV ZAS0 Enclosure A TBA11_06 GB Part No 01008051 GB 38 72...
Страница 40: ...2ULJLQDO RSHUDWLQJ LQVWUXFWLRQV ZAS0 Enclosure A TBA11_06 GB Part No 01008051 GB 40 72...
Страница 41: ...2ULJLQDO RSHUDWLQJ LQVWUXFWLRQV ZAS0 Enclosure A TBA11_06 GB Part No 01008051 GB 41 72...
Страница 42: ...2ULJLQDO RSHUDWLQJ LQVWUXFWLRQV ZAS0 Enclosure A TBA11_06 GB Part No 01008051 GB 42 72...
Страница 43: ...2ULJLQDO RSHUDWLQJ LQVWUXFWLRQV ZAS0 Enclosure A TBA11_06 GB Part No 01008051 GB 43 72...
Страница 45: ...2ULJLQDO RSHUDWLQJ LQVWUXFWLRQV ZAS0 Enclosure A TBA11_06 GB Part No 01008051 GB 45 72...
Страница 47: ...2ULJLQDO RSHUDWLQJ LQVWUXFWLRQV ZAS0 Enclosure A TBA11_06 GB Part No 01008051 GB 47 72...
Страница 48: ...2ULJLQDO RSHUDWLQJ LQVWUXFWLRQV ZAS0 Enclosure A TBA11_06 GB Part No 01008051 GB 48 72...
Страница 49: ...2ULJLQDO RSHUDWLQJ LQVWUXFWLRQV ZAS0 Enclosure A TBA11_06 GB Part No 01008051 GB 49 72...
Страница 50: ...2ULJLQDO RSHUDWLQJ LQVWUXFWLRQV ZAS0 Enclosure A TBA11_06 GB Part No 01008051 GB 50 72...
Страница 51: ...2ULJLQDO RSHUDWLQJ LQVWUXFWLRQV ZAS0 Enclosure A TBA11_06 GB Part No 01008051 GB 51 72...
Страница 53: ...2ULJLQDO RSHUDWLQJ LQVWUXFWLRQV ZAS0 Enclosure A TBA11_06 GB Part No 01008051 GB 53 72...
Страница 54: ...2ULJLQDO RSHUDWLQJ LQVWUXFWLRQV ZAS0 Enclosure A TBA11_06 GB Part No 01008051 GB 54 72...
Страница 55: ...2ULJLQDO RSHUDWLQJ LQVWUXFWLRQV ZAS0 Enclosure A TBA11_06 GB Part No 01008051 GB 55 72...
Страница 56: ...2ULJLQDO RSHUDWLQJ LQVWUXFWLRQV ZAS0 Enclosure A TBA11_06 GB Part No 01008051 GB 56 72...
Страница 58: ...2ULJLQDO RSHUDWLQJ LQVWUXFWLRQV ZAS0 Enclosure A TBA11_06 GB Part No 01008051 GB 58 72...
Страница 60: ...2ULJLQDO RSHUDWLQJ LQVWUXFWLRQV ZAS0 Enclosure A TBA11_06 GB Part No 01008051 GB 60 72...
Страница 61: ...2ULJLQDO RSHUDWLQJ LQVWUXFWLRQV ZAS0 Enclosure A TBA11_06 GB Part No 01008051 GB 61 72...
Страница 62: ...2ULJLQDO RSHUDWLQJ LQVWUXFWLRQV ZAS0 Enclosure A TBA11_06 GB Part No 01008051 GB 62 72...
Страница 63: ...2ULJLQDO RSHUDWLQJ LQVWUXFWLRQV ZAS0 Enclosure A TBA11_06 GB Part No 01008051 GB 63 72...
Страница 65: ...2ULJLQDO RSHUDWLQJ LQVWUXFWLRQV ZAS0 Enclosure A TBA11_06 GB Part No 01008051 GB 65 72...
Страница 66: ...2ULJLQDO RSHUDWLQJ LQVWUXFWLRQV ZAS0 Enclosure A TBA11_06 GB Part No 01008051 GB 66 72...
Страница 68: ...2ULJLQDO RSHUDWLQJ LQVWUXFWLRQV ZAS0 Enclosure A TBA11_06 GB Part No 01008051 GB 68 72...
Страница 69: ...2ULJLQDO RSHUDWLQJ LQVWUXFWLRQV ZAS0 Enclosure A TBA11_06 GB Part No 01008051 GB 69 72...
Страница 70: ...2ULJLQDO RSHUDWLQJ LQVWUXFWLRQV ZAS0 Enclosure A TBA11_06 GB Part No 01008051 GB 70 72...
Страница 71: ...2ULJLQDO RSHUDWLQJ LQVWUXFWLRQV ZAS0 Enclosure A TBA11_06 GB Part No 01008051 GB 71 72...


