PREMIER QUATRO INSTALLATION MANUAL (Fyreye MKII) Firmware Versions: PANEL 1.84 & LOOP 3.70
Doc No: GLT-215-7-1 Issue: 1.36 Author: NJ/TE DATE: 25/05/2017
49
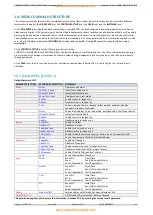
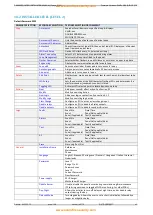
11.5 RELAY DISABLEMENT
Relay outputs can also be disabled. These can either be addressable output units on any of the loops or a PCB output relay (ALARM
or FAULT).
11.6 DISABLE BUZZER
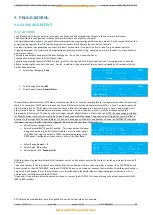
To disable the internal panel buzzer while carrying out commissioning or maintenance then it can be done by the following:
Enter the Installer menu (password 2222).
Select ‘General’ and press the
ENTER
key.
Scroll down to ‘Disable Buzzer’ using the directional keys, and press the
ENTER
key.
Change the mode from ‘Enable’ to ‘Disable’ and press
F1
to accept.
The internal buzzer should now be disabled, and the General Disablement LED should be lit. The buzzer can be re-enabled
through the same route and should be done after testing/commissioning has been complete.
12- TEST MODE
12.1 WHY USE TEST MODE
To aid commissioning and assist routine maintenance check, a non-latching ‘one man test’ facility is available.
When a detector, manual call point or input unit is triggered on any zone in Test, the Alarm sounders operate for approximately 10
seconds on and then switch off. The triggered device is automatically reset. The panel will enter the fire condition and indicate the
address of the fire. The panel automatically resets from the fire condition at the same time as the triggered device, but the LCD
indication remains until the panel is manually reset.
If the device is still in the fire condition, e.g. MCP still activated or the analogue value of a detector still above the alarm threshold,
the device will be triggered again and the Alarm sounders will operate for a further 10 seconds.
If an Alarm occurs on a zone that is not programmed to test, the Fire Alarm Panel will continue to operate as normal.
12.2 TO PROGRAMME ZONE IN TEST MODE
Turn the key switch clockwise to the Controls Enabled Position. The controls Active LED will light.
Press any key followed by the Level 1 password (default1111). Select Zones then Test.
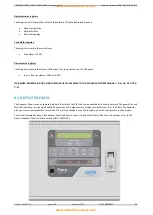
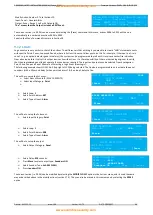
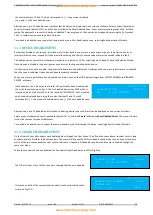
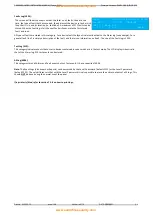
The LCD displays the following:
Enter the range of zones to be put in to test mode. Change
[No]
to
[Yes]
if you
require the Alarm sounders to operate as described in Section 14.1. If the
Sounders are not enabled, a zone of devices can be tested silently. All of the
events in 14.1 will occur apart from the sounders turning on and off again after
10 seconds.
TEST ZONE
RANGE : <001> TO :[001]
ENABLE SOUNDER : [NO ]
[Accept]
[Exit ]
Press
[Accept]
. Note that this is the “SELECT ZONES TO TEST” screen. It is possible to select more than one zone or range of zones
to test. So if ENABLE SOUNDER has been changed to
[Yes]
, the panel registers that those zones will be tested with sounder
activation, and then clears the screen ready for the next entry. (I.e. the screen will revert to Zone <001> to <001> Enable sounders
[No]
when
[Accept]
is selected.) Finally select
[Exit]
to leave the Test Zone screen.
NOTE:
When Enable Sounders is selected for test mode, the panel only operates the sounders in the zone that gives the alarm test.
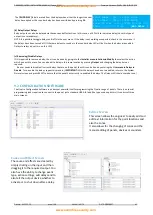
When one or more zones are in test mode, the main screen on the LCD display will change from SYSTEM NORMAL to ZONES IN
TEST, as shown.
In the example, line 2 indicates that a total of 2 zones have been disabled, and
the 1st of these is shown on line 3. Zone 3 (Z003) has the text label THIRD
FLOOR. The zone no. and text label for each disabled zone can be displayed by
28/04/15 12:20
ZONES IN TEST
001/002
Z003 – THIRD FLOOR

