background image

P A G E   5 3

206-3492-O

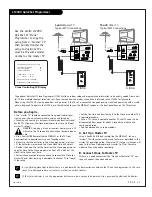
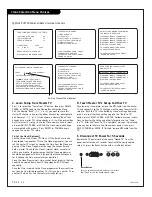
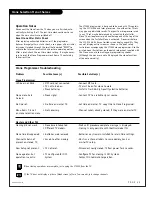
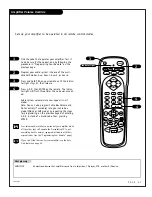
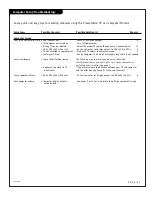
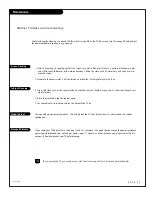
Computer Setup Troubleshooting:

Symptoms

Possible Cause(s)

Possible Solution(s)

Page(s)

Computer Image

Poor or no computer picture. • Poor Connections.

-Check all cable connections.

8

• TV/Computer not turned on.

-Turn TV/Computer on.

• Wrong TV source selected.

-Select the proper TV source the computer is connected to.

11

• 800 x 600 @60 HZ not set.

-On the Computer, set display output to 800 x 600 @60 Hz.

6

• TV not adjusted to computer yet.

-Wait until TV adjusts to computer image.

7

• Cable over 25 feet.

-Set up Computer/TV where an excessively long cable is not needed.

Local interference.

• Check for disturbing source.

The following may cause image problems or distortion:
Electrical appliances, powerful lights, cars, trucks; computers or
portable phones; medical equipment

• Appliance too close to TV.

-If possible increase the distance between your TV and computer

or computer.

and the offending appliance. Or shut one of them off.

Fuzzy computer picture.

• 800 x 600 @60 HZ not set.

-On the computer, set display output to 800 x 600 @60 Hz.

6

Poor computer picture.

• Computer display output is

-See pages 9 or 10 for instructions to optimize computer’s image.

not optimized.

Some quick and easy tips to resolving problems using the Presentation TV as a Computer Monitor

Содержание Presentation H27E46DT

Страница 1: ...Copyright 2002 Zenith Electronics Corporation Installation and Operating Guide Warranty Model Numbers H25E46DT H27E46DT H32E46DT H36E46DT PresentationTM TVs...

Страница 2: ...cted to the grounding system of the building as close to the point of the cable entry as practical REGULATORY INFORMATION This equipment has been tested and found to comply with the limits for a Class...

Страница 3: ...ld never be blocked by placing the product on a bed sofa rug or other similar surface This product should not be placed in a built in installation such as a bookcase or rack unless proper ventilation...

Страница 4: ...s product from the wall outlet and refer servicing to qualified service personnel under the following condi tions a If the power supply cord or plug is damaged b If liquid has been spilled or objects...

Страница 5: ...the PresentationTM TV s Features to your Preference Setup Menu Start with page 21 Auto Program Add Del Blank 26 Channel Labels Preset and Custom 27 28 Clock Set 29 Timer On Off Timers Setup 30 Caption...

Страница 6: ...the Presentation TV for Computer Requirements If your Computer is hooked up to the TV s front computer port which is 800 x 600 60 Hz choose FRONT COMPUTER SVGA input by pressing TV VCR SOURCE repeate...

Страница 7: ...is is normal when using this TV as a computer monitor When the TV has completely adapted to your computer the computer s image will appear on the screen Computer Hook Up Components may vary from those...

Страница 8: ...AUDIO OUT Connect to TV Connect to Monitor Connect to Computer TV PC MON Video Mirror cable connectors are clearly marked Connect as shown in drawing TV to the television MON to the Computer Monitor P...

Страница 9: ...t SIZE of 25 3 Select under the ITEM category ICON Select SIZE of 40 Select FONT SIZE of 20 Select FONT of TIMES NEW ROMAN BOLD Technical Update Optimum Display November 1998 4 Select under the ITEM c...

Страница 10: ...ter you will simply change the FONT and SIZE through the CON TROL PANEL and VIEW You have now changed the appearance of all your folders but NOT your applications VIEWING FOR PRESENTATION Vs PRIVATE 1...

Страница 11: ...he Up Down arrow on the remote control to select the computer source that you want to to appear on your screen Press Enter or the Left Right arrow on the remote to change to the new source press ENTER...

Страница 12: ...vertical size of picture Picture Preference Choose either Custom or Preset Custom allows you to set the picture the way you want Preset moves all the above options back to their original factory set l...

Страница 13: ...P A G E 1 3 206 3492 O Computer Setup Notes Use this blank page to write down notes regarding your particular computer setup...

Страница 14: ...S VCR page 19 TV Hook Up Directory To hook up a computer see pages 6 13 To hook up other equipment see below IMPORTANT Use this page to decide where you need to begin your TV set up First find the lin...

Страница 15: ...e Zenith Presentation TV 300 TO 75 OHM ADAPTER TV Back VIDEO ANTENNA CABLE R AUDIO L S VIDEO IN COMPUTER AUDIO R L AUX IN M P I R AUDIO L R AUDIO L S VIDEO OUT COMPUTER IN AUDIO OUT Flat wire 300 ohm...

Страница 16: ...e TV Wall Jack Cable Box In Out RF Coaxial Wire 75ohm 3 4 output switch VIDEO ANTENNA CABLE R AUDIO L S VIDEO IN COMPUTER AUDIO R L AUX IN M P I TV Back R AUDIO L R AUDIO L S VIDEO OUT COMPUTER IN AUD...

Страница 17: ...Adapter RF Coaxial Wire 75ohm Antenna In Out Audio Video 3 4 VCR Back VCR back AV panel output switch A V cables not included with TV VIDEO ANTENNA CABLE R AUDIO L S VIDEO IN COMPUTER AUDIO R L AUX I...

Страница 18: ...jack RF coaxial wire 75ohm Cable box In Out 3 4 output switch In Out Audio Video 3 4 VCR back VCR back AV panel output switch A V cables not included with TV VIDEO ANTENNA CABLE R AUDIO L S VIDEO IN C...

Страница 19: ...R through the special S Video LOOP OUT connection Hook up your S VHS VCR to the Zenith TV according to the diagram at the right Remove the back of the remote and put in two AAA batteries Plug in your...

Страница 20: ...rs Refer to the Audio Menu page for instructions on how to turn the TV s internal speakers off and on Control the Volume level settings using your external amplifier 1 2 Audio Out Hookup VIDEO ANTENNA...

Страница 21: ...Cable TV or Off Air Antenna on the screen Press the Right or Left arrow to begin the Channel Search Press ENTER when the channel search is done 1 2 3 4 5 6 7 PRG POWER CABLE VCR AUX TV SURF ENTER FLA...

Страница 22: ...le To use the front jacks as the signal source simply plug a composite video cable into the VIDEO jack The TV will automatically change its source setting to CamPort as indicated on the channel select...

Страница 23: ...MER Displays the Sleep Timer Menu VOLUME LEFT RIGHT Adjusts the sound levels on your Presentation TV QUIT Not functional TV VCR SOURCE Switches between watching TV through the available sources Keys d...

Страница 24: ...ks can be selected by keying in 999 on the remote number keypad Make connections use the TV VCR Source key or use Channel Up Down to choose the available picture and sound sources to appear on the TV...

Страница 25: ...o Pref V I D E O M E N U 35 Customizes the picture The options are Contrast Brightness Color Tint Sharpness Picture Pref PARENTAL 36 Allows user to block program content or the A V sources for up to 9...

Страница 26: ...el is Added Deleted or Blanked To continue select another channel and repeat Step 3 When you are finished press ENTER to remove menu 1 2 3 4 5 2 AUTO PROGRAM ADD DEL BLNK CH LABELS CLOCK SET TIMER CAP...

Страница 27: ...want from the available preset selections such as A E To continue channel labeling select another channel or if you are finished press ENTER to remove menu 1 2 3 4 3 AUTO PROGRAM ADD DEL BLNK CH LABEL...

Страница 28: ...tter a Press MUTE to clear the label if necessary Use Channel Up Down to scroll through and change the char acter to one of the 255 characters available Repeat Steps 4 and 5 to set characters for the...

Страница 29: ...the Setup menu displayed use the Up Down arrow to highlight the Clock Set option as shown Set the current time use the NUMBER keypad to key in the hours then minutes For example press 06 then 30 to s...

Страница 30: ...imer functions The On Off Timer can be disabled but the settings will be retained The clock must be set before the Timers will function The Off Timer can be used to turn the TV off at the preset time...

Страница 31: ...sually messages provided by the broadcaster Set up Closed Caption Text options for the user Closed Captions Text Operating Modes Setup Use MENU SELECT Up Down and ADJ Left Right arrows to choose the C...

Страница 32: ...ess the Left Right arrow to go to the menu Using the NUMBER keypad set the time you want the TV to turn on For example to set 7 30 AM press 0 7 3 0 Use TIMER to choose AM or PM as shown on the menu Pr...

Страница 33: ...e for the on screen menus Press MENU on the remote repeatedly until the Setup menu appears Use the Up Down arrow on the remote control to high light Language on your screen Use the Left Right arrow to...

Страница 34: ...emote control high light the audio option you want to change Choose from Bass Increases decreases lower end sounds Treble Increases decreases higher end sounds Balance Allows you to put the sound more...

Страница 35: ...t the picture the way you want Preset moves all the above options back to their original factory set levels Using the Up Down arrow on the remote control choose Contrast on your screen Using the Left...

Страница 36: ...such as Strong Dialog Bad Language Sex Scenes Violence Scenes or Fantasy Violence Scenes in the Content Blk option How many hours do you want Parental Control to be active You can set the Hours option...

Страница 37: ...Violence Scenes Press MENU repeatedly to go to the Parental Control menu As shown above with the Parental Control menu on screen use the Up Down arrow to highlight an option like Content Block then p...

Страница 38: ...ars Use the Up Down arrow on the remote control to select a new source for the picture and sound that you want to to appear on your screen Press ENTER on the remote to change to the new source press E...

Страница 39: ...ntal Control menu access Closed Captions Menu Press CC Depending on Captions setup turns selected Caption Text option on and off Alarm Menu In the Setup Menu select the ALARM MENU option Sets a time t...

Страница 40: ...can be accessed by using the installer s remote control Just press and hold MENU about 8 seconds until the display changes then press 9 8 7 6 then ENTER To exit the Installer s Menu press ENTER again...

Страница 41: ...ypical value is 15 Black bars top and bottom define the active screen area 05 HORZ POS Horizontal Position Moves captions and displays horizontally on the screen Use the ADJUST keys Typical value is 3...

Страница 42: ...etermines whether TEXT 1 TEXT 2 TEXT 3 or TEXT 4 decoding is enabled when TEXT is turned on either from the Setup Menu or directly with CC on the remote TIP Set Text Mode to 1 only if text is offered...

Страница 43: ...ION XX THE TV IS VERSION XX THE SW IS REVISION XX CLONE CLOCK XX XX TV CLOCK XX XX PRESS ANY KEY TO CONTINUE DISCONNECT CLONE WHEN DONE Clone Controlling TV Display Before you begin The master TV shou...

Страница 44: ...s Complete message is displayed press any key to return to the Clone menus option then press ON OFF POWER or ENTER If finished remove MPI cable from the TV E Disconnect TV Power for 5 Seconds Remove t...

Страница 45: ...the Clone as an aid to making your programming choices Although the menus are not all displayed the clone functions all operate normally When cloning operations are complete just unplug the LT2000 fro...

Страница 46: ...mming VCR CABLE AUX TV Using the NUMBER keypad enter the three number code found on the chart on pages 50 51 Press ENTER to save the code The indicator light will flash three times and turn off if the...

Страница 47: ...er use the Auto Find feature on page 49 Sets up your amplifier to be operated in all remote control modes Find the code that operates your amplifier Test it to make sure it s the correct one by follow...

Страница 48: ...Press the AUX key and the 1 on the NUMBER keypad at the same time for AUX 1 Using the NUMBER keypad enter the three number code for the device you ve selected Press ENTER to save the code Turn the de...

Страница 49: ...rrect device and press POWER Allow a second to pass then push the POWER key again Repeat until the device turns off This is a trial and error process so it may be neces sary to repeat these steps unti...

Страница 50: ...65 730 Saisho 722 Salora 297 Samsung 220 230 Sansui 289 292 709 726 Sanyo 212 247 294 Scott 243 290 729 Sears 211 212 213 265 274 Sharp 261 730 Signature 2000 216 219 249 Sony 232 723 724 Sylvania 275...

Страница 51: ...940 ADO 939 Aiwa 938 Akai 937 Denon 935 Dynatech 953 Emerson 952 Fisher 438 933 951 GE 932 Goldstar 460 Hitachi 950 JVC 949 954 Kenwood 441 931 948 Luxman 930 Magnavox 421 422 433 434 Marantz 929 947...

Страница 52: ...igit 5 6 TV Digit 6 VCR Digit 6 Cable Digit 6 AUX Digit 6 7 TV Digit 7 VCR Digit 7 Cable Digit 7 AUX Digit 7 8 TV Digit 8 VCR Digit 8 Cable Digit 8 AUX Digit 8 9 TV Digit 9 VCR Digit 9 Cable Digit 9 A...

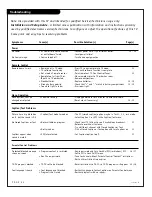
Страница 53: ...where an excessively long cable is not needed Local interference Check for disturbing source The following may cause image problems or distortion Electrical appliances powerful lights cars trucks comp...

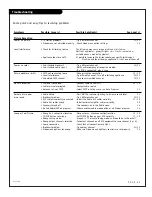
Страница 54: ...t but the sound is O K Select Caption 1 or OFF in the Caption Text menu No Closed Captions or Text Not available on program Check local TV listings to see if available on broadcast 31 Relocate over th...

Страница 55: ...reception Cable not connected Connect cable to UHF VHF 15 19 Cable service interrupted Contact cable service Antenna set not CATV Select CATV in Setup menu run Auto Program 21 Normal picture poor Audi...

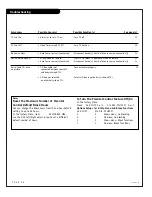
Страница 56: ...cables properly 19 no picture connected between source TV and daisy chained TVs S Video not selected Select S Video input on daisy chained TVs on other daisy chain TVs Notes Reset the Maximum Number o...

Страница 57: ...Let the cabinet air dry before turning the Presentation TV on Use a quality wood cleaner and polish This will protect the TV from dirt and dust as well as keep the cabinet looking new If you leave you...

Страница 58: ...ur home to be using an antenna AUTO PROGRAM Auto Program has the Presentation TV automatically find all the channels available in your area AUTO SENSE If a device is connected to an Auto Sense input i...

Страница 59: ...P A G E 5 9 206 3775 Notes...

Страница 60: ...ion of the product after manufacture voids this warranty in its entirety THIS WARRANTY IS IN LIEU OF ANY OTHER WARRANTY EXPRESSED OR IMPLIED INCLUDING WITHOUT LIMITATION ANY WARRANTY OF MERCHANTABILIT...

Отзывы: