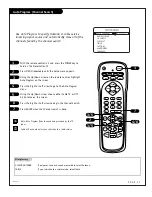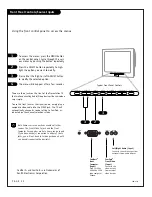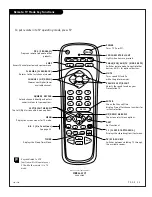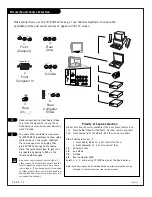
P A G E 1 8
206-3602
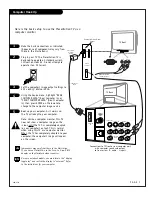
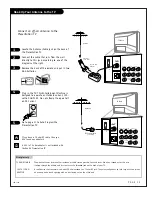
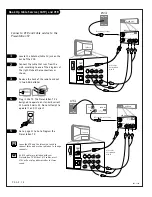
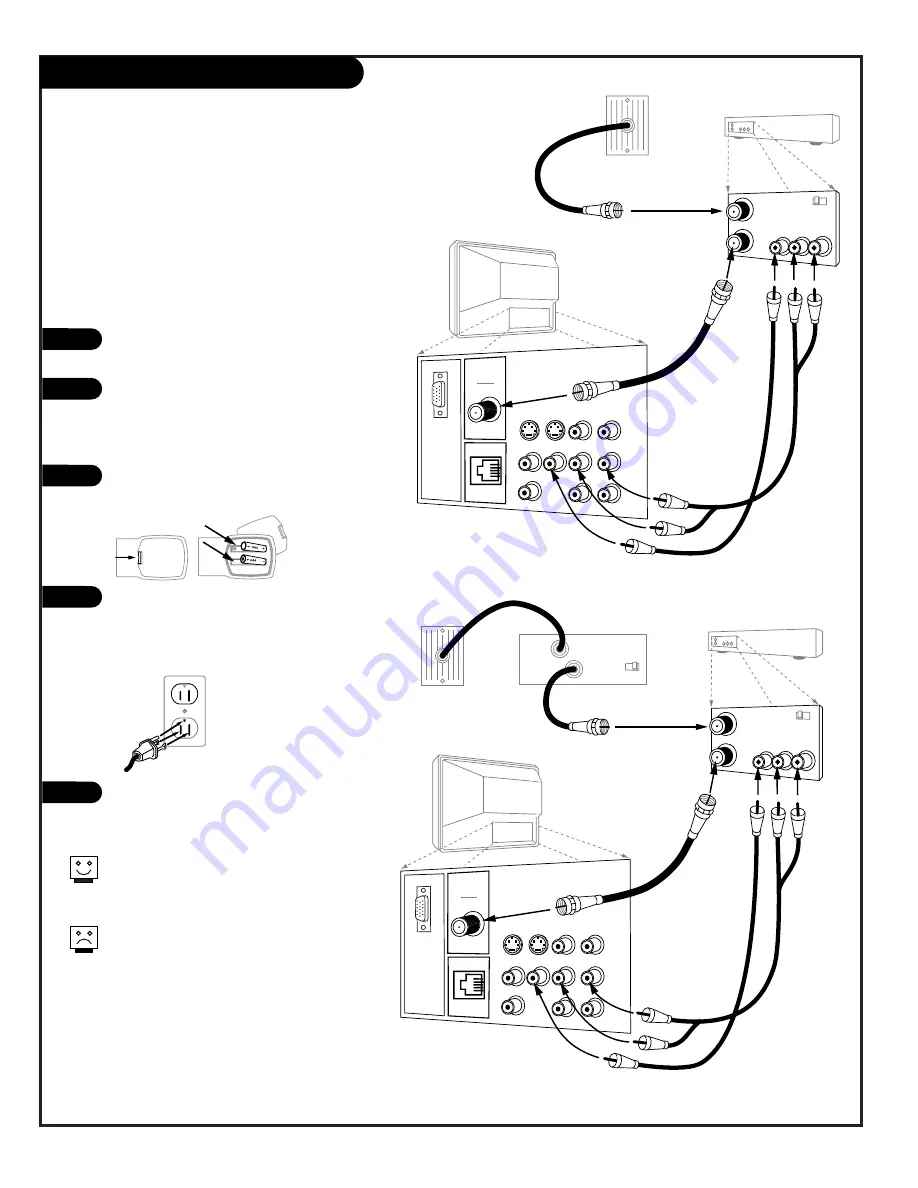
Hook Up Cable Service (CATV) and VCR
Connect a VCR and Cable service to the
Presentation TV
Leave the VCR and the television tuned to
channel three and use the cable box to change
channels.
No A/V cables are included with your
Presentation TV. Without A/V cables, most
VCRs will not play videocassettes in stereo
sound.
In
Out
Audio
Video
3 4
VCR back
VCR back AV panel
output
switch
A/V cables
not included
with TV
VIDEO
ANTENNA
CABLE
R- AUDIO- L
S-VIDEO IN
COMPUTER
AUDIO
R
L
AUX IN
M.P.I.
TV back
R- AUDIO- L
R- AUDIO- L
S-VIDEO OUT
COMPUTER
IN
AUDIO OUT
Cable TV
wall jack
RF coaxial wire (75 ohm)
Cable box
In
Out
3 4
output
switch
In
Out
Audio
Video
3 4
VCR back
VCR back AV panel
output
switch
A/V cables
not included
with TV
VIDEO
ANTENNA
CABLE
R- AUDIO- L
S-VIDEO IN
COMPUTER
AUDIO
R
L
AUX IN
M.P.I.
TV Back
R- AUDIO- L
R- AUDIO- L
S-VIDEO OUT
COMPUTER
IN
AUDIO OUT
Cable TV
Wall Jack
Round wire (75 ohm)
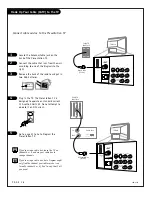
Locate the Antenna/Cable In jack on the
back of the VCR.
Connect the cable that runs from the
wall, according to one of the diagrams at
the right. Make other connections as
shown.
Remove the back of the remote and put
in two AAA batteries.
Plug in the TV. The Presentation TV is
designed to operate on standard current,
120-volt 60 Hertz AC. Do not attempt to
operate it on DC Current.
Go to page 21 to Auto Program the
Presentation TV.
1
2
3
4
5
Back of
Remote
Содержание Presentation H27E46DT
Страница 59: ...P A G E 5 9 206 3775 Notes...

