1
2
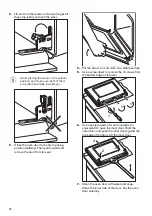
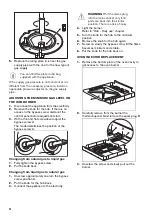
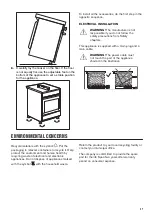
4. Release the burner injector with a 7 mm socket
spanner and replace it with a right one.
Assemble the burner in a revers sequence.
Replace the gas type sticker near the gas supply
ramp with the one related to the new gas type.
ADJUSTING THE MINIMUM GAS LEVEL ON
THE OVEN BURNER
1. Disconnect the appliance from the electricity.
2. Remove the knob for the oven functions. If
there is no access to the bypass screw
dismount the control panel before adjustment
start.
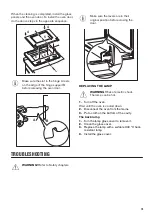
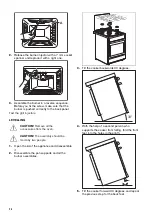
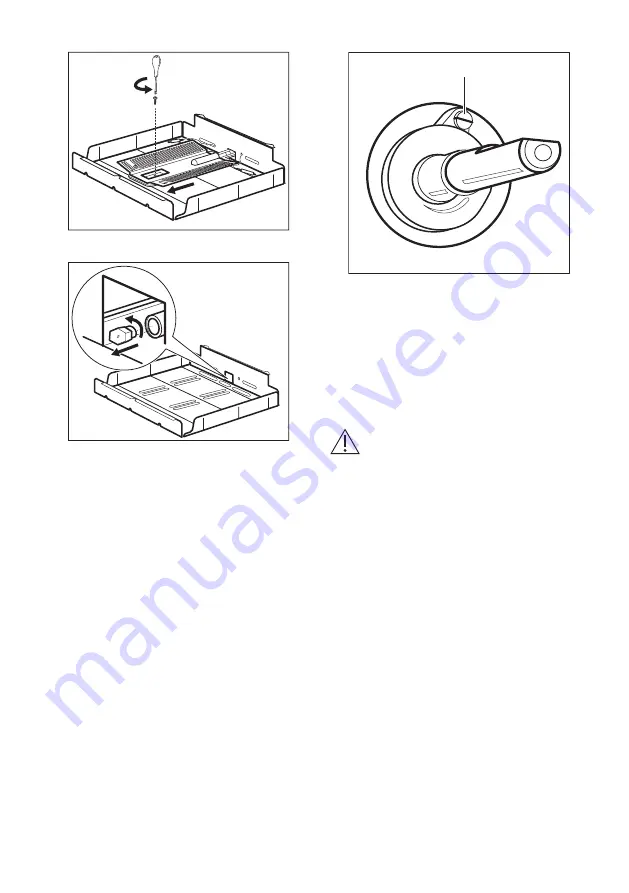
3. With a thin and flat screwdriver adjust the
bypass screw A.
The model determines the position of the
bypass screw A.
A
Changing from natural gas to liquid gas
1. Fully tighten the bypass screw.
2. Put the knob back.
3. Connect the appliance to the electricity.
Changing from liquid gas to natural gas
1. Unscrew approximately one turn the bypass
screw position A.
2. Put the knob for the oven functions back.
3. Connect the appliance to the electricity.
WARNING! Put the mains plug
into the mains socket only if all
parts are back into their initial
position. There is a risk of injury.
4. Light the burner.
Refer to "Oven - Daily use" chapter.
5. Turn the knob for the oven functions on the
minimum position.
6. Remove the knob for the oven functions again.
7. Screw on slowly the bypass screw till the flame
becomes minimum and stable.
8. Put the knob for the oven functions back.
9. Set the maximum gas flow position on the knob
for the oven functions and let the oven heat for
at least 10 minutes.
10. Quickly turn the knob for the oven functions
from maximum to the minimum gas flow
position.
Control the flame. Make sure the flame does not go
out when you turn the knob to the minimum gas
flow position. There must be a small regular flame
on the oven burner crown. If the flame goes out
adjust the oven burner again.
GAS GRILL INJECTOR REPLACEMENT
1. Release the screws which keep the grill burner
in position A.
25

