background image

21

www.yellowtec.com      

I

      [email protected]

Power Management

How do I 

check my battery capacity

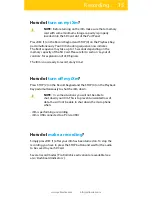
When the iXm is powered up and you are not recording you can always 

recall the remaining battery power and the remaining memory capaci-

ty. To indicate the remaining time to go simply hit the STOP (2) button 

on the Dashboard. First, the BAT LED will slow-flash yellow followed by 

a yellow slow-flashing MEM LED. Each flash indicates the approximate 

equivalent of one hour of remaining BAT or MEM capacity. Use this 

function regularely to assure that your required recording time is safe. 


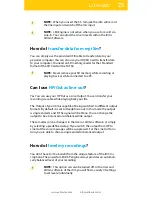
NOTE:   This function only works in Record Ready Mode, not  


while recording.


NOTE:   When the remaining battery life falls short of one  


hour you will be automatically warned. The BAT LED on the  


Dashboard will start flashing amber. The last five minutes of  


battery life are indicated by the BAT light on the Dashboard


flashing red.

What‘s my iXm‘s 

operating time

?

Your iXm‘s total operating time is determined by a combination of two 

power sources: an internal Li-Ion battery and an additional three AA 

batteries. Fully charged, the internal Li-Ion battery provides a minimum 

of 8 hours of operating time. Three AA batteries offer an additional 

minimum operating time of 6 hours. You can insert the AA batteries 

into the battery compartment of the PORT PANEL. In combination they 

will give you a minimum of 14 hours of operating time.

You can select which battery source (AA batteries or interal battery) will 

be used first. Selection is made in your iXm‘s user software. (See section 

`User Software´).


NOTE:   The remaining recording time is a combination of


memory space and battery life. Check that you have enough


memory space left on your SD Card for your next


recordings. (see: How to check my storage capacity?)


NOTE:    Battery life might be less than indicated due to  


low temperatures. It is recommended to fully charge the  


iXm once a month to ensure your iXm‘s operating ability.

Содержание iXm

Страница 1: ...iXm Recording Microphone V1 2 Manual Operations www facebook com yellowtec www twitter com yellowtec...

Страница 2: ...2 www yellowtec com I info yellowtec com...

Страница 3: ...displays and constantly readjust your settings The quality of our intelligent Auto Levelling algorithm LEA ensures perfect recordings for true professional broadcast use making the product ideal for...

Страница 4: ...ration for safe recording Silent marker setting on the fly Up to 14 hours of operation time Dual power system with intelligent management of built in Li Ion battery and or 3 x AA batteries Removable u...

Страница 5: ...12 15 18 20 21 23 24 25 26 27 28 30 WHAT S IN THE BOX SAFETY INSTRUCTIONS BASIC FUNCTIONS LAYOUT OF CONTROLS DASHBOARD INDICATORS RECORDING PLAYBACK POWER MANAGEMENT MEMORY MIC HEADS LINE IN LINE OUT...

Страница 6: ...6 www yellowtec com I info yellowtec com What s in the box Mic Head Recorder Wall Charger SD Card USB Cable Type A to Mini USB International Main Adapters 1 2 3 4 5 6 5 4 3 2 1 6...

Страница 7: ...e thread will prevent the Mic Head going loose Before you start to use the iXm charge the internal Li Ion battery for a minimum of 4 hrs The Battery Indicator will stop flashing when the Li Ion Batter...

Страница 8: ...der without a Mic Head installed Always hold the Mic Head straight and twist it gently tight Do not risk cross threading Charge Internal Li Ion Battery Before using iXm for the first time charge the i...

Страница 9: ...shing Your iXm is now ready to record See table of indicators Record To start a recording simply hit the RECORD button Once the REC LED shows red you are capturing every word During a recording simply...

Страница 10: ...ch hit will cause a change of 3dB NOTE Before using headphones make sure that you carefully set your playback level to an appropriate level to avoid temporary or permanent hearing damage It is advised...

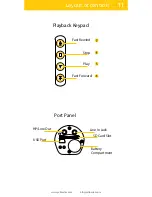
Страница 11: ...11 www yellowtec com I info yellowtec com Layout of controls Fast Forward Play Stop Fast Rewind Playback Keypad Line In Jack SD Card Slot Battery Compartment HP Line Out USB Port Port Panel...

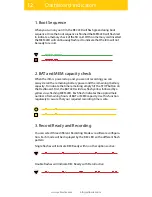
Страница 12: ...he remaining memory capacity To indicate the time remaining simply hit the STOP button on the Dashboard First the BAT LED will slow flash yellow followed by a yellow slow flashing MEM LED Each flash i...

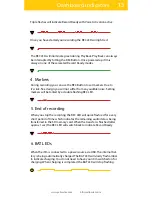
Страница 13: ...Ready with Voice Activation active Once you have started your recording the REC LED will light red When you stop the recording the REC LED will quick flash red for a very short period of time which in...

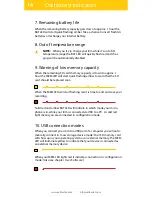
Страница 14: ...n that the SD card should be replaced soon When the MEM LED will start flashing red it is time to end and save your recording 9 Warning of low memory capacity When your MEM LED lights red it indicates...

Страница 15: ...dy to record at any time How do I turn on my iXm Press STOP 2 on the Record Keypad and the STOP 4 on the Playback Keypad simultaneously to shut the iXm down NOTE In some situations you will not be abl...

Страница 16: ...cording will halt when the sound pressure level will drop under a second adjustable threshold level This mode is very useful when you need to remote control your iXm All parameters for VAR will be sel...

Страница 17: ...not be affected Plug in your headphones and listen to your recording live In order to change the volume while listening you can use the FWW and REW 6 3 keys on the Playback Keypad in order to increas...

Страница 18: ...he STOP Key 2 on the Record Keypad and simultaneously press the FFW 6 or REW Key 3 on the Playback Pad together to increase or decrease the volume When you hold the FFW REW Key the volume will vary by...

Страница 19: ...y Mode You cannot playback a recorded file while you are recording Press the PLAY Key 3 on the Playback Keypad in order to playback your recording The playback will start at the beginning of your last...

Страница 20: ...were set you will jump to the next or previous file Press and hold the FFW or REW Keys in order to cue through your files forwards or backwards How do I charge the iXm Charge the iXm by connecting th...

Страница 21: ...ht on the Dashboard flashing red What s my iXm s operating time Your iXm s total operating time is determined by a combination of two power sources an internal Li Ion battery and an additional three A...

Страница 22: ...ources if necessary The use of AA batteries is not necessary to operate the iXm The internal Li Ion battery is fully able to operate your iXm up to 8 hours When using AA batteries make sure you insert...

Страница 23: ...s recording environments you have a choice of several Mic Heads Mic Heads can be exchanged easily by it s TOTO mount twisting off twisting on How do I swap Mic Heads In order to protect the thread and...

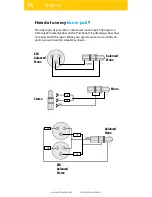
Страница 24: ...e input is a 3 5mm jack marked yellow on the Port Panel The drawings show how to connect with the input When your signal source is on an XLR con nector you will need an adapter as shown How do I use m...

Страница 25: ...ansfer your recording via cable while playing back your file The Output of your iXm is capable of being switched to different output formats By default it is set to Headphone out In this mode the outp...

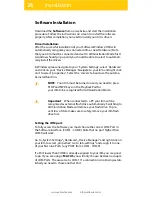
Страница 26: ...ou will learn how to use the software and how to set up your iXm The basic and advanced mode of your iXm s personal Software will be explained and you will be provided with a step by step Software Ins...

Страница 27: ...iXm will only be able to communicate with your host PC when it is switched on When connected a window should pop up which shows your iXm as a Mass Storage Device via your file system You will now see...

Страница 28: ...stall function NOTE Your iXm must be turned on and you need to press STOP and FWD keys on the Playback Pad for your iXm to be recognized for Administration Mode Setting the COM port To fully access th...

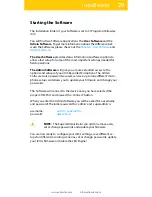
Страница 29: ...will find two Software Applications The User Software and the Admin Software To get more information about the difference bet ween the Softwares please check out the Chapters User Software and Admin S...

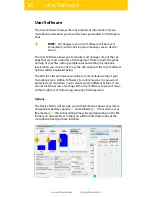
Страница 30: ...en you choose not to use the LEA engine Other User Software options will be explained below The Admin Software however provides a more detailed setup of your microphone see Admin Software For safety r...

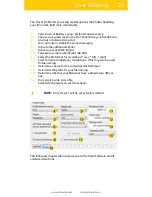
Страница 31: ...ate your LEA DSP Engine Select your sample rate 32 44 1 48 kHz Select the file format for recordings wav bfw mp2 Select a name to label your microphone This may also be used for file naming Determine...

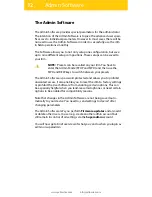
Страница 32: ...m in field operations smoothly The Software allows you to not only setup one configuration but save up to nine different setup compositions These setups can be saved to your iXm NOTE Presets can be re...

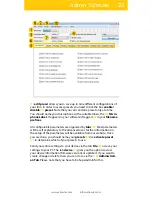
Страница 33: ...ameters are organized by tabs 5 Most parameters will be self explanatory to the advanced user Further information on the setup of the parameters will be available from our website Once you are done yo...

Страница 34: ...34 www yellowtec com I info yellowtec com...

Страница 35: ...llowtec com I info yellowtec com Like us on Facebook and follow us on Twitter to receive interesting background information about Yellowtec and our products www twitter com yellowtec www facebook com...

Страница 36: ......
Отзывы: