197
◆
◆
◆
◆
◆
◆
◆
◆
◆
◆
◆
◆
◆
◆
◆
◆
◆
◆
◆
◆
◆
◆
◆
◆
◆
◆
◆
◆
◆
◆
◆
◆
◆
◆
◆
◆
◆
◆
◆
◆
◆
Disk
Save Operation
Path:
d
➞
!
(Save)
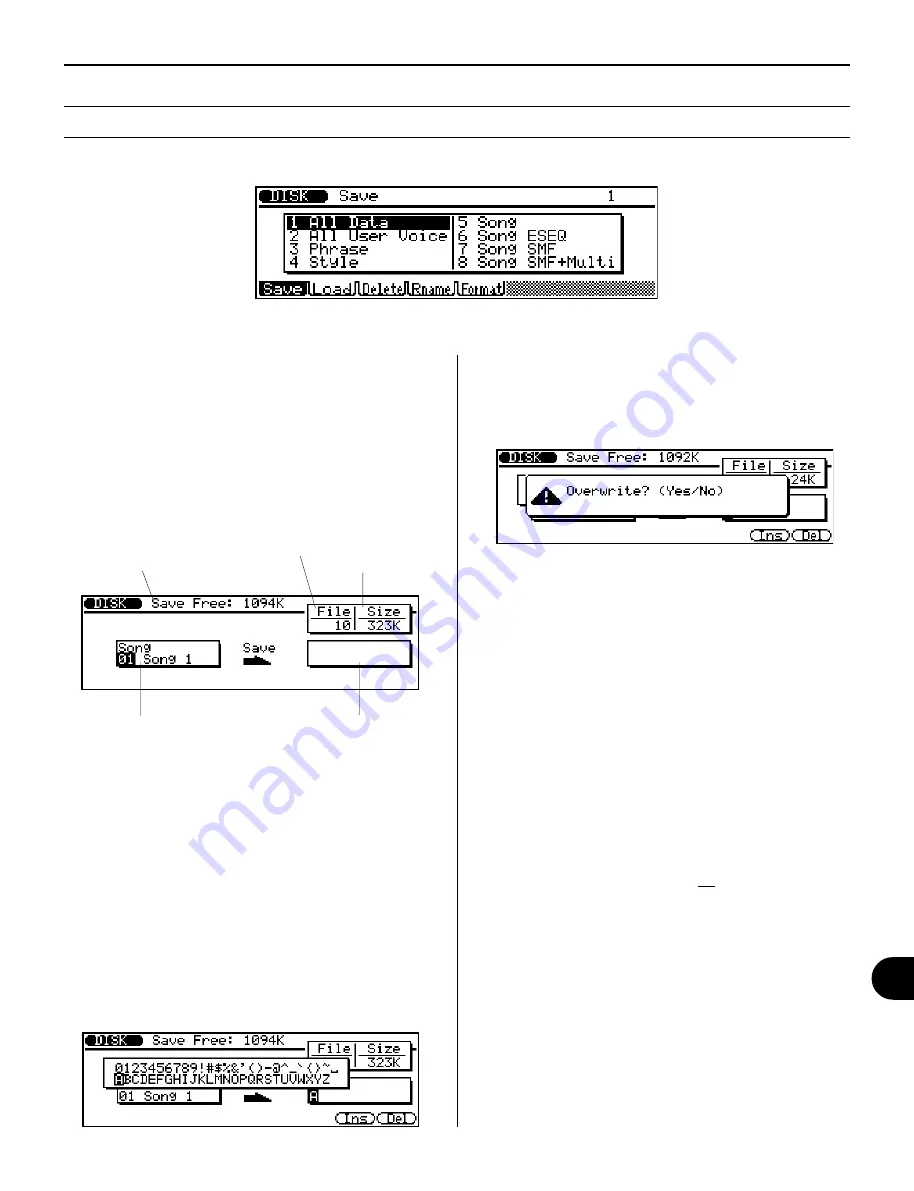
The Save operation allows you to store files to floppy disk
for future recall. Select the desired data type from the
above display (by any data entry method), and press
E
.
IMPORTANT: The disk write-protect slide must be in the write-
enable position to perform a Save operation. If it is not, the
“Write Protected!” error message will appear when you attempt
to execute the Save operation.
4.
Press
E
.
If the destination location already contains data under
the same file name, a “Overwrite?” prompt appears in
the display.
Answer the prompt by pressing the
I
button to go ahead
with the Save operation, or pressing
D
to cancel.
After the operation is completed, press
)
to return to
the previous mode display, or press any of the MODE
buttons.
NOTE: You can use the
)
button to leave the Save display
at any time except while the operation is actually in progress.
NOTE:
• When saving All Data, if no Song data has been recorded,
the Multi data is not saved. If you wish to save Multi data
as well, simply record a few “empty” measures to a Song.
• For Song data, only data from tracks 1 - 16 is saved
(Pattern, Chord and Tempo track data is not saved). When
saving the Song data type (number 5), User Patterns and
User Phrases in the Song data are not saved.
NOTE:
• File names can be up to 8 characters in length. Spaces will
be converted to hyphens when the file is saved. Entering all
spaces for a name will result in an “Illegal File Name”
message.
• The last-entered file name is automatically shown by default.
• If you use characters not recognized by the MS-DOS
operating system, the file name may not be recognized when
attempting to read the disk on different equipment.
Amount of remaining memory
space on disk (in kilobytes).
Destination location.
Source data.
Size of selected
file (in kilobytes).
Number of files
(on disk).
To use the Save operation: ...................................................
1.
From the above display, select the specific data file
you wish to save.
Do this by highlighting the desired number/title in the
left (source data) box, or select the number of the data
directly. (Note: This step is unnecessary for the All
Data and All User Voice types.)
2.
Select the destination location (right box).
3.
Enter a file name if necessary.
When the destination location is highlighted, the name
operation popup page (below) is automatically called
up. (See page 161 for instructions on entering names.)
Disk Mode
Содержание QS300
Страница 1: ......
Страница 2: ......
Страница 3: ......
Страница 4: ......
Страница 46: ...42 ...
Страница 100: ...96 ...
Страница 108: ...104 ...
Страница 142: ...138 ...
Страница 166: ...162 ...
Страница 182: ...178 ...
Страница 207: ...203 Q S 3 0 0 APPENDIX Troubleshooting 204 Warning and Error Messages 206 Specifications 208 Index 209 APPENDIX ...
Страница 217: ......


