Chapter 14. MIDI/Time Code
143
The following sources can be selected.
•
CONSOLE
..........Time code (LTC) will be received
from the TIMECODE IN con-
nector of the console.
•
ENGINE A
..........Time code (LTC) will be received
from the TIMECODE IN con-
nector of engine A.
•
ENGINE B
..........Time code (LTC) will be received
from the TIMECODE IN con-
nector of engine B.
•
INT GEN
.............The internal time code generated
by the PM1D system itself will be
followed. The instant you click
this button, internal time code
will start being generated at the
time specified by the INT GEN
START TIME knobs.
•
OFF
.....................If this button is clicked, no time
code will be received from out-
side.
If “OFF” is selected in the TIME CODE IN section,
time code will not be displayed in this screen or in
the TIME CODE section of the meter bridge block.
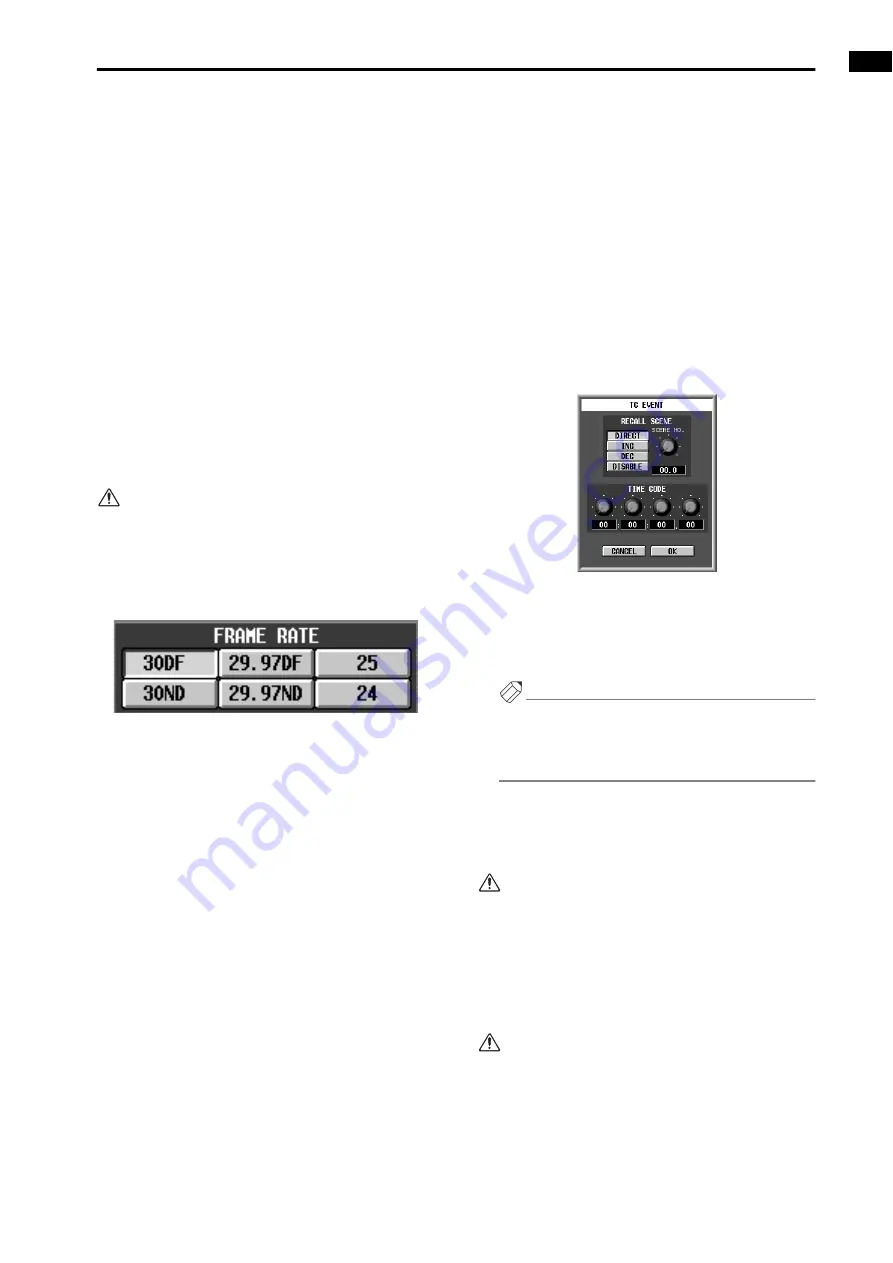
4. Use the buttons of the FRAME RATE section to
select the frame rate appropriate for the time code
that will be received.
The following frame rates can be selected.
•
24
.........................24 frames/second
•
25
.........................25 frames/second
•
29.97ND
..............29.97 frames/second (non-drop)
•
29.97DF
..............29.97 frames/second (drop
frame)
•
30ND
...................30 frames/second (non-drop)
•
30DF
...................30 frames/second (drop frame)
5. As necessary, use the knobs of the OFFSET section
to specify the offset value.
The four knobs of the OFFSET section specify the
offset value by which the event times will be shifted
relative to the incoming time code.
If the INT GEN button is selected as the time code
source, you can use the INT GEN START TIME
knob to specify the starting time of the internally-
generated time code.
6. Start time code output on the external device.
At this time, the currently received time code value
will be displayed in the TIME CODE section of the
meter bridge and in the TC EVENT screen.
7. When you come to the moment at which you want a
scene to be recalled, click the CAPTURE button in
the TC EVENT screen.
Each time you click the CAPTURE button, the time
location at that instant will be added to the list below.
If an event is already recorded at the same time loca-
tion, the original event will take priority.
8. When you have captured all of the desired times,
stop time code output on the external device.
9. In the list, click the line of time code that you cap-
tured first.
The TC EVENT popup window will appear, in which
you can select a scene memory.
•
TC EVENT popup window
10. Select a scene memory, and click the OK button.
11. Repeat steps 7–8 until you have assigned the
desired scene to each of the time code locations you
captured.
Hint
By using the ADD button, DELETE button, or ALL
DELETE button located below the list, you can regis-
ter new time code locations and events to the list, or
delete a time code location from the list.
12. Click the EVENT RECALLING ENABLE button to
turn it on.
This setting will allow events to be controlled by time
code.
While this button is set to “ENABLE,” it is not pos-
sible to store or sort SCENE memories or UNIT/
PATCH/NAME libraries. Nor is it possible to load
from memory card.
13. Once again, start time code output on the external
device.
Each time a time location registered in the list is
reached, the corresponding scene will be recalled.
•
The FRAME RATE button and OFFSET/INT GEN
START TIME knobs can be operated only while
“OFF” is selected in the TIMECODE IN section.
•
CAPTURE, ADD, DELETE, and ALL DELETE but-
tons can be operated only while the EVENT
RECALLING button is set to “DISABLE.”
Содержание CS1D
Страница 14: ...Owner s Manual ...
Страница 18: ...Operating Manual ...
Страница 19: ...Operating Manual Start up ...
Страница 68: ...Operating Manual Basic Operation ...
Страница 227: ...Reference Manual ...
Страница 228: ...Reference Manual Hardware ...
Страница 345: ...Reference Manual Software ...
Страница 543: ...Reference Manual Appendices ...


