Other functions
232
Chapter
14
Operation section
Pingpong-recording multiple tracks to one or
two tracks
On the AW2816, multiple previously-recorded tracks
can be mixed, and recorded on one or two tracks. This
operation is called “ping-pong recording” or “bounce
recording.” After ping-pong recording, you can assign
other virtual tracks to the original tracks and use them
to record new parts. This is convenient when you
want to record more than 17 parts of audio sources.
As an example, here’s how tracks 1–14 can be mixed
in stereo and recorded on tracks 15/16.
■
Set the patching and routing
In order to perform ping-pong recording, the monitor
channels that will be the ping-pong recording sources
must be sent to buses 1–8, and the outputs of those
buses must be patched to the inputs of the ping-pong
recording destination tracks. In this example, we will
make settings to send tracks 1–14 to buses 7/8, and
record on tracks 15/16.
1
Press the [PATCH] key
→
[F1] (Patch IN) key
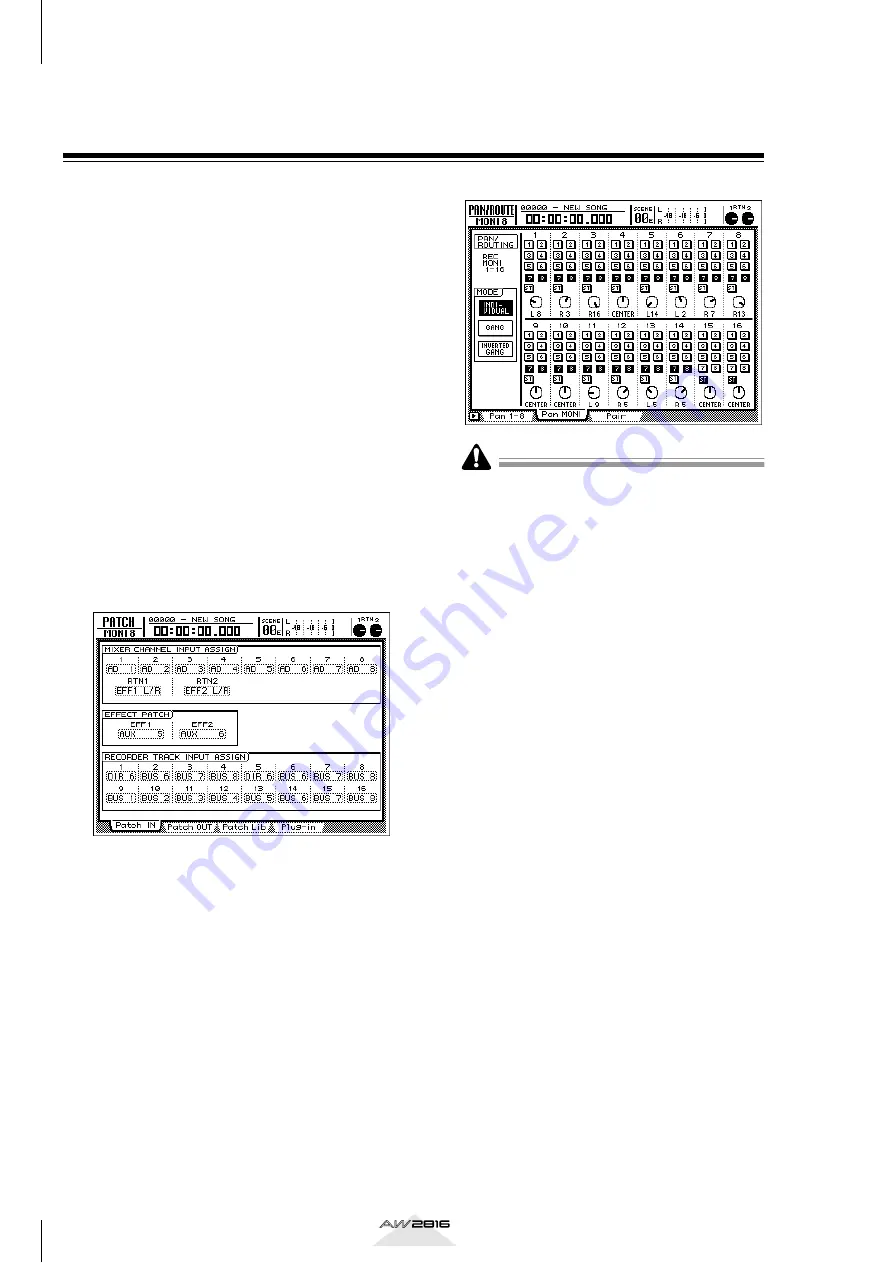
to access the PATCH screen/Patch IN page,
and assign buses 7/8 (BUS 7/8) to recorder
inputs 15/16.
2
Press the RECORDER [1-8]/[9-16] keys to
verify that the [ON] keys are turned on for
monitor channels 1–14, and raise the fad-
ers.
3
Press the [PAN] key
→
[F2] (Pan MONI) key
to access the PAN screen/Pan MONI page.
Turn the bus assign 7/8 buttons on and the
ST button off for each monitor channel 1–
14. Also set the pan for each channel.
With these settings, the signal that has passed
through the fader and pan of monitor channels
1–14 will be routed through buses 7/8, and sent
to recorder inputs 15/16.
It will not be possible to adjust the pan of each audio
source after recording to tracks 15/16. Make pan set-
tings carefully.
■
Monitor the input signals
Now we will make settings so that the signals sent to
recorder inputs 15/16 can be monitored via the stereo
output channel from the MONITOR OUT jacks/
PHONES jack.
4
Press the REC TRACK SELECT [15]/[16]
keys.
The REC TRACK SELECT [15]/[16] keys will
blink, and tracks 15/16 will be in record-ready
mode.
5
Press the [PAN] key
→
[F2] (Pan MONI) key
to access the PAN screen/Pan MONI page.
For monitor channels 15/16, turn the ST
button on and the bus assign 1–8 buttons
off.
6
Set the monitor channel 15 PAN knob to
the far left (L16), and the monitor channel
16 pan knob to the far right (R16).


