Using automix
9
145
Operation section
Storing an automix
You can assign a name to the current automix, and
store it in internal automix memory. Data for up to six-
teen automixes can be stored in memory.
Tip!
The automix data you store is saved on the hard disk
as part of the current song. In other words, you can
create up to sixteen automixes for a single song, and
compare these automixes at any time.
1
Press the [AUTOMIX] key
→
[F2] key.
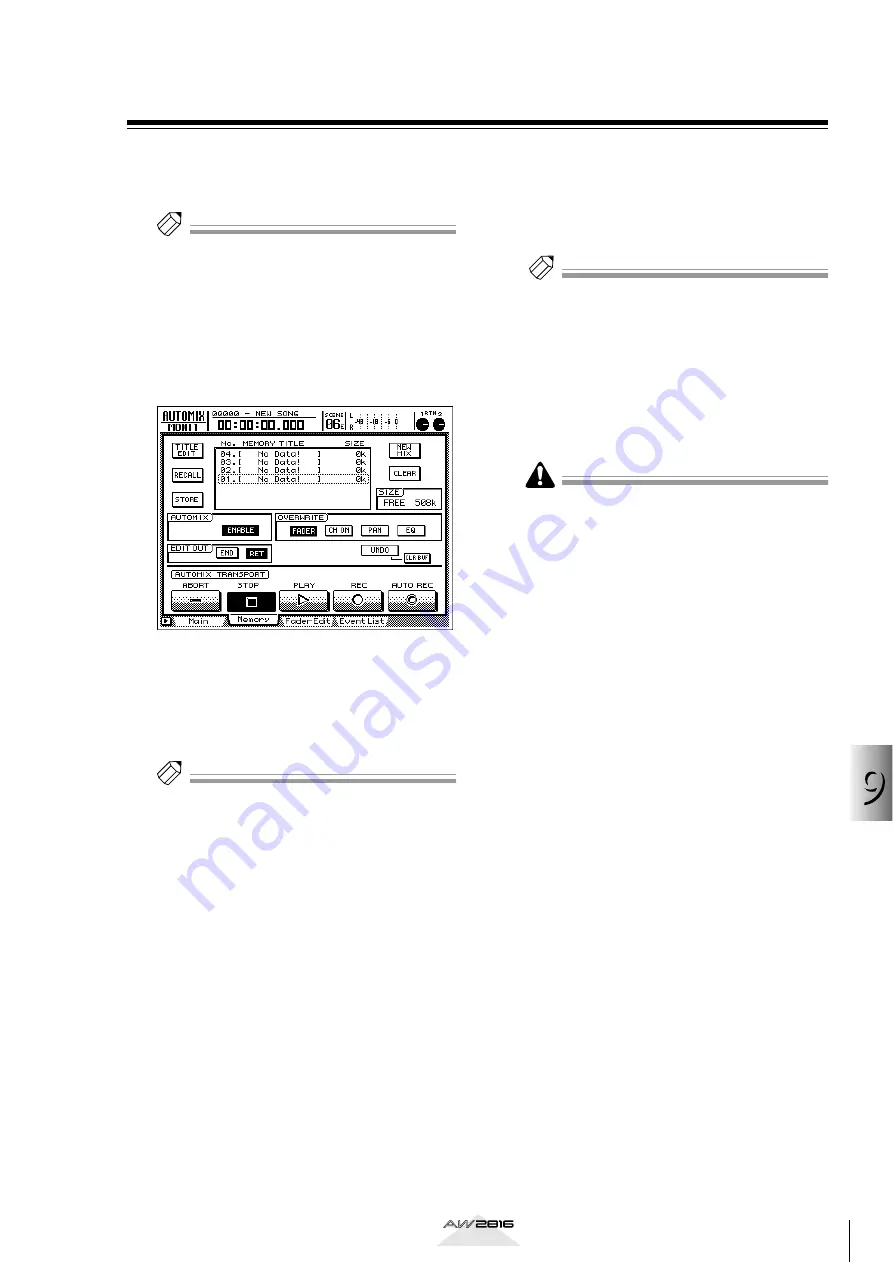
The AUTOMIX screen/Memory page will appear.
This page is used mainly to manage the internal
automix memory.
2
Turn the [DATA/JOG] dial to select the
store destination automix number.
You can select a store destination automix num-
ber in the range of 01–16. Vacant automix num-
bers will appear in the list as “[No Data!].
Tip!
When this page is displayed, you can use the [DATA/
JOG] dial to select an automix number in the list
regardless of where the cursor is located.
3
Move the cursor to the STORE button at
the left of the list, and press the [ENTER]
key.
A popup window will appear, allowing you to
input the name. Assign a name of up to sixteen
characters. (For details on inputting characters,
refer to page 37.)
4
After inputting the name, move the cursor
to the OK button and press the [ENTER]
key.
The current automix data will be stored in the
selected automix number.
Tip!
• If STORE CONFIRMATION is turned “OFF” in the
UTILITY screen/Prefer.1 page, you can save to the
specified automix number without having to input a
name. This method is convenient when you are
repeatedly overwriting an automix to store it in the
same automix number.
• The contents of the automixes stored in internal
memory and the current automix can be saved on a
MIDI sequencer or other external MIDI device by
using the MIDI Bulk Dump function. For details on
using Bulk Dump, refer to page 212.
The automix memory is used in common by the cur-
rent automix and the stored (maximum of) sixteen
automixes. This means that if the current automix
uses a large amount of memory, it may not be possi-
ble to store it even though vacant automix numbers
are shown in the list. In this case, use the Memory
page CLEAR button to delete an unneeded automix,
and then execute the Store operation.


