4
5
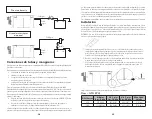
Using Panel Switch
Grey wire
Fuse
Black wire
Plumbing
This system has been designed to be used with flexible hose. Rigid piping or tubing may damage the
pump or the pump’s discharge.
Factors that reduce the flow of a bilge pump may include but are not limited to the following:
• The length of discharge piping (longer runs reduce flow)
• The number or radius of bends
• The roughness of the interior surfaces of piping and fittings (smooth bore hose is best)
• The reduction (hose restriction) in cross-sectional area of discharge system components such
as check valves and thru-hulls
Attach the discharge hose to the hose barb using stainless steel hose clamps.
The thru-hull discharge fitting should be mounted at least 8" (20.3 cm) above the heeled water line to
prevent water siphoning in from outside the vessel or the discharge may be located below the maximum
heeled waterline if the discharge line is provided with both of the following:
• A seacock installed in accordance with the requirements of ABYC H-27, Seacocks, Thru-Hull
Connections, and Drain Plugs, and
• A vented loop or other means to prevent siphoning into the boat. A check valve shall not be
used for this purpose.
If the discharges of several pumps are manifolded to discharge through a single thru-hull fitting, the
system shall be designed so that the operation of one pump will not back feed another pump, and the
simultaneous operation of each pump will not diminish the pumping capacity of the system. A check
valve shall not be used in the discharge manifold system.
Hose connections shall be secured with a non-corrosive type of clamp, or be mechanically fastened
with permanently-attached end fittings, such as swaged sleeve. Threaded inserts shall be attached
with corrosion resistant metallic clamps.
Best practice: Use two stainless steel hose clamps to attach hose to hose barb.
Installation
We recommend securing the shower drain box with four #8 stainless steel flathead screws of an adequate
length as to secure the system but not penetrate the entire thickness of the hull. Use a flexible sealant
in the screw holes to prevent water from penetrating the screw holes.
OPTIONAL — Included in this kit is a rear mounting bracket to help make installation easier in tight areas.
1. Install the rear mounting bracket in the hull using two #8 stainless steel flathead screws as to
secure the system but not penetrate the entire thickness of the hull. Use a flexible sealant in
the screw holes to prevent water from penetrating the screw holes.
2. Slide the back of the shower drain box into the mounting foot so that it makes full contact with
the mounting foot.
3. Using two more screws, anchor the box on any of the other three sides of the shower drain box.
For your convenience, there is an additional anchor point between the discharge hoses.
Periodically clean the strainer to prevent clogging the system.
Flow — GPH (LPH)
GPH Series
@ 0 ft
0m – 0 kPa
@ 3.3 ft
1m – 10 kPa
@ 6.7 ft
2m – 20 kPa
Max Head
Height
800
952 (3601)
687 (2597)
483 (1827)
9' (2.7m)
1100
1120 (4236)
906 (3424)
437 (1653)
11' (3.4m)
5"
(13cm)
9.5"
(24cm)
9"
(23cm)


