Page | 84
23.
On-site Troubleshooting
Problems most commonly occur with the power supply or communications. Use these steps to diagnose problems:
1.
Physical Check
. Look for visual damage, theft, broken fittings, undone connections, poor connections, etc.
2.
Power Check
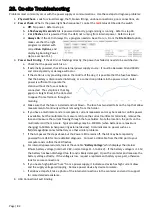
. What is the power light flash sequence? Look at the
red
Status LED beside the switch
a.
Off
: No power. Refer to step 2.
b.
1 flash every 10 seconds
: Ai1 is powered correctly, programming is running. Refer to step 3b.
c.
2 or 3 flashes
: Ai1 is powered from the USB, not running from internal power. Refer to step 2.
d.
Always On
: If the LED is Always On, a program needs to be set to run. From the
File Control
option,
make sure that the right
program is selected with
correct
Run Options
, and
displaying Running, Power
Up (see section 15.1).
3.
Power Fault Finding
. If the LED is not flashing correctly, the power has failed or needs to be switched on.
a.
Check that the power switch is on
b.
If externally powered, check the external power supply source. It must be between 10 and 18Vdc
and correct polarity or damage will occur.
c.
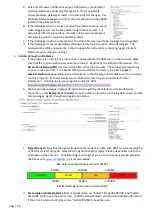
If the station is only providing data in the middle of the day, it is possible that the fuse has blown,
that the battery is disconnected internally, or a connection problem in the power circuit. Solar
power is sufficient to operate the
station without the fuse or battery
connected. The symptom is that big
gaps (or straight lines) in the data start
to appear from afternoon through to
morning.
d.
Make sure that the fuse is installed and not blown. The fuse has two small tabs on the top that allow
measurement of continuity without removing from the holder.
e.
If you have a multimeter and are competent, current measurements may be made to confirm power
is available. Set the multimeter to measure mA (use the correct multimeter terminals), remove the
fuse and measure the current flowing through the fuse holder. Note the location, the ports on the
multimeter and the mA scale. Typical readings may be -1000mA (when batteries are maximum
charging) to 500mA (when powering external devices). 0mA indicates no power such as a
flat/damaged/disconnected battery or other similar problems.
f.
If the Ai1 passes the steps above but the Power LED remains off, the AI1 may be temporarily
powered from USB for more detailed diagnosis. Connect a USB cable from the USB port to your
computer and confirm the LED flashes.
g.
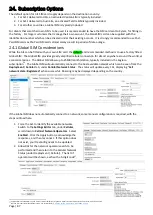
For internally powered units,
look at the variable “
BatteryVoltage
” which displays
the internal
lithium battery voltage (nominal 12.8V, normal range 11.5 to 14.2V). If the battery voltage is <11.5V
the battery has been discharged too far and is likely damaged. Open the cannister and measure the
battery voltage directly. If the voltage is low, request a replacement battery spare part, otherwise
look for secure connections.
h.
If you hear a high pitched “hum” from a power supply, it indicates a device has high current draw
and the supply voltage is dropping. Remove power device by device to isolate.
i.
If all above steps fail, take a photo of the internal connections in the cannister and send to support
for more detailed assistance.
4.
USB Connection Fault Finding.


