background image

21

PARTS LIST

Содержание 212 CC

Страница 1: ...SPECTION MAINTENANCE AND CLEANING PROCEDURES WRITE THE PRODUCT S SERIAL NUMBER ON THE BACK OF THE MANUAL NEAR THE ASSEMBLY DIAGRAM OR MONTH AND YEAR OF PURCHASE IF PRODUCT HAS NO NUMBER OWNER S MANUAL AND SAFETY INSTRUCTIONS ITEM 61030 For questions please call our customer support 909 628 0880 Mon Fri 9am to 3pm PST ...

Страница 2: ... small children away from the area while chipper shredder is in use Do not allow adults to operate the chipper shredder without proper instruction Please read this section carefully Operate the chipper shredder according to the safety instructions and recommendations outlined here and inserted throughout the text Anyone who uses this chipper shredder must read the instructions and be familiar with...

Страница 3: ...ed and will act as a constant visual reminder to you and others who may use the equipment to follow the safety instructions necessary for safe effective operation THIS UNIT DISCHARGES DEBRIS AT HIGH SPEEDS ALWAYS WEAR PROTECTIVE GOGGLES AND DO NOT OPERATE WITHOUT THE DEBRIS BAG IN PLACE DO NOT ALLOW ANYONE IN THE AREA WHILE THE UNIT IS RUNNING IF SOMEONE DOES ENTER THE AREA SHUT THE UNIT OFF IMMED...

Страница 4: ...to a complete stop and disconnect the spark plug before leaving the area Always move the unit to a safe storage area when not in use ALWAYS stand to the side of the chipper cone when feeding tree limbs and branches into the unit as tree limbs branches and harder woods may kick back while being chipped ALWAYS keep hands out of the chipper cone and shredder hopper when feeding materials Never wrap f...

Страница 5: ...may be present even if you do not smell or see any engine exhaust Breathing carbon monoxide can cause nausea fainting or death in addition to drowsiness dizziness and confusion If you experience any of these symptoms seek fresh air and medical attention immediately Use an approved fuel container NEVER add fuel to a running engine or hot engine Fill fuel tank outdoors with extreme care Never fill f...

Страница 6: ...ing engine Test the fuel cap for proper installation before starting and using engine ALWAYS run the engine with fuel cap properly installed on the engine During storage keep machine so gas cap is up NEVER siphon fuel by mouth to drain fuel tank When storing gasoline or equipment with fuel in the tank store away from furnaces stoves water heaters or other appliances that have a pilot light or othe...

Страница 7: ... to the axle 1 Position the chipper cone A over the three M8 1 25 threaded studs protruding from the engine plate and attach using three M8 1 25 flange nuts B INSTALL CHIPPER CONE 2 Rotate cone and cone base away from engine so cone does not contact engine 3 Tighten the flange nuts securely 1 Remove back four M6 1 0 nuts A and set nuts and rear stud plate B aside Loosen front four M6 1 0 nuts C do...

Страница 8: ...1 Hold the hopper handle A up so that the outer holes in the handle align with the holes in the hopper and secure with four M8 1 25 x 20 bolts B M8 washers C and M8 1 25 nuts D Insert the screws from the outside of the hopper INSTALL THE HANDLE 1 Slide the support rod A into the bracket B SEE FIGURE 8 Rotate the rod so that it sits below the front tab C of the bracket FIGURE 9 INSTALL THE DEBRIS B...

Страница 9: ...aterial no larger than 1 2 inch in diameter is loaded into the shredder hopper it is pulled into the path of the triangular and J hammers by air flow SHREDDER OPERATION Select an area with firm level ground covered by dirt or grass Do not operate on wet or slick surfaces or near bystanders Locate and organize the materials to be processed so that you don t have to walk in front of the inlet or dis...

Страница 10: ...blades probably need to be sharpened Consult the Troubleshooting and Repair section of this manual or see your authorized dealer Maintain control of the materials you are feeding to prevent them from whipping around DO NOT insert short pieces of material into the chipper cone by hand Use a larger piece of material to feed them into the chipper cone CHIPPING TIPS Don t overload the shredder by dump...

Страница 11: ...ing the fuel tank for support If the unit must be lifted always use at least two people and always grip the unit securely using the front leg and hopper handle 4 ALWAYS follow the engine manual instructions for storage preparations before storing the unit for both short and long term periods 5 ALWAYS follow the engine manual instructions for proper start up procedures when returning the unit to se...

Страница 12: ...ect the unit checking for loose hardware or components Pay special attention to the hardware attaching the chipper cone hopper axle and front leg CHECK FOR LOOSE HARDWARE Service Interval Every spring and fall Check that the safety labels are in place and undamaged Sample illustrations and part numbers of the decals can be found on page 6 Replace any damaged or missing decals CHECK SAFETY LABELS S...

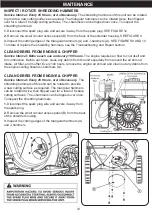
Страница 13: ...each use and every 100 hours The engine requires air flow to cool itself and for combustion Before each use clean any debris from the unit especially from around the air shroud intake air filter and muffler Every 100 hours remove the engine air shroud and clean out any debris from the engine cooling finsand J hammers A CLEAN DEBRIS FROM ENGINE CHIPPER Service Interval Every 25 Hours or As Necessar...

Страница 14: ...the chipper Remove the chipper cone A to access the knives SEE FIGURE 11 3 Using the recoil starter slowly pull the starter rope to rotate the rotor into position so the blades can be seen To sharpen or replace the chipper knives see the Troubleshooting and Repair section INSPECT CHIPPING KNIVES Service Interval Every 25 hours The engine air cleaner assembly should be opened inspected and the filt...

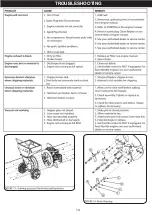
Страница 15: ...14 TROUBLESHOOTING ...

Страница 16: ...G on the opposite side of the rotor faces outward for balanced rotation 7 Repeat for all the hammers To rotate the shredding hammers The chipping knives should be sharpened or replaced when tree limbs require extra force to feed into the chipper cone The chipping knives may be sharpened at a 30 degree angle until the distance between the edge of the blade bevel and the mounting hole is less than 1...

Страница 17: ...16 REPAIR ...

Страница 18: ...17 PARTS LIST ...

Страница 19: ...18 PARTS LIST ...

Страница 20: ...19 PARTS LIST ...

Страница 21: ...20 PARTS LIST ...

Страница 22: ...21 PARTS LIST ...

Страница 23: ...22 PARTS LIST ...

Страница 24: ...Y STATES THATALL REPAIRS AND PARTS REPLACEMENTS SHOULD BE UNDERTAKEN BY CERTIFIED AND LICENSED TECHNICIANS AND NOT BY THE BUYER THE BUYER ASSUMES ALL RISK AND LIABILITY ARISING OUT OF HIS OR HER REPAIRS TO THE ORIGINAL PRODUCT OR REPLACEMENT PARTS THERETO OR ARISING OUT OF HIS OR HER INSTALLATION OF REPLACEMENT PARTS THERETO Record Product s Serial Number Here Note If product has no serial number ...

Отзывы: