1. Flip the Fill/Flush switches to flush mode (Rocker
switches located left of machine).
2. Place bottles under spouts.
3. Turn on the main power switch (Green rocker switch
located right side of the machine).
4. Turn on the spout switch, full on position all the way
up. Then turn on the Release Switch (UP) to allow
flushing through the vent area. Also turn the pressure
release dial on the top counter-clockwise to open up
the valve for fast flow.
5. Let solution fill the bottle completely and allow it to
run for a while after full.
6. Turn the spout switch to the middle position (stop
fill).
7. Turn on the spout switch again all the way up (This
runs the purge cycle again and allows the CO2 flow
path to be cleaned as well) Repeat step 7 a few times.
8. When satisfied with the cleaning put the Fill/Flush
switches back to Fill mode (down).
9. Turn off the spout switch completely. This will allow
you to remove the bottle and empty it of the
remaining cleaning solution.
10. This is the end of part one of the two part process for
cleaning your machine.
265 Prado Road, Suite 1 | San Luis Obispo, CA 93401 | 805.541.0100 | xpressfill.com | [email protected]
15
| XpressFill Systems LLC
Part One
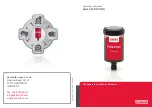
Attach cleaning hoses as pictured below. Hosing and connectors are supplied in the accessory packet.