8
www.xprgroup.com
17
www.xprgroup.com
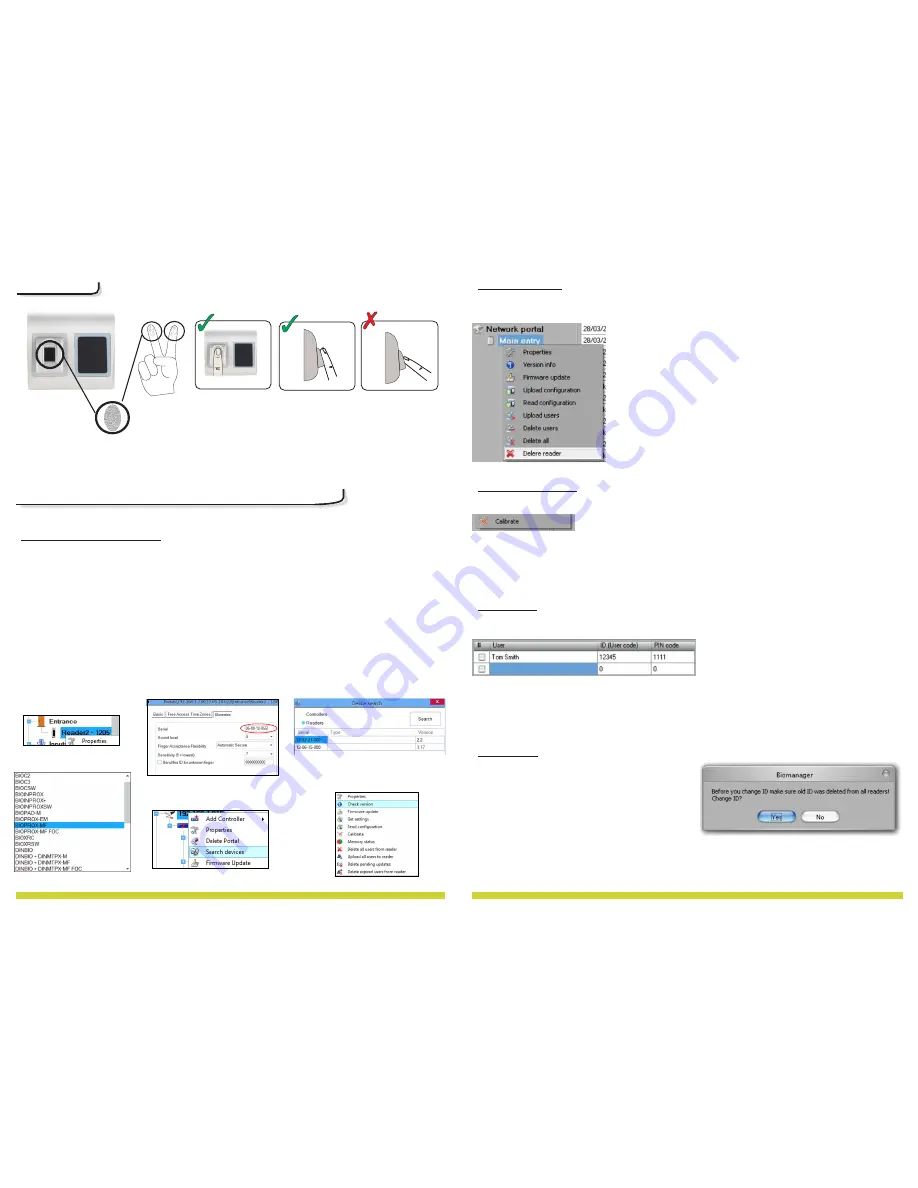
8. CONFIGURING THE BIOMETRIC READERS IN PROS CS SOFTWARE
1.
Expand the Door item to view the readers
2. Right click on the reader and select properties (8.1)
3. I
n the Basic tab
, for “Type” of the Reader select “BIOPROX-MF”. (8.2)
4. After selecting the type, a third tab will appear “Biometric”. Go to that tab and put the serial number of
the Biometric Reader. (8.3)
Important Note:
The serial number of the reader can be found on a sticker inside the reader, on the
packaging box and it can be search from the software (right click on the portal/search devices/readers).
(8.4 & 8.5)
To check if the reader is On Line, right click on the reader and select “Check version”. In the Event Window
a message should appear “Device ON Line, Type: BIOPROX-MF” (8.6)
8.1
8.2
8.3
8.4
8.5
8.6
8.1 ADDING BIOMETRIC READER
7. ENROLLMENT
9.3 DELETE READER
Right-click on the reader and select
Delete reader
9.4 C
ALIBRATE
SENSOR
9.5 ADD USER
Right-click on the reader and select
Calibrate
See the events panel to check the calibration flow
It is recommended to do sensor calibration once after reader is mounted. Clean the fingerprint sensor
before calibration.
At user table, click on the last empty user field and enter user name
Click on ID (User code) field and enter ID number. This number will be sent by the reader to the access
controller when user finger is recognized by the reader
Click on PIN code field and enter the PIN. PIN code is used at readers with keypad. When PIN code is typed
at reader, User ID will be sent to the access controller
9.6 EDIT USER
Find the user at user table to edit
Click on the user field for edit (Name, ID or PIN)
Type new value
Press Enter on the keyboard
Important:
When ID is changed, warning message is displayed reminding that if ID exist in some reader, should be
deleted from reader prior to change.
BIOPROX-MF
BIOC3


