PAGE1
PAGE2
英语
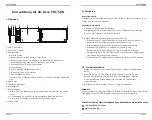
I. Overview
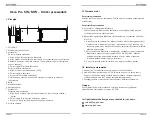
1. USB-C port
2. Trackpad/Touch
3. Indicator 1
In blue status:
a. Flashing slowly: No Bluetooth connected
b. Flashing quickly: Waiting for pairing with Bluetooth connection (Long
press the shortcut key on the top left for 3 seconds)
c. Always On: Successfully paired
In red status:
a. Flashing: Low battery (20%)
b. Always On: Charging
c. Off: Fully charged
A purple color indicates that the red and the blue indicator are both On
simultaneously
4. Roller
5. Shortcut keys
6. Active area
7. Indicator 2:
Handwriting indicator:
a. Flashing: The stylus is in the active area, but not touching the pen tablet
b. Always On: The stylus is in contact with the active area
c. Off: The stylus is outside the active area
8. Power key
Deco Pro SW/MW Quick Guide
Note:
For the best performance of your device, we highly recommend you check and
update driver regularly from XP-PEN website.
III. Install the Driver
1. Make sure your pen tablet was connected to the computer.
2. Visit the XP-PEN website (www.xp-pen.com), choose Support section and
click Download. Choose product model and download the latest driver
according to your computer system.
3. Follow the prompts to finish the driver installation.
Wired Connection
Connect the pen tablet to your computer. The pen tablet will get started
automatically.
Wireless Connection
A. Connection to the Bluetooth receiver
Plug the Bluetooth receiver into the computer and then toggle the power key to
turn the pen tablet on.
B. Direct Bluetooth connection (Windows/Mac OS only)
1. Toggle the power key to turn the pen tablet on. Then long press the
shortcut key on the top left for 3 seconds to enter Bluetooth pairing (with
the blue indicator flashing quickly).
2. Turn on the Bluetooth on the computer, set up and add Bluetooth device,
search for device name Deco Pro SW/MW and complete Bluetooth pairing
by clicking the device name (with the blue indicator always on).
3. Toggle the power key to turn the pen tablet off after use.
If you need any further assistance, please contact us:
www.xp-pen.com
service
@
xp-pen.com
II. Getting Started
1
2 3 4
5
6
8
7


