


Xerox Travel Scanner 150
User’s Guide
128
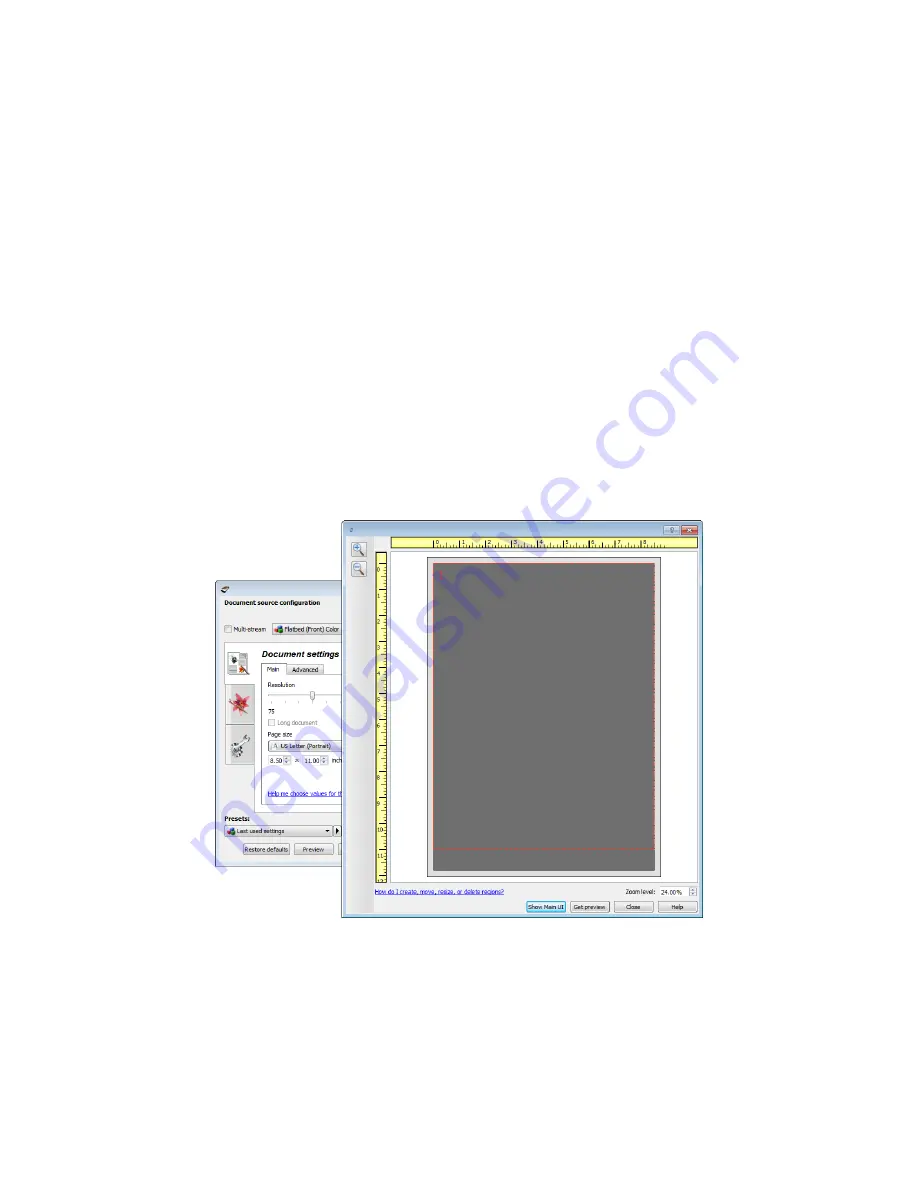
Using the Preview Window
Clicking the Preview button will display the preview window for the scanner interface. Use the preview option if you
want to scan and display a sample image that reflects the current settings in the main interface. After the preview is
displayed, you can then adjust the settings in the main interface until you are happy with how the sample image
looks. The preview window is also where you can define custom scan regions. Please refer to
Scan Regions
for
instructions on creating and scanning custom regions.
To use the preview window:
1.
Select the initial scan settings you want to use for the preview image and scanning.
If you want to modify the settings for a particular preset, make sure you select that preset before continuing.
2.
Click the
Preview
button to open the preview window.
The preview window displays the scan area and the current scan region. This scan region reflects the paper size
currently selected in the main interface. When you pass the mouse cursor over the scan region it will highlight
for you to move or resize it. If you move, resize, or add scan regions the main interface will display
User
defined
for the page size. Please refer to
Scan Regions
for instructions on creating, resizing and deleting
regions.
3.
Place an item in the scanner.
4.
Click the
Get preview
button.
Содержание Travel Scanner 150
Страница 1: ...Xerox Travel Scanner 150 One Touch 4 6 August 2012 05 0840 100 User s Guide...
Страница 6: ...Xerox Travel Scanner 150 User s Guide 6 Energy Star for the USA 189 Index...
Страница 14: ...Xerox Travel Scanner 150 User s Guide 14...
Страница 34: ...Xerox Travel Scanner 150 User s Guide 34...
Страница 124: ...Xerox Travel Scanner 150 User s Guide 124...
Страница 166: ...Xerox Travel Scanner 150 User s Guide 166...
Страница 180: ...Xerox Travel Scanner 150 User s Guide 180...
Страница 190: ...Xerox Travel Scanner 150 User s Guide 190...
Страница 194: ...Index Xerox Travel Scanner 150 User s Guide 194...


