Loading Paper
Phaser® 7400 Color Printer
3-18
4.
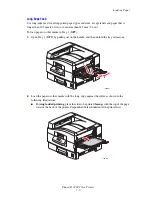
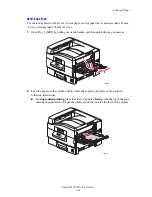
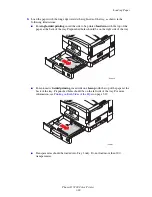
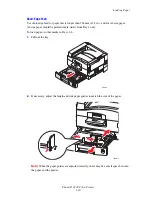
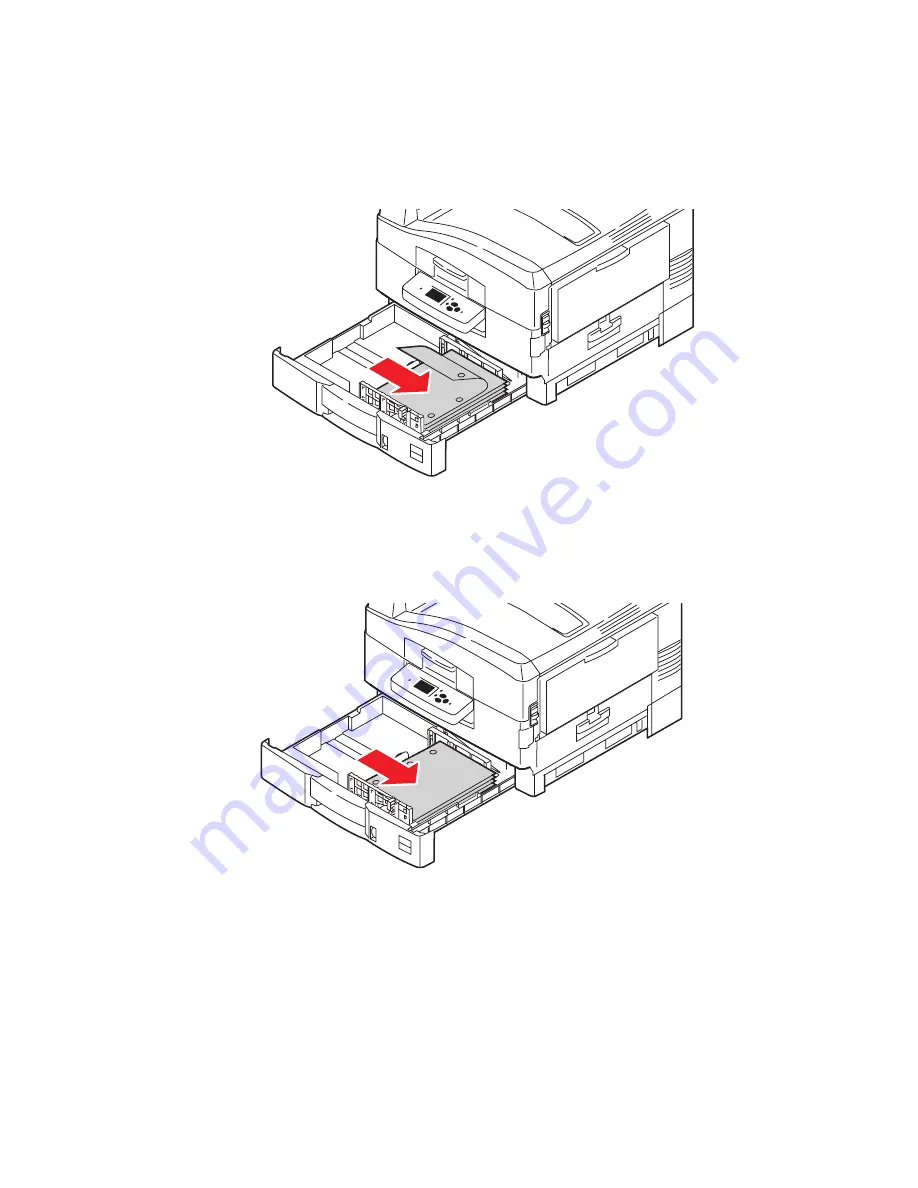
Load the paper with the long edge towards the right side of the tray, as shown in the
following illustrations:
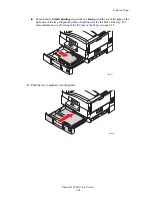
■
For
single-sided
printing
, insert the side to be printed
facedown
with the top of the
paper at the back of the tray. Prepunched holes should be on the right side of the tray.
■
For automatic
2-sided
printing
, insert side one
faceup
with the top of the paper at the
back of the tray. Prepunched holes should be on the left side of the tray. For more
information, see
Printing on Both Sides of the Paper
on page 3-29.
■
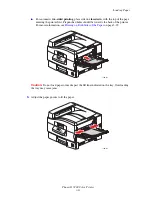
Transparencies should be loaded into Tray 2 only. Do not load more than 200
transparencies.
7400-020
XEROX
7400-164
XEROX
Содержание Phaser 7400
Страница 113: ...Adding Staples Phaser 7400 Color Printer 5 9 10 Push the stapler back into the finisher and close Door J 7400 037...
Страница 136: ...Clearing Paper Jams Phaser 7400 Color Printer 6 18 9 If the printer has a finisher slide it back into place 7400 053...
Страница 149: ...Clearing Paper Jams Phaser 7400 Color Printer 6 31 3 Carefully remove the jammed paper 4 Close Door D 7400 045 7400 136...
Страница 150: ...Clearing Paper Jams Phaser 7400 Color Printer 6 32 5 If the printer has a finisher slide it back into place 7400 053...
Страница 153: ...Clearing Paper Jams Phaser 7400 Color Printer 6 35 5 If the printer has a finisher slide it back into place 7400 053...
Страница 166: ...Clearing Paper Jams Phaser 7400 Color Printer 6 48 4 Close Door F 5 Close the finisher 7400 073 7400 083...
Страница 168: ...Clearing Paper Jams Phaser 7400 Color Printer 6 50 8 Remove the jammed paper 9 Close Door I 7400 076 7400 077...
Страница 169: ...Clearing Paper Jams Phaser 7400 Color Printer 6 51 10 Slide the finisher back into place 7400 053...
Страница 171: ...Clearing Paper Jams Phaser 7400 Color Printer 6 53 3 Slide the finisher back into place 7400 053...
Страница 180: ...Clearing Paper Jams Phaser 7400 Color Printer 6 62 6 Close Door H 7 Close the finisher 7400 082 7400 083...

