4.3 Configuring the Printer Drivers
76
Installing/Configuring the P
rinter
D
ri
v
ers
4
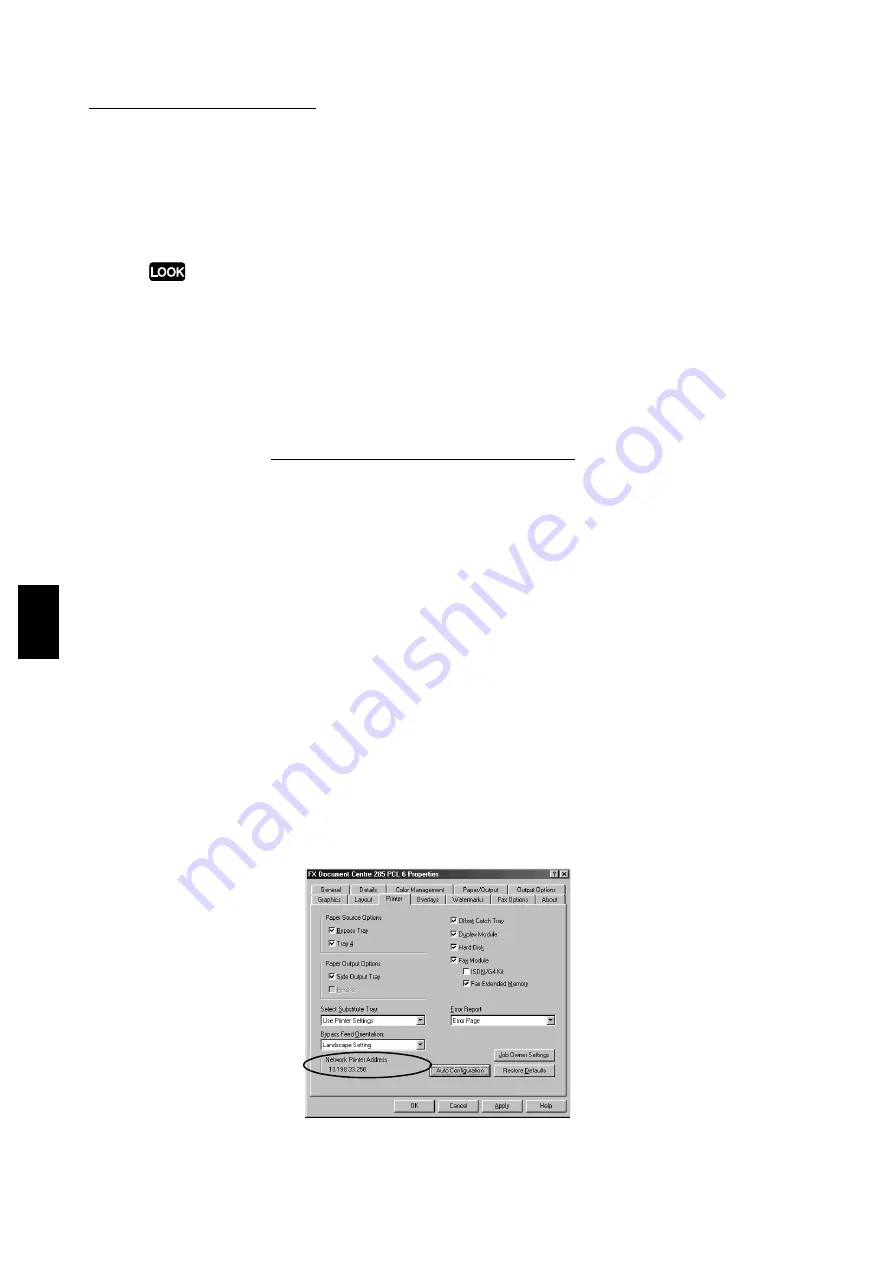
Hard Disk
(default: off)
Select this if your printer is installed with a hard disk which enables the printer to support job
collation. This has to be selected also when using the stapling function.
If this is not checked, Collated on the Output Options tab will not be available.
Error Report
Select whether or not errors are to be reported for print jobs. Options include:
●
Off
No error report will be printed.
●
Error Page (default)
An error page will be printed when the printer encounters error in printing the job.
Device Halftone (for Windows NT 4.0/Windows 2000 only)
Click to display the Device Color/Halftone Properties dialog box for defining the color and
halftone properties for the printer.
Job Owner Settings
Click to display the Job Owner Settings dialog box to define the job owner name, which is
required by the printer to generate the print volume report. The name can be entered in 1 to
31 characters. If you do not specify the name, the printer will use the user’s login name.
Auto Configuration
Click to automatically display the correct hardware options instead of manually specifying
each device option.
Before clicking this button to update the printer configuration, you will need to enable SNMP
as a network port and select UDP or IPX for Transport Protocol on the printer control. For
details, refer to "2.6.2 Setting the port and transport protocol".
If the printer driver is using TCP/IP or IPX network port, and the connected printer is of the
same target model as the printer driver, the driver will successfully acquire the information
on your printer configuration and the check box of the installed options will be selected.
Once the printer has been configured automatically, the network printer address will be
displayed on the tab, right below Bypass Feed Orientation.
Содержание document centre285 series
Страница 1: ...Document Centre 285 235 Series User Guide Printer This PDF file is best viewed using Acrobat Reader 5...
Страница 12: ...This page is intentionally left blank...
Страница 37: ...2 3 Using Quick Setup Menu 25 Setting Up 2...
Страница 42: ...2 5 Setting IP Address 30 Setting Up 2 Setting Subnet Mask and Gateway Address...
Страница 43: ...2 5 Setting IP Address 31 Setting Up 2...
Страница 47: ...2 6 Setting Port 35 Setting Up 2...
Страница 52: ...This page is intentionally left blank...
Страница 74: ...This page is intentionally left blank...
Страница 108: ...This page is intentionally left blank...
Страница 143: ...5 4 Outputting Reports Lists 131 Mode Menu and Common Menu 5...
Страница 147: ...5 4 Outputting Reports Lists 135 Mode Menu and Common Menu 5...
Страница 149: ...5 4 Outputting Reports Lists 137 Mode Menu and Common Menu 5...
Страница 151: ...5 4 Outputting Reports Lists 139 Mode Menu and Common Menu 5...
Страница 153: ...5 4 Outputting Reports Lists 141 Mode Menu and Common Menu 5...
Страница 155: ...5 4 Outputting Reports Lists 143 Mode Menu and Common Menu 5...
Страница 157: ...5 4 Outputting Reports Lists 145 Mode Menu and Common Menu 5...
Страница 159: ...5 4 Outputting Reports Lists 147 Mode Menu and Common Menu 5...
Страница 168: ...This page is intentionally left blank...
Страница 169: ...6Precautions and Limitations 6 1 In General 158 6 2 On Using TCP IP 160...
Страница 174: ...This page is intentionally left blank...
Страница 194: ...This page is intentionally left blank...
Страница 208: ...This page is intentionally left blank...


