


USER GUIDE
(P
RINT)
2–97
U
S E R
G
U I D E
(P
R I N T
)
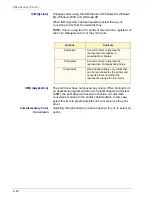
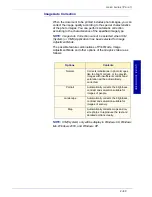
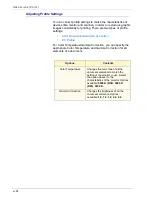
Adjusting Color Balance
You can adjust the toner density of Cyan, Magenta, Yellow, Black
(CMYK) for printing. Each color can be adjusted to low/medium/
high density and in seven levels each within the range of -3 to 3.
Display the
Color Balance
tab to adjust these settings.
NOTE:
When
Output Color
of the Graphics tab has been
selected as Black, only black can be adjusted here.
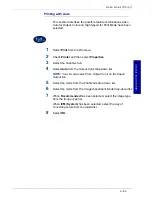
1
Select
from the
File
menu.
2
Check
Printer
, and then select
Properties
.
3
Select the
Graphics
tab and then the
Color Balance
button.
•
The
Graphics
tab will be opened with the
Color Balance
tab displayed.
4
Check the
Adjust Color Balance
check box.
5
Select the color to be adjusted from the list box below.
6
Adjust the density.
•
Use the up and down arrow buttons located below the
graphs of low/medium/high density to adjust the settings.
7
Select
OK
.
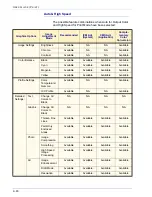
Содержание DocuColor 1632
Страница 1: ......
Страница 2: ......
Страница 12: ...2 6 USER GUIDE PRINT...
Страница 76: ...2 70 USER GUIDE PRINT...


