Paper Trays & Loading Media
DT6180 HandyBook
16
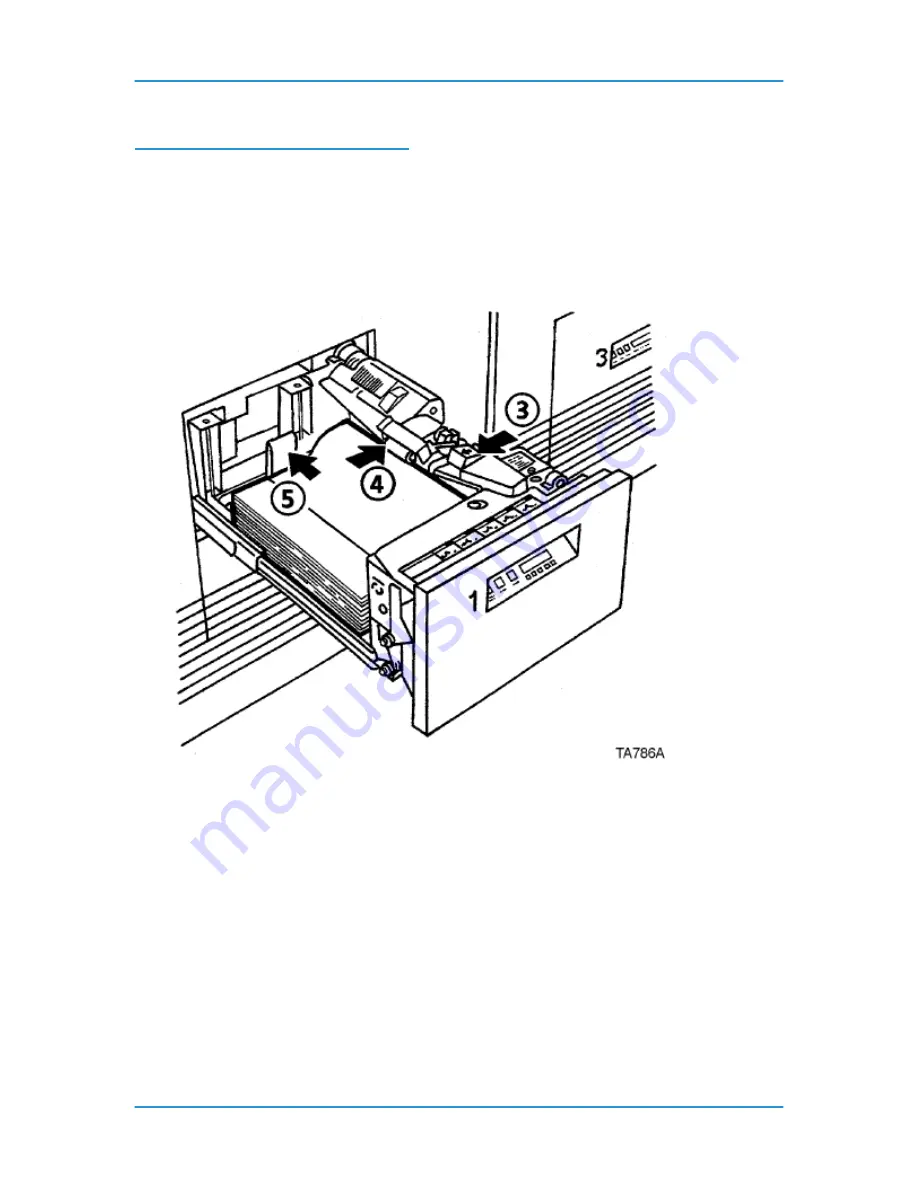
Adding Paper to Tray 1 or 2
The following steps must be performed to add paper to tray 1 or 2.
1. Press the Tray unlock button on the front of the tray. Wait for the red "Please wait" light to
go off.
2. When the green "Ready to open" light comes on, pull the tray out until it stops.
3. Press the green release tab.
4. Lift the metal handle on the feed belt and remove any paper under the belt.
5. Move the rear guide to the back of the tray.
NOTE: To load the paper correctly, refer to the label located
on the inside panel at the front of the paper tray. Remove any
damaged sheets from the top of the stack.
Do not load the paper above the red line. A jam could occur if too
much paper is loaded in the tray.
6. Load the required paper into the paper tray. Load paper with the
curl
side facing down
.
Load Xerox paper with the package wrapper seam side facing up.
NOTE: When loading drilled paper, be sure to fan the edge where the holes are
located.
7. Position the stack against the front right corner of the tray, as shown below. This is
indicated by the green arrow on the bottom of the tray.
Содержание 6100BD - Phaser Color Laser Printer
Страница 6: ...System Hardware DT6180 HandyBook 6...
Страница 7: ...System Hardware DT6180 HandyBook 7 1 System Hardware...
Страница 12: ...Paper Trays Loading Media DT6180 HandyBook 12...
Страница 42: ...Machine Maintenance DT6180 HandyBook 42 5 Sheets Short Edge MEASURE PAPER CURL...
Страница 67: ...Solutions in Alphabetical Order DT6180 HandyBook 67 Use A New Ream of Paper 139...
Страница 70: ...Solutions in Alphabetical Order DT6180 HandyBook 70 Area 12 Area 13...
Страница 140: ...Perform Printer Functions DT6180 HandyBook 140...
Страница 164: ...Sensor Maps DT6180 HandyBook 164...


