M A - 5 Q C S P E C T R O P H O T O M E T E R
13
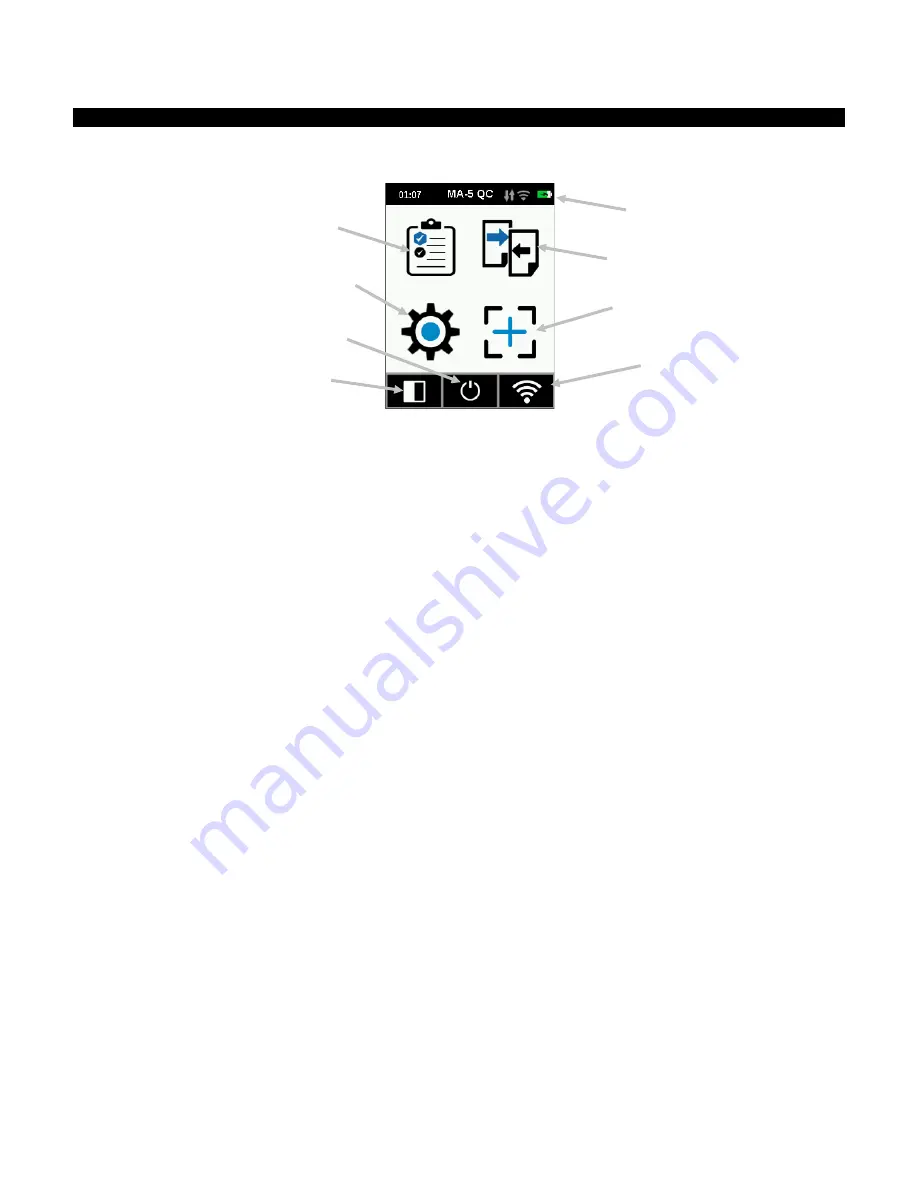
Home Screen
When the instrument is powered-up, the home (top level) screen appears after the startup procedure is
complete. Select the modes by tapping the icons located on the display screen.
Job Templates (1)
This mode is used to access current job templates downloaded from the application. Refer to Using Job
Templates section for more information.
Settings Mode (2)
The settings mode is used to set and edit the instruments configuration options, and to enter the calibration
mode. The settings options should be reviewed before you use your instrument for the first time. Refer to the
Settings Mode section for information.
Quick Compare (3)
The Quick Compare mode is used to compare standards with measured samples. Standards are either
downloaded from the software application or created on the instrument. Refer to Quick Compare Mode section
for more information.
Basic Measurement (4)
This mode is used to take quick measurements with no standard comparison. Measurement data can be viewed
and deleted as needed. Refer to Basic Measurement section for more information.
Header Bar (5)
Displays the current mode, time, software connection status (green when connected), WiFi connection (where
applicable), and battery charge status.
Calibration mode (6)
This mode is used to access the calibration procedure. Refer to Calibration mode section for more information.
Power off (7)
This option is used to power off the instrument. To access, tap the icon and then tap
Power Off
to confirm.
WiFi Info/Connect (8)
The WiFi information screen displays for connection state and IP address.
If the WiFi is set to ON and a network is correctly configured in the settings menu, the device will always be
connected to WLAN as soon as available. This is indicated by the WiFi icon in the header bar which turns from
greyed-out to white.
If the WiFi is set to OFF in the settings menu, tapping this icon will connect the device once. The connection is
terminated after exiting the WiFi Info/Connect screen.
Refer to WiFi mode section later in this manual for additional information.
(5)
(1)
(2)
(8)
(3)
(4)
(7)
(6)


