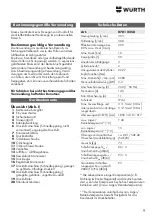
23
Producing compressed air
▸
Switch the device on at the On/Off switch
[2]
and wait until the maximum tank pressure is
reached.
3
Once the maximum tank pressure is reached, the
compressor switches off.
3
The tank pressure is indicated at the tank pressure
gauge
[14]
.
Attention!
The set control pressure must not be higher that the
maximum operating pressure of the connected air
tools!
▸
Set the control pressure at the pressure con-
troller
[15]
.
3
The current control pressure is indicated on the
control pressure gauge
[16]
.
▸
Connect the air hose at the compressed air
connection:
—
Air connection for unregulated, unfiltered com
-
pressed air
[6]
—
Air connection for regulated, filtered, oil-free com
-
pressed air
[18]
—
Air connection for regulated, filtered, oily com
-
pressed air
[17]
(to adjust the oil quantity,
see
Fig. VI
)
▸
Connect the air tool.
3
You can now work with the air tool.
▸
Switching off the device and pull out the mains
plug if the work is completed or is to be inter-
rupted.
▸
Drain the pressure tank condensation daily at the
condensate drain
[7]
.
Troubleshooting
DANGER!
Before any work on the device:
¾
Switch off the device and unplug.
¾
Wait until the device is at a standstill.
¾
Ensure that the device and all air tools and accessory parts are depressurised.
¾
Allow the device and all air tools and accessory parts to cool.
After any work on the device:
¾
Start up and check all safety devices.
¾
Ensure that there are no tools or similar on or in the device.
¾
Advanced maintenance and repair work as described in this chapter, must only be carried
out by specialists.
Fault
Possible cause
Remedy
Operation not
possible.
No mains voltage.
Check cable, plug, plug and fuse.
Mains voltage too low.
Use an extension cable with an adequate conductor
cross-section (see technical data).
If the device is cold: Avoid using an extension cable.
If the device is cold: Discharge the pressure in the
pressure tank.
Compressor was switched off
by pulling out the mains plug.
Switch the compressor off at the On/Off switch
[2]
,
then switch back on.
Motor overheats, e.g. due to
lack of cooling (cooling fins
covered).
Switch the compressor off at the On/Off switch
[2]
.
Clear the cause of the overheating. Allow to cool for
about 10 minutes.
Switch the compressor back on at the On/Off switch.
Содержание 0701 225 0
Страница 3: ...3 I 6 14 5 4 3 2 13 11 10 9 12 8 7 1 15 16 17 18 19 20...
Страница 4: ...4 II III IV V VI VII VIII IX 6 19 13 1...
Страница 126: ...126 GR Adolf W rth GmbH Co KG 3 1...
Страница 127: ...127 a b c a b c d e a b c d e f g...
Страница 128: ...128 a b c d e f g a...
Страница 129: ...129...
Страница 132: ...132 3 II 6 III I 7 I 10 11 IV 19 4 RCD 30 mA 2 3 3 14...
Страница 133: ...133 15 3 16 6 18 17 VI 3 7 2 2 10...
Страница 134: ...134 7 15 50 250 12 19 7 50 13 VII 10 20 VIII 1 IX...
Страница 135: ...135 250 13 VII 500 9 1000 5 C 7 W rth W rth W rth W rth masterService W rth http www wuerth com partsmanager W rth...
Страница 214: ...214 BG Adolf W rth GmbH Co KG 3 1...
Страница 215: ...215 a b c a b c d e a b c d e f g...
Страница 216: ...216 a b c d e f g a...
Страница 217: ...217...
Страница 220: ...220 3 II 6 III I 7 I 10 11 IV 19 4 RCD 30 mA...
Страница 221: ...221 2 3 3 14 15 3 16 6 18 17 VI 3 7 2 2 10...
Страница 222: ...222 7 15 50 250 12 19 7 50 13 VII 10 20 VIII 1 IX...
Страница 258: ...258 RU Adolf W rth GmbH Co KG 3 1...
Страница 259: ...259 a b c a b c d e a b c d e f g...
Страница 260: ...260 a b c d e f g a...
Страница 261: ...261...
Страница 264: ...264 3 II 6 III I 7 I 10 11 IV 19 4 RCD 30...
Страница 265: ...265 2 3 3 14 15 3 16 6 18 17 VI 3 7 2 2 10...
Страница 266: ...266 7 15 50 250 12 19 7 50 13 VII 10 20 VIII 1 IX...
Страница 267: ...267 250 13 VII 500 9 1000 5 C 7 W rth W rth W rth W rth W rth masterService http www wuerth com partsmanager W rth...
Страница 291: ......

