AUTOMATIC OIL CUT-OUT:
The automatic oil cut-out responds if there is too little oil in the engine. In this case it will not be possible to start the
engine or it will cut out automatically after a short period of time. It cannot be started again until the engine oil has
been topped up.
MAINTENANCE:
................. .............................-––––––.....
ATTENTION:
Before carrying out maintenance or repairs, stop the engine and disconnect the spark plug.
NOTICE:
Switch off the machine immediately and contact your service station:
- In the event of unusual vibrations or noise
- If the engine appears to be overloaded or misfires
CLEANING:
Keep all safety devices, air vents and the motor housing free of dirt and dust as far as possible. Wipe the equipment
with a clean cloth or blow it with compressed air at low pressure. n We recommend that you clean the device
immediately each time you have finished using it. Clean the equipment regularly with a moist cloth and some soft
soap. Do not use cleaning agents or solvents; these could attack the plastic parts of the equipment. Ensure that no
water can seep into the device.
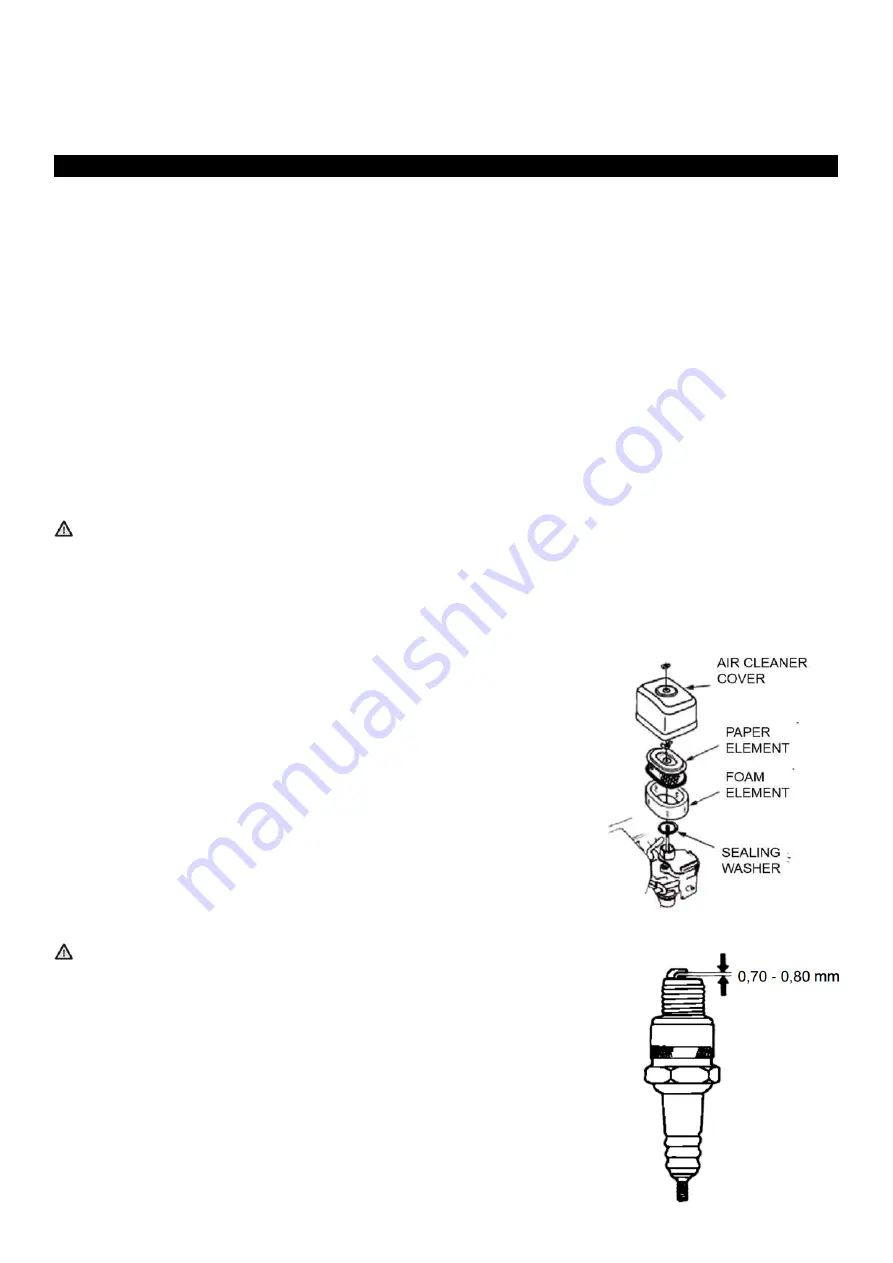
1. INSPECTION AND CLEANING AIR CLEANER:
A dirty air cleaner will restrict air flow to the carburetor and cause poor engine performance. Inspect the air cleaner
each time the engine is operated. You will need to clean the air cleaner more frequently if you operate the engine in
very dusty areas
NOTICE!
Operating the engine without an air cleaner, or with a damaged air cleaner, will allow dirt to enter the engine,
causing rapid engine wear. This type of damage is not covered under the warranty.
Remove the air cleaner cover. Be careful to prevent dirt and debris from falling into the air cleaner base. Remove the
air cleaner from the air cleaner base. Inspect the air cleaner elements. Replace any damaged elements. Clean or
replace dirty elements.
1. Remove the air cleaner cover and foam element
2. Remove the paper element from the air cleaner base
3. Paper element: Tap the element several times on a hard surface to remove
excess dirt, or blow compressed air [not exceeding 30 psi (207 kPa)] through the
filter from the wire screen side. Never try to brush off dirt; brushing will force
dirt into the fibers. Replace the paper element if it is excessively dirty.
4. Wipe dirt from the air cleaner base and cover using a moist rag. Be careful to
prevent dirt from entering the air duct that leads to the carburetor.
5. Reinstall the air cleaner element, and make sure both elements are properly
positioned. Install the air cleaner cover and tighten the two wing bolts securely
2. Maintaining the spark plug:
NOTICE!
Incorrect spark plugs can cause engine damage
1. Disconnect the cap from the spark plug, and remove any dirt from the spark plug
area.
2. Use the proper size spark plug wrench to remove the spark plug.
3. Inspect the spark plug. Replace it if damaged, badly fouled, if the sealing washer is
in poor condition, or if the electrode is worn.
4. Measure the electrode gap with a suitable gauge. T he correct gap is 0.028 - 0.031
in (0.70 0.80 mm). If adjustment is needed, correct the gap by carefully bending the
side electrode.
5. Install the spark plug carefully, by hand, to avoid cross-threading.


