


Page 19
BirdCam Pro User Guide
Page 2
BirdCam Pro User Guide
Tripods
For very precise placement and aiming,
no mounting method will beat a camera
tripod. A standard threaded tripod mount
(¼”-20) is embedded into the bottom of
the BirdCam Pro. This allows users to attach
the BirdCam Pro to any tripod or any of
thousands of 3rd-party camera mounting
accessories – providing users with a world
of creative opportunities through angle
and height adjustment.
Wingscapes makes an optional mounting
accessory for the BirdCam Pro:
Universal Camera Stake
(MCA-13051)
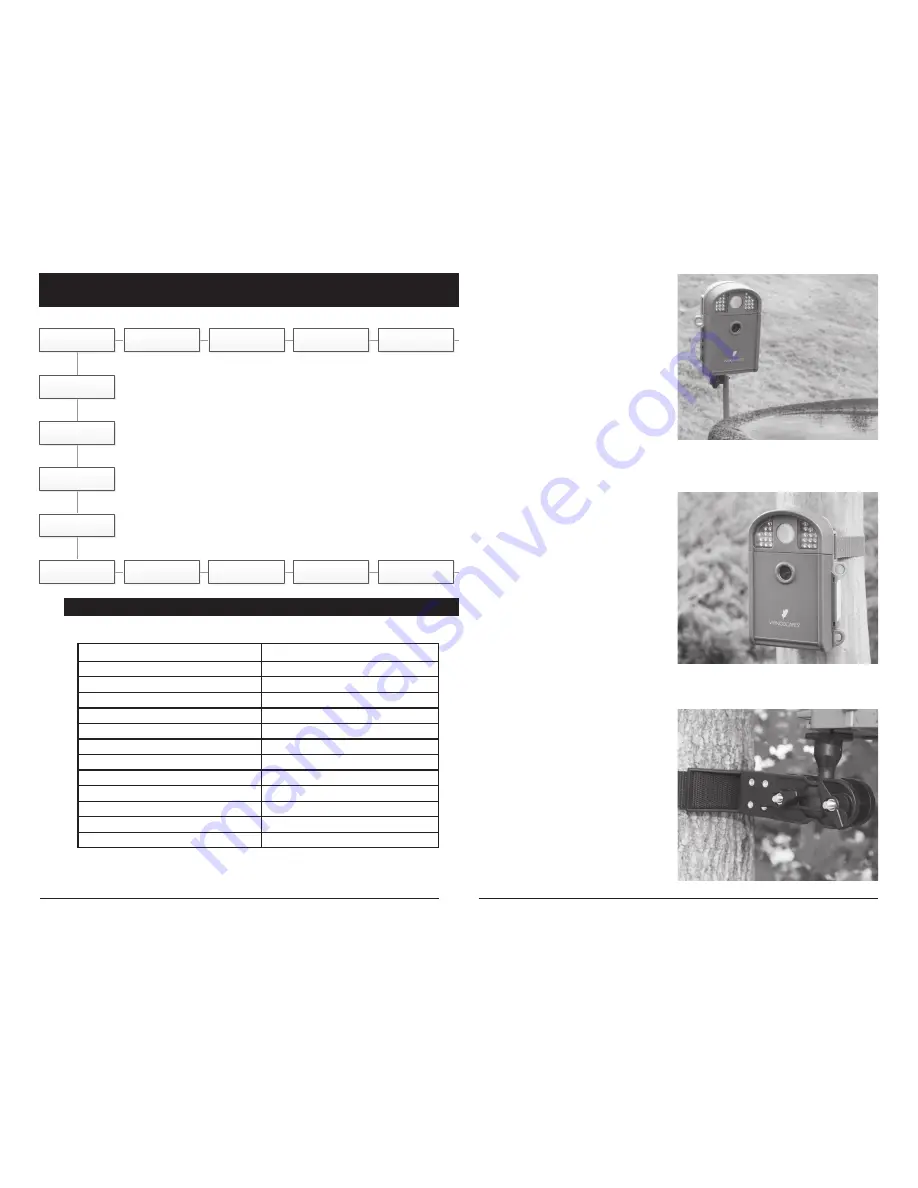
Mounting Strap
The BirdCam Pro comes with a
Mounting Strap to facilitate mounting.
You will find slots in the rear of the
BirdCam Pro through which a strap
can be threaded. Many users will
tighten the BirdCam Pro to a tree,
then wedge a stick or piece of bark
between the BirdCam Pro and the
tree to facilitate aiming.
Mounting Arm Accessories
This accessory will allow you to easily
mount the BirdCam Pro to a common
bird feeder pole, a post, a stake, a wall,
or a tree. Numerous angle settings and
360° rotation make this mounting arm
one of the most versatile setup options.
Your Wingscapes BirdCam Pro offers
nearly limitless mounting opportunities,
allowing you to capture images of wildlife
in practically any situation.
To read more about attracting wildlife to
your backyard and BirdCam Pro, visit our
website at www.wingscapes.com.
Wingscapes BirdCam Pro
DEFAULT SETTINGS
General
DATE/TIME:
01/01/2016 11:11pm
PHOTO RESOLUTION:
HIGH (10 MP)
VIDEO RESOLUTION:
FHD (1920 x 1080)
VIDEO LENGTH:
10 SECONDS
CAMERA NAME:
BIRDCAM PRO
INFOSTRIP ACTIVE:
YES
TEMPERATURE:
FAHRENHEIT
AC CONNECTED?:
NO
PROGRAM SECURITY CODE:
00000
MANAGED MEMORY:
DO NOT OVERWRITE
ERASE ALL IMAGES:
NO
RESET TO FACTORY DEFAULTS:
NO
SETUP MODE
< OPTIONS >
RESET TO
FACTORY DEFAULTS
MULTI-SHOT
DETECTION
DELAY
TIME LAPSE
INTERVAL
T.L. PROGRAM #2
STOP TIME
DATE & TIME
T.L. PROGRAM #2
START
CAMERA NAME
UPGRADE
FIRMWARE
PROGRAM
SECURITY CODE
MANAGED
MEMORY
ERASE ALL IMAGES
(FORMAT CARD)
WI-FI SD CARD?
IMPRINT INFO
TEMPERATURE
UNIT
AC CONNECTED?
PHOTO
QUALITY
PIR
SENSITIVITY
VIDEO
QUALITY
VIDEO
LENGTH
VIDEO
SOUND
PHOTO OR
VIDEO
CAPTURE MODE
T.L. PROGRAMS
PER DAY
T.L. PROGRAM #1
STOP
T.L. PROGRAM #1
START


