Step Six: Wheelchair Therapeutic Handles
Step Seven: Rail & Canopy Installation
The Wheelchair Therapeutic Handles
(see page 2)
are located in the small box
labeled Wheelchair Therapeutic Handles.
Note location of holes near the middle of the wheelchair-side hangers approximately half way up
from the platform. The therapeutic handles are to be attached here. Install using the four 2-inch bolts
and corresponding nuts in the fastener kit labeled “Therapeutic Handles”.
Canopy rails(2) are contained in Box #6.
Use hardware contained in the “Frame Assembly Kit” pack.
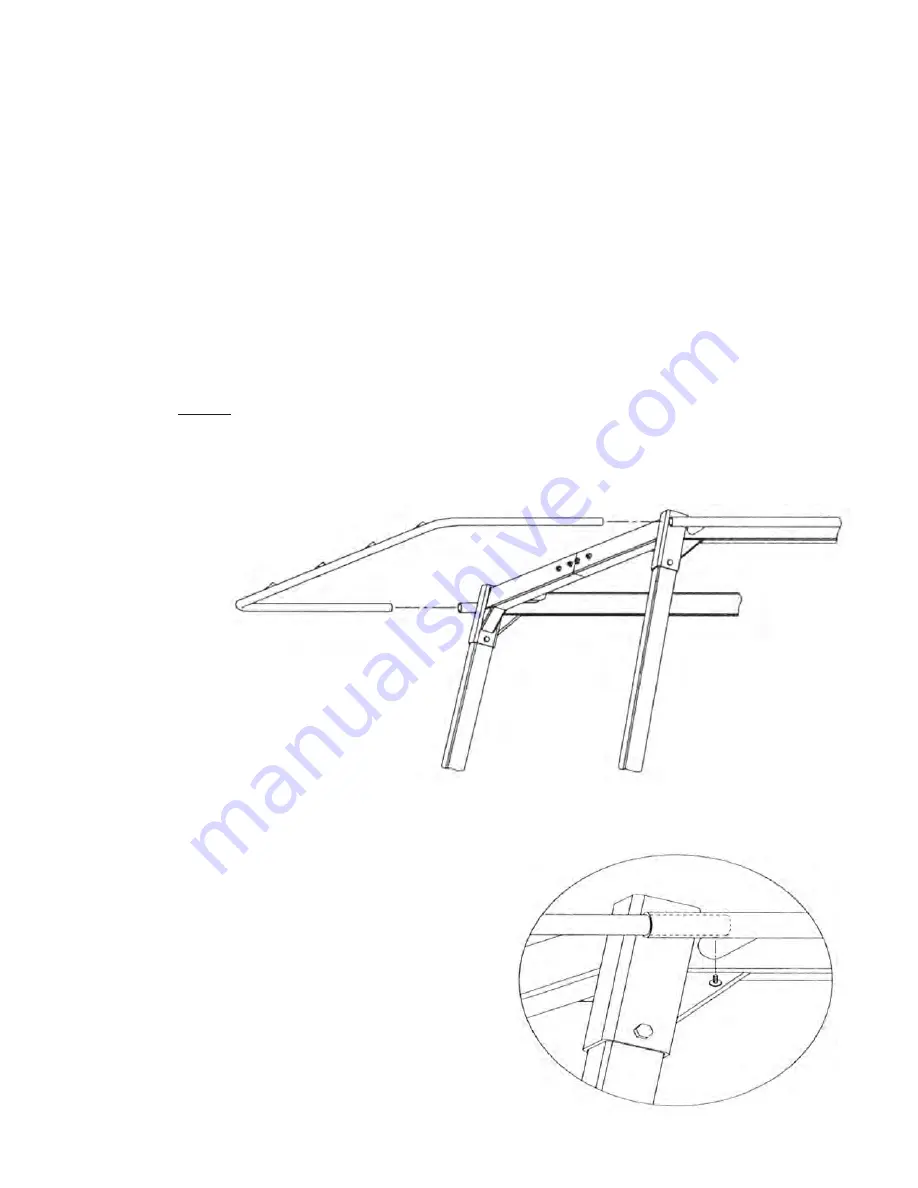
1. Ensure the short, angled tubes (of the canopy end rails)
are facing
upward
for installation onto the frame.
2. Align each end of the canopy end rail with the side rails on the upper frame and
slide into the side rails. Be sure to push both sides evenly or it will bind and be
difficult to slide into place. Continue pushing the canopy end rail into the side rails
until the small holes on the bottom of the
canopy rail are lined up with the holes
on the side rail ends.
3. Fasten the rails together with the small
Phillips head screws
(K)
into the aligned holes.
Tighten securely.
CANOPY INSTALLATION
4. There are four fiberglass rods. Insert a rod into each of the two
middle holes of the canopy end rail. Next, while canopy is still not
installed, thread the remaining two canopy rods through the 2
short pockets sewn lengthwise on the underside of the canopy.
5. Now lift the canopy onto and over the center rods.
Maneuver the outside rods so they can be placed in their
respective insert holes.
6. Fasten the canopy straps together around the
canopy end rails and side rails.
PA G E
T H I R T E E N
Side Rail


