M O N I T O R P A N E L
page 10
D-8 / Feb 2009
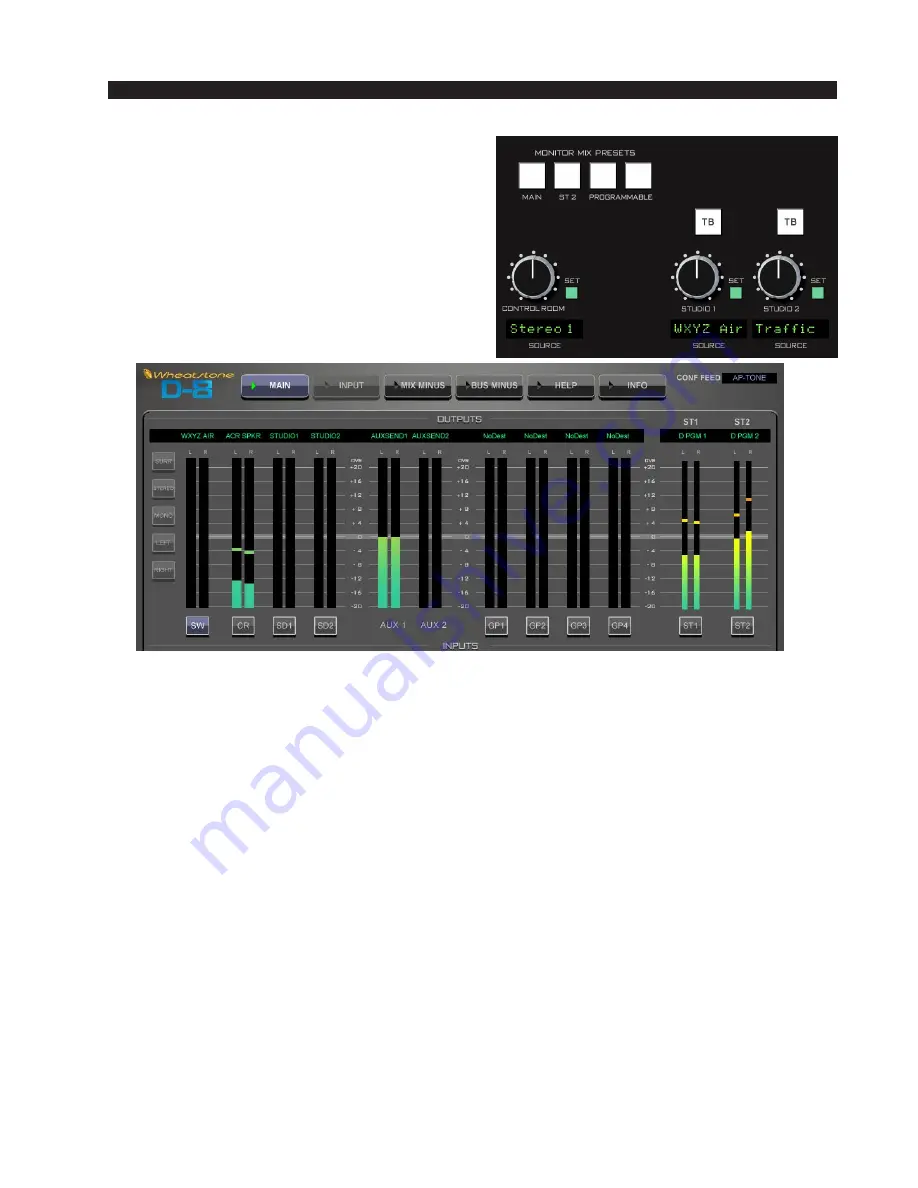
Using the MODE Selector
On the far top left section of the MAIN touch
screen is a MODE selector. Access this selector
by pressing a monitor’s SET button on the Moni-
tor panel, or pressing a button below the CR,
ST1, or ST2 meters on the MAIN touch screen.
When switching modes, note that the CR can be set to Surround only if pre-
configured as a 5.1 output. Studio outputs are typically configured as Stereo.
When SURROUND is selected for the CR, mono mixes or Sources will be routed
to the CENTER channel.
Programmable Presets
The last two MONITOR MIX PRESETS buttons are user programmable. These
may be loaded with commonly used sources like AIR, Tuner, etc. To program a button,
decide on the source you want that button to represent. If the source in question is not
currently assigned to one of the monitors, make the assignment now, as described above.
Next, make sure the SET button on the monitor to which the source in question is
assigned is lit. Then press and hold the programmable button for three seconds. The new
source is now loaded into the button. Confirm the source storage by switching through
the MONITOR MIX PRESETS.
Studio Output Functions
Studio Outputs have extra functionality that must be programmed using the XPoint
software. In most installations, a STUDIO output is programmed to MUTE whenever
a D-8 fader controlling a microphone in the corresponding Studio is turned ON. Logic
output ports may also be programmed to drive an ON AIR light whenever one of these
microphones is turned ON. Please refer to the User Programming in the Appendix 2
of this manual for details.


