WELL WRC7020N User’s Manual
185
17
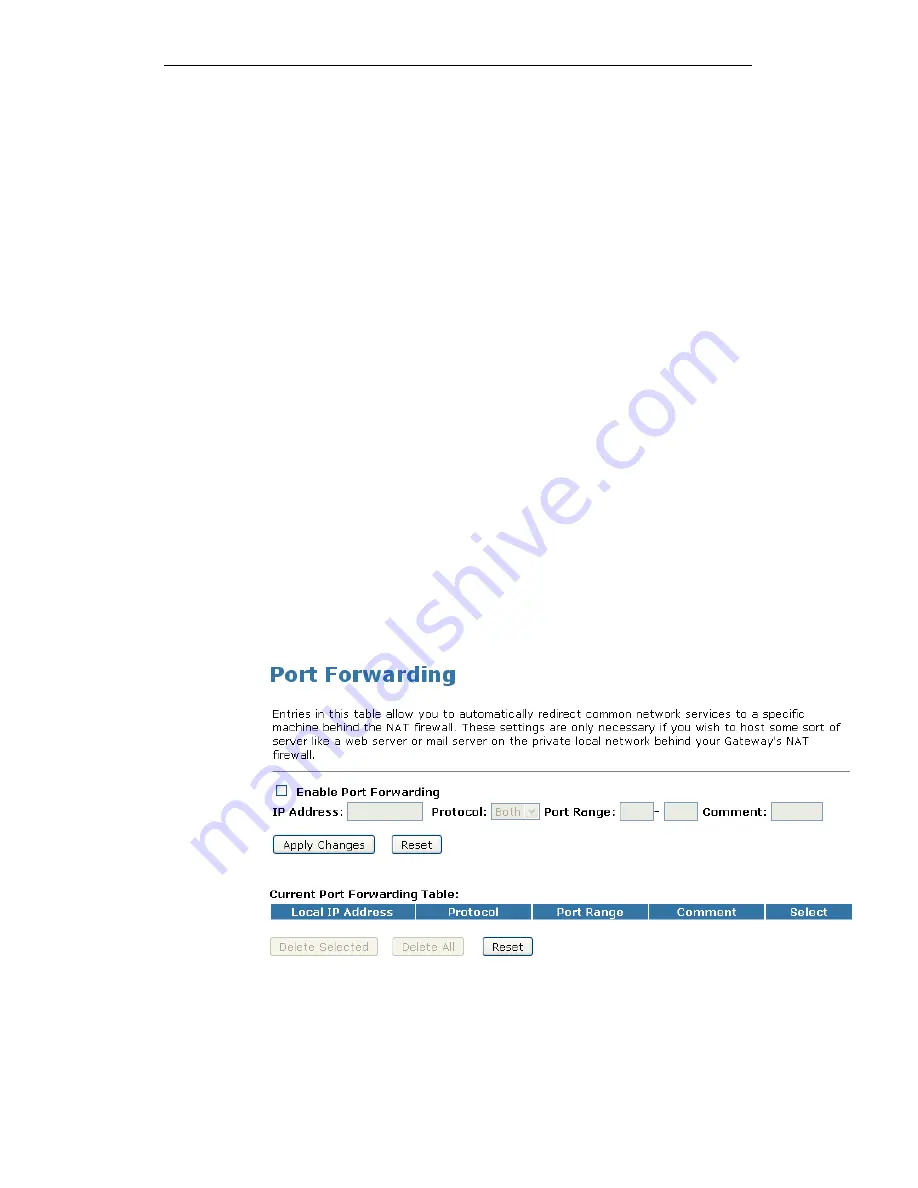
Port Forwarding
Entries in this table allow you to automatically redirect common
network services to a specific machine behind the NAT firewall.
These settings are only necessary if you wish to host some sort
of server like a web server or mail server on the private local
network behind your Gateway's NAT firewall.
Your device has built in advanced Security features that protect
your network by blocking unwanted traffic from the Internet.
If you simply want to connect from your local network to the
Internet, you do not need to make any changes to the default
Security configuration. You only need to edit the configuration if
you wish to do one or both of the following:
•
allow Internet users to browse the user pages on your local
network (for example, by providing an FTP or HTTP server)
•
play certain games which require accessibility from the
Internet
This chapter describes how to configure Security to suit the
needs of your network.
By default, the IP addresses of your LAN PCs are hidden from
the Internet. All data sent from your LAN PCs to a PC on the
Internet appears to come from the IP address of your device.
In this way, details about your LAN PCs remain private. This
security feature is called Port Forwarding.
1. From the left-hand Firewall -> Port Forwarding menu. The
following page is displayed:
Содержание WRC7020N
Страница 1: ...WELL WRC7020N User s Manual 1 WELL WRC7020N User s Manual...
Страница 11: ...WELL WRC7020N User s Manual 11 1 2 3 4 Off No LAN link Blink Valid Ethernet packet being transferred...
Страница 15: ...WELL WRC7020N User s Manual 15 2 Single RIGHT click on Local Area connection then click Properties...
Страница 16: ...WELL WRC7020N User s Manual 16 3 Double click on Internet Protocol TCP IP...
Страница 20: ...WELL WRC7020N User s Manual 20 3 Single RIGHT click on Local Area connection then click Properties...
Страница 24: ...WELL WRC7020N User s Manual 24 2 In the Control Panel Home click on Change adapter settings to continue...
Страница 25: ...WELL WRC7020N User s Manual 25 3 Single RIGHT click on Local Area Connection then click Properties...
Страница 26: ...WELL WRC7020N User s Manual 26 4 Double click on Internet Protocol Version 4 TCP IPv4...
Страница 31: ...WELL WRC7020N User s Manual 31 4 Click Wireless Configuration...
Страница 43: ...WELL WRC7020N User s Manual 43 3 Click on the ratio of Gateway and then click on Next...
Страница 46: ...WELL WRC7020N User s Manual 46...
Страница 49: ...WELL WRC7020N User s Manual 49 2 Double click Network Connections...
Страница 90: ...WELL WRC7020N User s Manual 90 Figure 9 Wireless Network page...
Страница 119: ...WELL WRC7020N User s Manual 119 15 Connect successfully Click on OK button to confirm and return...
Страница 128: ...WELL WRC7020N User s Manual 128 7 Click on Turn on network discovery and file sharing...
Страница 129: ...WELL WRC7020N User s Manual 129 8 Click on No make the network that I am connected to a private network...
Страница 130: ...WELL WRC7020N User s Manual 130 9 AP s icon will show up Double click on it...
Страница 131: ...WELL WRC7020N User s Manual 131 10 Users could also Click Add a wireless device if the icon is not there Click next...
Страница 132: ...WELL WRC7020N User s Manual 132 11 Enter AP s Self PIN Number and click next...
Страница 133: ...WELL WRC7020N User s Manual 133 12 Choose a name that people who connect to your network will recognize...
Страница 134: ...WELL WRC7020N User s Manual 134 13 Enter the Passphrase and then click Next...
Страница 155: ...WELL WRC7020N User s Manual 155 1 From the left hand Network Settings WAN Interface menu The following page is displayed...
Страница 159: ...WELL WRC7020N User s Manual 159 5 Change setting successfully Click on Reboot Now button to confirm...
Страница 161: ...WELL WRC7020N User s Manual 161 4 Change setting successfully Click on Reboot Now button to confirm...
Страница 163: ...WELL WRC7020N User s Manual 163 5 Change setting successfully Click on Reboot Now button to confirm...
Страница 165: ...WELL WRC7020N User s Manual 165 5 Change setting successfully Click on Reboot Now button to confirm...
Страница 167: ...WELL WRC7020N User s Manual 167 5 Change setting successfully Click on Reboot Now button to confirm...
Страница 170: ...WELL WRC7020N User s Manual 170 5 Change setting successfully Click on Reboot Now button to confirm...
Страница 191: ...WELL WRC7020N User s Manual 191...
Страница 202: ...WELL WRC7020N User s Manual 202 6 Change setting successfully Click on Reboot Now button to confirm...
Страница 206: ...WELL WRC7020N User s Manual 206 6 Change setting successfully Click on Reboot Now button to confirm...
Страница 210: ...WELL WRC7020N User s Manual 210 5 Firmware update has been update complete The following page is displayed...
Страница 217: ...WELL WRC7020N User s Manual 217...
Страница 226: ......


