


37
|
56
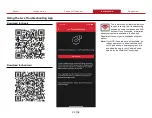
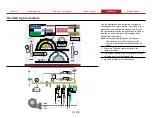
Powering Up the Display
1
2
3
< SOLUTION
SYSTEM >
REAR DRIVER / DECK GUN 5"
306
10201
30
1000
REAR PASSENGER 2~1/2”
603
20102
11.3
375
REAR PASSENGER
2~1/2”
REAR DRIVER /
DECK GUN 5"
DRIVER 6”
151.1
5038
37.5
1250
DRIVER 6”
FRONT / REAR CROSSLAY 1~3/4”
136.9
4563
3
100
FRONT / REAR
CROSSLAY 1~3/4”
PASSENGER 6"
89.2
2972
37.5
1250
PASSENGER 6"
#1 / #2 DRIVER 2~1/2”
524.7
17491
11.3
375
#1 / #2 DRIVER
2~1/2”
DECK GUN 8”
298.5
9950
75
2500
DECK GUN 8”
#1 / #2 PASSENGER 2~1/2”
111.2
3708
11.3
375
#1 / #2
PASSENGER 2~1/2”
4
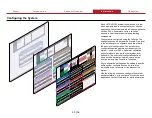
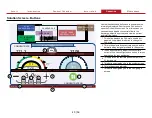
Use the illustrations and instructions to monitor the
start-up as the system comes online. The display
powers-up automatically with the pump panel.
1 This is the first start-up screen. This screen
indicates that the display is receiving power and
the boot sequence has initiated.
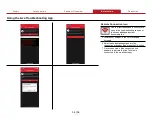
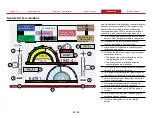
2 This screen displays as the Tellurus begins to
communicate with the PLC.
Note:
The operating system and the software
versions are displayed in the lower
corners.
3 A pulsating ring animates as the Tellurus and
PLC communicate.
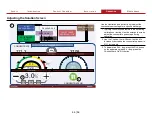
4 Once the start-up sequence is complete the
system displays the gauge screen.
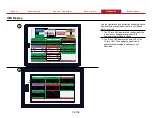
Note:
All the screens described in this section are
configurable to your specific application.
The appearance of your screen may differ
than what is illustrated. The illustrations in
this section are based on the 15-inch HMI.
The 8-inch HMI displays the lower 2/3 of
the 15-inch HMI—omitting the apparatus
graphic and discharge locations. Apply the
concepts described in the instruction to your
application. Contact Waterous for more
information.


