7
PC 1030
GB
6
REPLACING THE STATOR
REPLACING THE STATOR
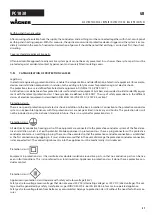
Clean the outlet unit
Clean the outlet unit (4) with a jet of water and a suitable bot-
tle brush.
Clean the container (7) with a jet of water and a suitable brush.
Clean the protective grid with a radiator brush.
Also clean the rotor (6) and stator (5) thoroughly with water
and, if necessary, using a brush.
Then spray rotor (6) and stator (5) and with a suitable pump
lubricant.
Keep the thread of the pump housing and the pump tube
clean so that leaking after the assembly is avoided.
Dismantling
Mortar spraying machine must be depres-
surised.
If necessary, set the selector switch briefly
to “R” (reverse).
Watch the manometer ––> 0 bar.
Wear safety goggles.
Disconnect external controls. Disassembly
may only be carried out by the person
who controls the machine.
Never operate mortar spraying machine
with an exposed rotor.
Do not reach into the rotor when it is mov-
ing. Risk of crushing.
Caution if you have long hair. Only wear
close-fitting clothes at work.
• Move selector switch (fig. 14, 1) to “A” and set delivery vol-
ume controller (2) to „0“.
•
Disconnect mains plug.
• Loosen the star screws (3) and remove the outlet unit (4).
• Set delivery volume controller (2) to 1 or 2.
•
Connect mains plug to mains power supply.
• Move the selector switch (1) to position „F“. As soon as the
stator (5) is released from the rotor (6), set the selector
switch to „A“.
• Remove the stator (5) completely.
•
Disconnect mains plug.
Mounting
If the machine is down for a longer period of
time, the stator can become set at the rotor.
Therefore, if the stator has been in storage for
a longer period of time, do not mount it until
you are about to begin work.
Assembly, see chapter 6.2.2
POWER
ERROR
SPEED
R
A
F
2
1
4
3
3
6
5
7
7
Содержание PLASTCOAT 1030
Страница 9: ...9 PC 1030 GB...
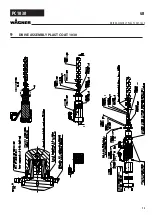
Страница 13: ...13 PC 1030 9 DRIVE ASSEMBLY PLAST COAT 1030 GB DRIVE ASSEMBLY PLAST COAT 1030...
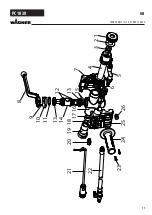
Страница 15: ...15 PC 1030 GB...


