46
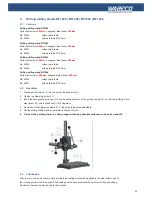
4. Drilling milling stands BF1240 | BF1242 | BF1243 | BF1244
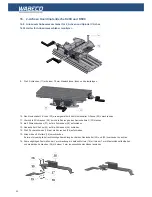
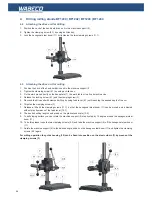
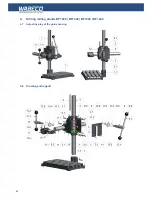
4.4 Attaching the drive unit for drilling
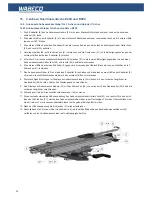
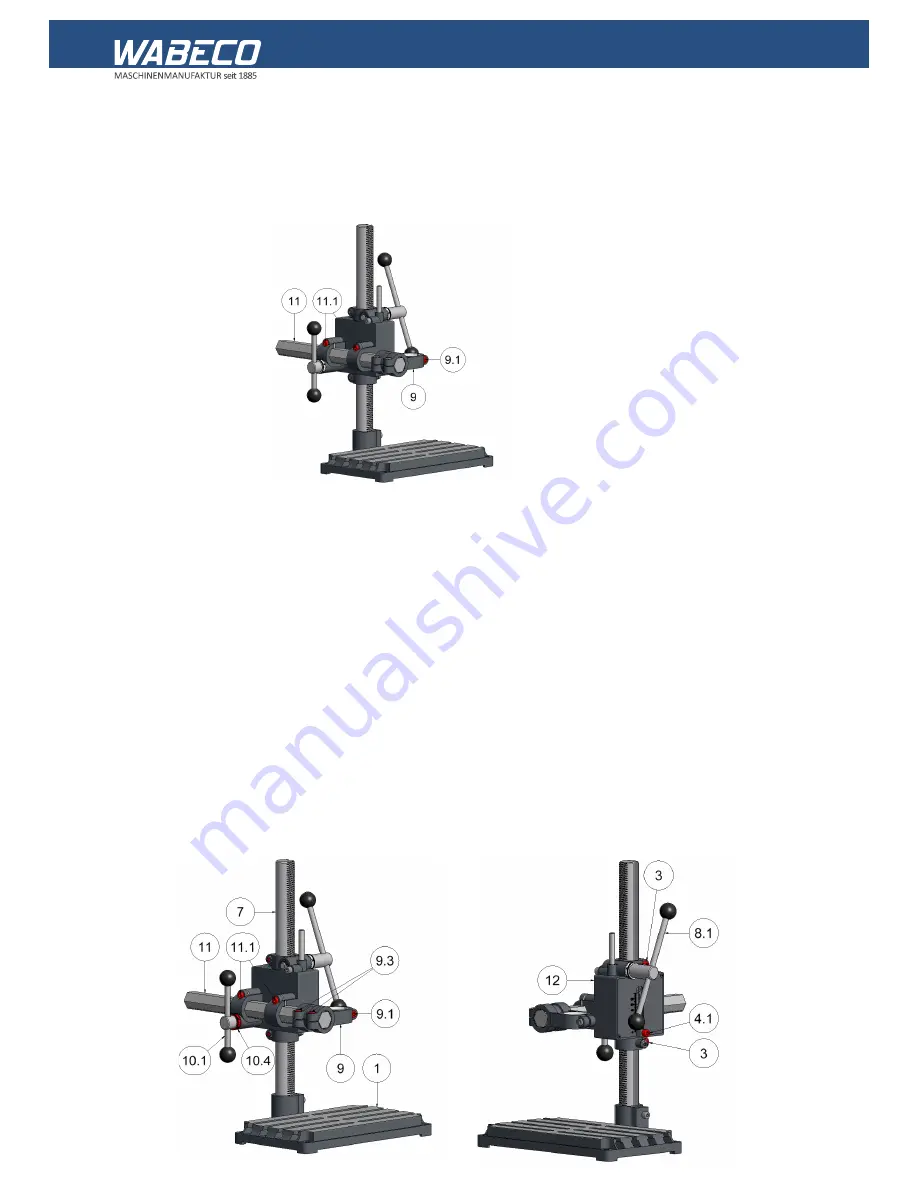
1. Position the neck of the hand-held drive unit in the machine support (9)
2. Tighten the clamping screw (9.1) by using an Allen key.
3. Lock the hexagonal steel boom (11) by tightening the two clamping screws (11.1).
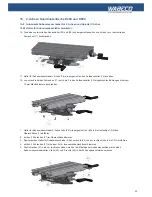
4.5 Attaching the drive unit for milling
1. Position the neck of the hand-held drive unit in the machine support (9
2. Tighten the clamping screw (9.1) by using an Allen key.
3.
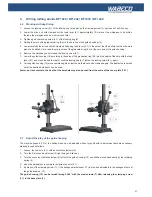
Fix the work piece directly on the base plate (1), the work table or in a fixed machine vice.
4. Release the locking screw (4.1) and the clamping screw (3).
5. Descend the drive unit with clamped milling by using feed lever (8.1) until reaching the desired depth of the cut
6. Thighten the clamping screws (3)
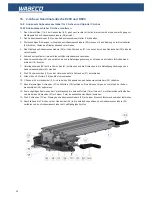
7. Release a little bit the clamping screws (11.1) so that the hexagonal steel boom (11) can be moved and adjusted
without play by means of the feed lever (10.1)
8. The desired milling length can be read on the graduatend scale (10.4)
9. To mill sloping surface you can rotate the machine support (9) step by step by 15 degree around the hexagonal steel
boom (11)
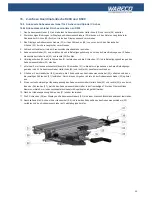
10. To do this please loose the two clamping screws (9.3) and take the machine support (9) off the hexagonal steel boom
(11)
11. Rotate the machine support (9) to the desired angle, slide it on the hexagon steel boom (11) and tighten the clamping
screws (9.3) again.
For milling operation the guide housing (12) can be fixed into position on the steel column (7) by means of the
clamping screws (3).
Содержание BF1243
Страница 26: ...26 16 2 Achsen Koordinatentische K400 und K600 16 5 Zeichnung und Legende...
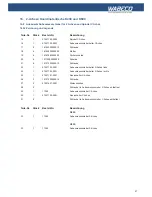
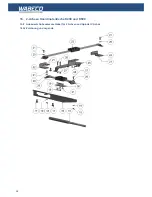
Страница 63: ...63 16 2 axis coordinate tables K400 and K600 16 5 Drawing and legend...
Страница 76: ......

