background image

24

handset settings 

Set date/time

 The answering system announces the day and time 

of each message prior to playing it. Before using the 

answering system, set the date and time as follows. If you 

subscribe to caller ID service, the day, month and time are 

set automatically with each incoming call. However, the 

year must be correct so that the day of the week can be 

calculated from the caller ID information.

To change the setting:

Press the 

MeNu

 softkey when the handset is not  

in use.
Press 

/

VoL+

/  

or 

CID

/

VoL-

/  

to highlight 

SeTTINGS

then press the 

SeLeCT

 softkey.

Press 

/

VoL+

/  

or 

CID

/

VoL-

/  

to highlight  

Set date/time

, then press the 

SeLeCT

 softkey.

Use the dialing keys (

0

-

9

) to enter a two-digit number or 

press 

/

VoL+

/  

or 

CID

/

VoL-

/  

until the screen displays 

the desired number. Press the 

SeT

 softkey  

to advance.
Repeat step 4 until the date and time are set.

1.

2.

3.

4.

5.

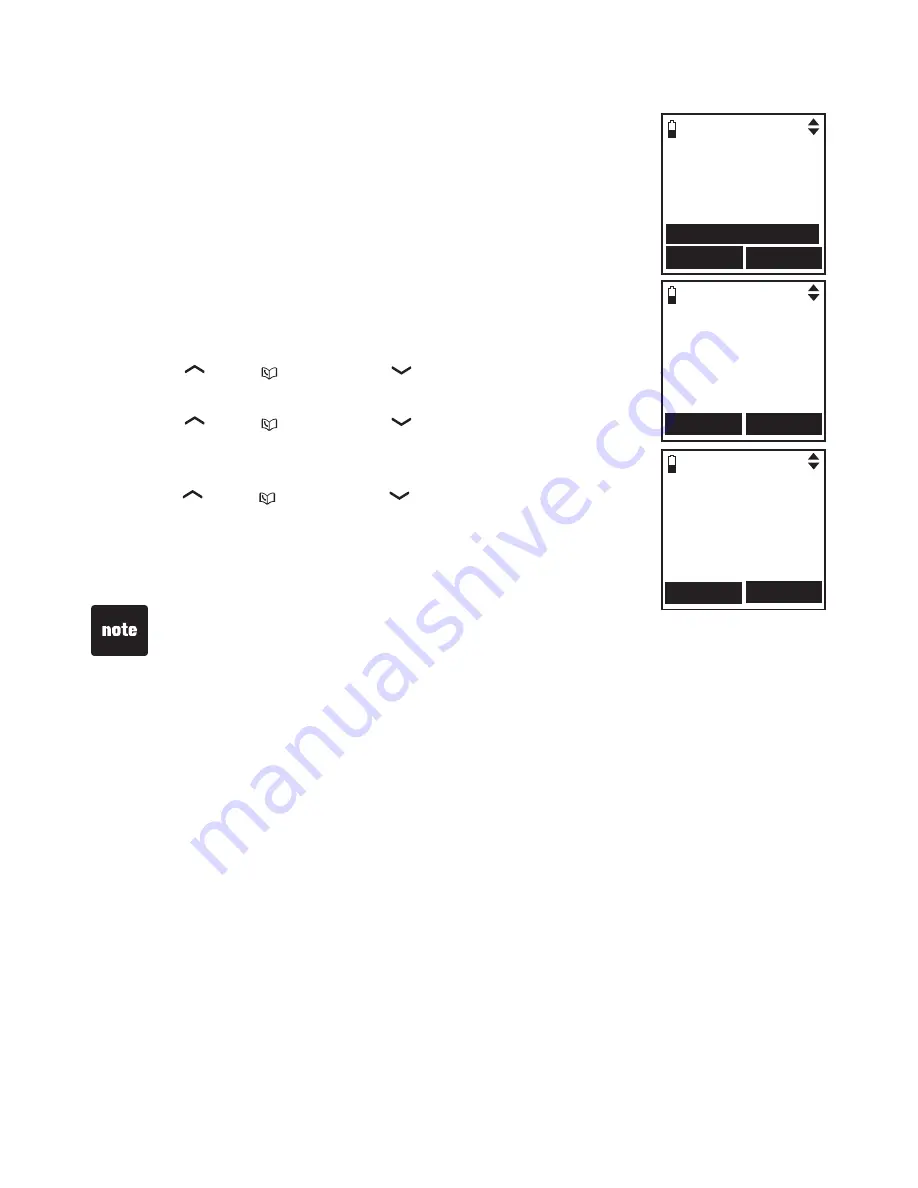
SETTINgS

Clr voicemail
Auto keylock
Key tone

Set date/time

SELECT

BACK

If the date and time are not set, the system announces,  


“Time and day not set,” 

 before each message plays.

The handset displays the date and time while in idle mode if there are no  

  screen display messages.

SET DATE

s

--/--/--

MM/DD/yy

SET

BACK

SET TIME

--:-- --

SET

BACK

Содержание Expandable Cordless Phone System with BLUETOOTH® Wireless Technology

Страница 1: ...User s manual w w w v tec hphones c om Model LS6245...

Страница 2: ...everything new at VTech visit our website at www vtechphones com In Canada please visit www vtechcanada com The ENERGY STAR program www energystar gov recognizes and encourages the use of products th...

Страница 3: ...f an active device 20 Change PIN 20 Handset settings 21 Settings 21 LCD language 21 Clear voicemail 22 Auto keylock 23 Key tone 23 Set date time 24 Home area code 25 Ringers 26 Ringer volume 26 Ringer...

Страница 4: ...62 Memory match 63 Review the call log 63 Make a call log entry ready to dial 64 Dial a call log entry 64 Save a call log entry to the directory 65 Delete from the call log 66 Call log display screen...

Страница 5: ...ty service is necessary Handset Telephone base Telephone base power adapter User s manual To purchase a replacement battery or power adapter visit our website at www vtechphones com or call 1 800 595...

Страница 6: ...sticker covering the handset and or telephone base display Remove it before use Avoid placing the telephone base too close to Communication devices such as personal computers computer routers televisi...

Страница 7: ...our DSL service provider for more information about DSL filters Use only the power adapter supplied with this product To order a replacement visit our website at www vtechphones com or call 1 800 595...

Страница 8: ...t cover is on the handset press on the triangle and slide the cover to remove Plug the battery connector securely into the socket inside the handset battery compartment matching the color coded label...

Страница 9: ...in low battery mode the handset beeps every minute The following table summarizes the battery charge indicators and actions to take Battery indicators Battery status Action The screen is blank Battery...

Страница 10: ...use press to enter the directory page 58 1 While reviewing a call log entry press repeatedly to add or remove 1 in front of the telephone number before dialing or saving it in the directory page 64 H...

Страница 11: ...to make or answer a cell call page 44 Flashes quickly when there is an incoming cell call Flashes slowly when a cell call is on hold HOLD Press to put a call on hold page 48 Press repeatedly to show...

Страница 12: ...e page 68 VOL While in a menu press to scroll down During a call press to decrease the listening volume page 47 VOL While in a menu press to scroll up During a call press to increase the listening vol...

Страница 13: ...ingers for the home and cell lines Settings change your handset settings Handset main menu To enter the main menu Press the MENU softkey when the handset is not in use Press VOL or CID VOL to select a...

Страница 14: ...settings Directory store and search for names and numbers Call log review the caller ID history or delete all call log entries Page all HS page the system handset s Intercom intercom call with a syst...

Страница 15: ...h headset with the LS6245 you are limited to the range of your headset see the user s manual of your headset for more information Make sure that your cell phone has sufficient signal strength You may...

Страница 16: ...from the telephone base Discoverable mode Before a Bluetooth device can be paired it must be set in this mode When pairing your cell phone the telephone base is set in this mode When pairing a headset...

Страница 17: ...ng information is stored on the paired devices list page 16 To use a paired device it must be connected and on the active devices list page 18 IMPORTANT INFORMATION Once you have paired a device with...

Страница 18: ...rily disconnect the device and continue the pairing process Press the NEXT softkey to set the telephone base to discoverable mode Turn on the Bluetooth feature of your cell phone and search for or add...

Страница 19: ...h for your headset Once the telephone base finds your headset press the SELECT softkey Enter the PIN of your headset the PIN for most Bluetooth devices is 0000 then press the NEXT softkey The screen d...

Страница 20: ...ed devices then press the SELECT softkey Press VOL or VOL to highlight a selected item then press the OPTION softkey Press VOL or VOL to highlight Rename then press the SELECT softkey The screen displ...

Страница 21: ...ECT softkey The screen displays Remove device from paired list Press the YES softkey to confirm or the NO softkey to exit View information of a paired device Press the MENU softkey on the telephone ba...

Страница 22: ...ive devices menu you can connect or disconnect your active device Press the MENU softkey on the telephone base when it is not in use Press VOL or VOL to highlight Bluetooth then press the SELECT softk...

Страница 23: ...You can have a maximum of two devices on the active devices list To add an active device Press the MENU softkey on the telephone base when it is not in use Press VOL or VOL to highlight Bluetooth the...

Страница 24: ...s VOL or VOL to highlight Active devices then press the SELECT softkey Press VOL or VOL to highlight a selected device then press the INFO softkey to view the information Press the OK softkey to retur...

Страница 25: ...the MENU softkey when the handset is not in use Press VOL or CID VOL to highlight Settings then press the SELECT softkey Press VOL or CID VOL to highlight LCD language then press the SELECT softkey P...

Страница 26: ...our voicemail messages As long as you have new voicemail messages your telephone service provider continues to send the signal that turns on the indicators To manually turn off these indicators Press...

Страница 27: ...shing LOCK softkey to lock the keypad Key tone You can turn the key tone feature on or off To change the setting Press the MENU softkey when the handset is not in use Press VOL or CID VOL to highlight...

Страница 28: ...Press VOL or CID VOL to highlight Settings then press the SELECT softkey Press VOL or CID VOL to highlight Set date time then press the SELECT softkey Use the dialing keys 0 9 to enter a two digit num...

Страница 29: ...Press VOL or CID VOL to highlight Home area code then press the SELECT softkey The stored home area code appears with the last digit flashing Use the dialing keys to enter the desired home area code P...

Страница 30: ...ght Home Cellular 1 Cellular 2 or All home cell Press the SELECT softkey to confirm Press VOL or CID VOL to adjust the ringer volume A sample of each ringer volume plays as you scroll through the choi...

Страница 31: ...All home cell Press the SELECT softkey to confirm Press VOL or CID VOL to select a ringer tone A sample of each ringer tone plays as you scroll through the choices Press the SET softkey to confirm you...

Страница 32: ...n To change the setting Press the MENU softkey when the telephone base is not in use Press VOL or VOL to highlight Settings then press the SELECT softkey Press VOL or CID VOL to highlight Set date tim...

Страница 33: ...s the MENU softkey when the telephone base is not in use Press VOL or VOL to highlight Settings then press the SELECT softkey Press VOL or VOL to highlight LCD language then press the SELECT softkey P...

Страница 34: ...turn off automatically Use the clear voicemail feature when the telephone indicates that there is new voicemail but there is none for example when you have accessed your voicemail while away from home...

Страница 35: ...hin your local area the telephone number is automatically stored without the area code in the call log Press the MENU softkey when the telephone base is not in use Press VOL or VOL to highlight Settin...

Страница 36: ...r 2 or All home cell Press the SELECT softkey to confirm Press VOL or VOL to adjust the ringer volume A sample of each ringer volume plays as you scroll through the choices Press the SET softkey to co...

Страница 37: ...hen press the SELECT softkey Press VOL or VOL to highlight Home Cellular 1 Cellular 2 or All home cell Press the SELECT softkey to confirm Press VOL or VOL to select a ringer tone A sample of each rin...

Страница 38: ...ress VOL or VOL to highlight Answer ON OFF then press the SELECT softkey Press VOL or VOL to choose On or Off then press the SET softkey to confirm your setting Using the handset Press the MENU softke...

Страница 39: ...Press VOL or VOL to choose On or Off then press the SET softkey to confirm your setting Using a handset Press the MENU softkey when the handset is not in use Press VOL or CID VOL to highlight Ans Sys...

Страница 40: ...s the SELECT softkey The telephone base announces To play press 2 To record press 7 Press 2 to play Using the handset Press the MENU softkey when the handset is not in use Press VOL or CID VOL to high...

Страница 41: ...en the handset is not in use Press VOL or CID VOL to highlight Ans System then press the SELECT softkey Press VOL or CID VOL to highlight Ans sys setup then press the SELECT softkey Press VOL or CID V...

Страница 42: ...the handset Press the MENU softkey when the handset is not in use Press VOL or CID VOL to highlight Ans System then press the SELECT softkey Press VOL or CID VOL to highlight Ans sys setup then press...

Страница 43: ...VOL to highlight Ans sys setup then press the SELECT softkey Press VOL or VOL to highlight of rings then press the SELECT softkey Press VOL or VOL to choose from 2 4 6 or Toll saver then press the SET...

Страница 44: ...ing keys 0 9 to enter a two digit number from 10 99 then press the SET softkey to confirm your setting Using the handset Press the MENU softkey when the handset is not in use Press VOL or CID VOL to h...

Страница 45: ...n press the SET softkey to confirm your setting Using the handset Press the MENU softkey when the handset is not in use Press VOL or CID VOL to highlight Ans System then press the SELECT softkey Press...

Страница 46: ...home call Press OFF CLEAR or put the handset in the telephone base Using the telephone base To make a home call Press HOME then enter the telephone number To predial a home call Enter the telephone n...

Страница 47: ...t OR Press the OPTION softkey Press VOL or VOL to highlight Use headset and then press the SELECT softkey To switch between the headset and base speakerphone while on a call Press the OPTION softkey P...

Страница 48: ...u to select a cell phone before you make a cell call Using a handset To make a cell call Press CELL then enter the telephone number Press the DIAL softkey To predial a cell call Enter the telephone nu...

Страница 49: ...and telephone base and the telephone rings To answer the incoming cell call Press CELL on the handset or telephone base The home call is automatically placed on hold and Home call on hold appears on...

Страница 50: ...s When you have calls established on the home and cell lines you can create a 3 way conference using the handset or telephone base To conference both home and cell calls Press the OPTION softkey on th...

Страница 51: ...base while on a call Silence the ringer When the home or cell line is ringing you can temporarily silence the ringer of the handset without disconnecting the call The next call rings normally at the...

Страница 52: ...ME on the telephone base flash To resume a home call on hold Press HOME FLASH on the handset or HOME on the telephone base To place a cell call on hold Press HOLD on the handset or telephone base Cell...

Страница 53: ...OL to highlight Call log and then press the SELECT softkey Press VOL or VOL to scroll to the desired entry Press the DIAL softkey to dial the displayed number To access the last number redial while on...

Страница 54: ...the handset or HOME on the telephone base using the home line OR Press CELL on the handset or telephone base using the cell line Save a redial entry to the directory Press the REDIAL softkey when the...

Страница 55: ...ial entry Press the REDIAL softkey when the handset or telephone base is not in use Press VOL or VOL to browse to the desired entry Press the OPTION softkey Press VOL or VOL to highlight Delete and th...

Страница 56: ...te an intercom call with a handset Press the MENU softkey when the handset is not in use Press VOL or CID VOL to highlight Intercom then press the SELECT softkey When the handset shows INTERCOM TO pre...

Страница 57: ...cell call during an intercom call there is an alert tone and Incoming call appears on screens Press CELL on the handset or telephone base to answer the cell call and the intercom call ends automatical...

Страница 58: ...OL to select a destination Press the SELECT softkey If you are calling the telephone base your handset shows Calling base and the telephone base rings and shows Handset X is calling If you are calling...

Страница 59: ...ady saved Create a new directory entry Using a handset Press the MENU softkey when the handset is not in use Press VOL or CID VOL to highlight DIRECTORY then press the SELECT softkey Press VOL or CID...

Страница 60: ...L to backspace and erase a digit Press the PAUSE softkey to insert a dialing pause a p appears Press VOL to move the cursor to the right or VOL to the left Press and hold CANCEL to exit and return to...

Страница 61: ...aracters to be displayed in the following order When entering a name in the directory the first letter of each word is automatically capitalized Number key Characters by number of key presses 1 2 3 4...

Страница 62: ...se Press VOL or VOL to highlight Directory then press the SELECT softkey Press VOL or VOL to highlight Review then press the SELECT softkey Press VOL or VOL to browse the entries Alphabetical search T...

Страница 63: ...cal search on page 58 When the desired entry appears press the EDIT softkey The screen shows EDIT NUMBER Use the dialing keys to edit the number Press OFF CLEAR to backspace and erase a digit Press th...

Страница 64: ...T softkey to move to the name The screen shows EDIT NAME Use the dialing keys see page 57 to enter the name Press CANCEL to backspace and erase a character Press VOL to move the cursor to the right or...

Страница 65: ...is feature Contact your telephone service provider and cell phone service provider if You have both caller ID and call waiting but as separate services you may need to combine these services You have...

Страница 66: ...ding missed and unreviewed calls Call log empty shows when there are no records in the call log Only one handset or the telephone base can review the call log at a time If a handset tries to enter the...

Страница 67: ...key when the handset is not in use Press VOL or VOL to highlight Call log then press the SELECT softkey Press VOL or VOL to highlight Review then press the SELECT softkey Press VOL or VOL to browse th...

Страница 68: ...n the directory Press 1 repeatedly if you need to add or remove 1 in front of the telephone number before dialing or saving it in the directory Dial a call log entry Using a handset Search for the des...

Страница 69: ...ress and hold OFF CLEAR to exit and return to idle mode Press the SAVE softkey then the screen shows the saved directory Using the telephone base Select a desired entry in the call log see Review the...

Страница 70: ...o confirm or the NO softkey to exit Using the telephone base Press the MENU softkey when the telephone base is not in use Press VOL or VOL to highlight Call log then press the SELECT softkey Press VOL...

Страница 71: ...s contact your telephone service provider Set your answering system to answer calls at least two rings earlier than your voicemail is set to answer For example if your voicemail answers after six ring...

Страница 72: ...ss to skip to the next message Press CANCEL to repeat the message currently playing Press CANCEL twice to listen to the previous message Press FLASH X to delete the current message The system advances...

Страница 73: ...elete all old messages Press the YES softkey to confirm or the NO softkey to exit Using a handset Press the MENU softkey when the handset is not in use Press VOL or CID VOL to highlight ANS SYSTEM the...

Страница 74: ...then press the SELECT softkey Press VOL or VOL to highlight Record memo then press the SELECT softkey The system announces Recorded after the tone Press 5 when you are done After the tone speak toward...

Страница 75: ...er the remote access code Remote access A two digit security code is required to access the answering system remotely from any touch tone telephone The preset code is 19 See Remote access code on page...

Страница 76: ...tem handset or the telephone base on the cell line is in use Charging The handset with low battery is recharging Directory empty There are no directory entries Directory is ful l The directory is full...

Страница 77: ...all log or directory and another handset telephone base attempts to review it Paging al l handsets The telephone base is paging handset s Paging The system handset is paged Place in charger The batter...

Страница 78: ...ly when there is an incoming home call Flashes slowly when the home line is on hold CHARGE On when the handset is charging in the telephone base Telephone base lights CELL On when the cell line is in...

Страница 79: ...ff on steadily when all the ringers of Home Cellular 1 and Cellular 2 are turned off Flashes when only one or two of the ringers are turned off New voicemail indicates you have new voicemail message s...

Страница 80: ...ss headset on steadily when a Bluetooth wireless headset is in use on the home line Ringer off on steadily when all the ringers of Home Cellular 1 and Cellular 2 are turned off Flashes when only one o...

Страница 81: ...and follow these instructions Use only the battery ies provided or equivalent To order a replacement visit our website at www vtechphones com or call 1 800 595 9511 In Canada go to www vtechcanada co...

Страница 82: ...se For more details on battery charging see the table on page 5 To register a handset Place the unregistered handset in the telephone base If To register press HOLD on BASE for 4 sec does not appear o...

Страница 83: ...telephone base for about 10 seconds until the telephone base displays Deregister all handsets Press the YES softkey All system handsets show Searching for BASE The deregistration process takes about...

Страница 84: ...base Unplug the unit s electrical power Wait for approximately 15 seconds then plug it back in Repeat the above suggestions I cannot pair my headset to the telephone base Make sure that your Bluetooth...

Страница 85: ...S6245 from your cell phone s handsfree device history list see the user s manual of your cell phone Turn off your cell phone then turn it on again Reset the telephone base Unplug the unit s electrical...

Страница 86: ...is too loud or quiet During a cell call if the listening volume is to too loud or quiet try changing the volume on your cell phone On some cell phones changing the volume on the cell phone effects you...

Страница 87: ...o charge the handset before HANDSET X appears on the screen page 5 Purchase a new battery Refer to the Battery section page 77 The CHARGE light is off Clean the charging contacts on the handset and te...

Страница 88: ...telephones intercoms room monitors televisions VCRs personal computers kitchen appliances and other cordless telephones Test a working telephone at the telephone wall jack If another telephone has th...

Страница 89: ...ation about DSL filters Appliances or other cordless telephones plugged into the same circuit as the telephone base can cause interference Try moving the appliance or telephone base to another outlet...

Страница 90: ...ne The caller may not be calling from an area which supports caller ID Both your and the caller s telephone service providers must use equipment compatible with the caller ID service The caller ID inf...

Страница 91: ...our handset and telephone base from communicating with each other Install your telephone base as far away from these electronic devices as possible wireless routers radios cellular telephones intercom...

Страница 92: ...ax machine documentation for information on compatibility with answering systems The outgoing announcement is not clear When recording the announcement make sure you speak in a normal tone of voice to...

Страница 93: ...ch tone telephone and cannot activate the answering system The answering system may not detect the remote access code when your announcement is playing Wait until the announcement is over before enter...

Страница 94: ...the risk of electric shock do not disassemble this product but take it to an authorized service facility Opening or removing parts of the telephone base or handset other than specified access doors m...

Страница 95: ...ectronic parts so it must be treated with care Avoid rough treatment Place the handset down gently Save the original packing materials to protect your telephone if you ever need to ship it Avoid water...

Страница 96: ...care in handling batteries in order not to create a short circuit with conducting material such as rings bracelets and keys The battery or conductor may overheat and cause harm Observe proper polarit...

Страница 97: ...Product extends for ONE 1 YEAR from the date of purchase If VTech repairs or replaces a Materially Defective Product under the terms of this limited warranty this limited warranty also applies to rep...

Страница 98: ...purchased Product model and the date of purchase or receipt and Provide your name complete and correct mailing address and telephone number Other limitations This warranty is the complete and exclusi...

Страница 99: ...of the product This product has been tested and found to comply with the FCC criteria The handset may be safely held against the ear of the user The telephone base shall be installed and used such th...

Страница 100: ...es are planned If this product is equipped with a corded or cordless handset it is hearing aid compatible If this product has memory dialing locations you may choose to store emergency telephone numbe...

Страница 101: ...onmental conditions at the time of use Size Handset 8 03 X 1 65 X 0 75 in 204 X 42 X 19 mm Telephone base 9 84 X 3 74 X 2 01 in 250 X 95 X 51 mm Weight Handset 5 19oz 147g including battery Telephone...

Страница 102: ...ge PIN Bluetooth 20 Character chart 57 Charging 5 Cleaning tips 2 Clear voicemail 22 30 Conference home and cell calls 46 Connect an active device 18 Create a new directory entry 55 D Date 24 28 Delet...

Страница 103: ...device 19 Review the active devices list 18 Review the call log 63 Review the directory 58 Review the redial list 50 Ringer mute 47 Ringers 26 32 Ringer tone 27 33 Ringer volume 26 32 S Safety instruc...

Страница 104: ...ologies Canada Ltd Richmond B C V6W 1L5 Copyright 2009 for VTECH TELECOMMUNICATIONS LTD Printed in China 91 002487 050 100 The Bluetooth word mark and logos are owned by Bluetooth SIG Inc and any use...

Отзывы: