This is a publication by Conrad Electronic SE, Klaus-Conrad-Str. 1, D-92240 Hirschau (www.conrad.com).
All rights including translation reserved. Reproduction by any method, e.g. photocopy, microfilming, or the capture in
electronic data processing systems require the prior written approval by the editor. Reprinting, also in part, is prohibited.
This publication represent the technical status at the time of printing.
© Copyright 2017 by Conrad Electronic SE.
1088913_V3_0117_02_VTP_m_en
Selecting the memory for the correction parameter
This is only possible during the measurement process of the illuminance level (Lux/
Fc), but not during the measurement of the lumious intensity (cd).
In this case, select the measuring mode for the illuminance level first and then se-
lect a memory for the correction factor. Then, proceed to the measurement of the
luminous intensity. The previously set correction factor will also be used during the
measurement process of the luminous intensity.
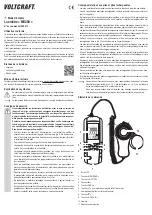
• Press and hold the “HOLD L.S.” button (9) for 1 second and the numbers (1....9) on the bot-
tom of the display will flash.
• Select the desired memory using the “
S
” (4) or the “
F
” (8) button.
• Press and hold the “HOLD L.S.” button (9) again for one second and the display will stop
flashing and the memory has been selected successfully.
Changing/saving correction parameters
• Press and hold the “HOLD L.S.” button (9) for 1 second and the numbers (1....9) on the bot-
tom of the display will flash.
• Select the desired memory using the “
S
” (4) or the “
F
” (8) button.
• Briefly press the “HOLD L.S.” (9) button and the correction parameter display flashes.
• Set the correction parameter using the “
S
” (4) or the “
F
” (8) button. For a quick adjustment,
hold the corresponding button for a longer period of time.
• Press and hold the “HOLD L.S.” button (9) for one second and the correction value will be
saved and the display stops flashing.
h) Saving/displaying/deleting measured values
Saving the measured value
The luxmeter has over 99 memories (01....99) for the measured values of the illuminance level
(lux/fc). When saving, not only the measured value but also the unit set during saving (lux or
fc) will be stored in the memory.
Measured values of the luminous intensity can not be saved.
To save a measured value, briefly press the “MEM READ” (2) button. The upper left corner of
the display will briefly show “M” and the storage number (e.g. “No. 01”).
Displaying the measured value
In order to display one of the 99 stored measured values, proceed as follows:
• Press and hold the “MEM READ” button (2) for 1 second and the upper left corner of the
display will show “R” and the last saved measured value (and the storage number) will be
shown.
• Select the desired memory using the “
S
” (4) or the “
F
” (8) button. For quick adjustment, hold
the corresponding button for a little longer.
• To exit the die saved measured value mode press and hold the “MEM READ” button (2) again
for 1 second. “R” and the storage number will disappear from the display.
Deleting Measured Values
Deleting a single memory is not possible. you can only delete all memories at one
time.
• Shortly press the “ ” button (6) to switch the luxmeter off.
• Press and hold the “ ” button (6) and the “MEM READ” button (2) at the same time. “CLR”
appears on the display.
When “CLR” disappears from the display, all stored measured values have been deleted.
Now release both buttons.
Cleaning
Clean the product carefully, e.g. with a soft, clean cloth. Do not press too hard on the display;
this can lead not only to scratches but also to the destruction of the display.
Dust can be easily removed with a soft, clean brush and a vacuum cleaner.
Never use aggressive cleaning agents or any chemicals at all for cleaning; these can lead not
only to discolouration, but can also damage the product.
Disposal
a) General
Electronic devices are recyclable material and do not belong with household waste.
Please dispose of the device, when it is no longer of use, according to current statu-
tory requirements.
b) Normal and rechargeable batteries
As the end user, you are required by law (Battery Regulation) to return used batteries and
rechargeable batteries. Do not dispose of used batteries in the household waste!
Batteries/rechargeable batteries containing hazardous substances are labelled with
these symbols to indicate that the disposal of them in the household waste is forbid-
den.
You can return used (rechargeable) batteries free of charge at the official collection
points in your municipality, our stores, or where ever (rechargeable) batteries are
sold!
You thereby fulfil your statutory obligations and contribute to the protection of the environment.
Technical data
Power supply ................................ 3 batteries of type AAA/Micro
Sensor .......................................... photo diode with filter
Measurement/indicating range ..... 0....400000 lux / 0....40000 fc
......................................................
(if the measurement range is exceeded, “OL” will be
displayed)
Accuracy ....................................... ±3% with standard light bulbs with a colour temperature of
2856K or with corrected white led spectrum
......................................................
±6% with other visible light
Deviation of the entry angle .......... 30°: ±2%
......................................................
60°: ±6%
......................................................
80°: ±25%
The optimal case is when the light to be measured falls on the sensor vertically.
Sampling rate ............................... 2,5/s
Operating conditions ..................... Tempe5 °C to +40 °C
......................................................
Humidity 0% to 80% relative air humidity, non-condensing
Cable length ................................. approx. 1.5 m
Dimensions ................................... 160 x 58 x 27 mm (L x W x H)
Weight .......................................... 280 g (without battery)

