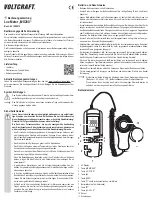
Inserting/replacing the batteries
• Open the battery compartment on the bottom of the device, by unscrewing the fastening
screw on the battery compartment cover and then removing the cover.
• Insert three AAA/Micro batteries into the battery compartment paying attention to the correct
polarity (observe po and negative/-).
• Put back the battery cover and tighten it again.
• The battery must be replaced if the display contrast fades or the device cannot be switched
on any longer. Additionally, a battery symbol indicates the state of the batteries or recharge-
able batteries in form of a bar graph.
Operation
a) Switching on/off
• Shortly press the “ ” button (6) to switch the luxmeter on or off.
• If no button is pressed, the luxmeter switches off automatically after 3 - 5 minutes to save
power.
The automatic switch-off function can be deactivated. Switch on the luxmeter by
pressing the “ ” button (6) briefly.
Then, press and hold the “ ” button (6) for 1 second and the symbol “ ” has disappeared.
If you wish to reactivate the switch-off function, hold the “ ” button (6) again for 1 second and
the symbol “ ” appears on the display again.
Be sure to always put the protective cap (11) on to the sensor (10) when no measu-
rements are performed.
b) Measuring the illuminance level (Lux/Fc)
• Switch the luxmeter on.
• Remove the protective cap (11) from the sensor (10).
• Hold the sensor housing with the sensor in a way that the light to be measured falls on the
sensor as vertically as possible.
• Press the “LX/FC/CD” button (3) shortly in order to switch between the measurement unit
“Lux” and “Fc” (“Lux” = illuminance level lx, “Fc” = “footcandle”), depending on which unit you
need (the unit “Fc” is commonly used in the USA).
The measured value shown on the display changes according to the incidence of light on the
sensor.
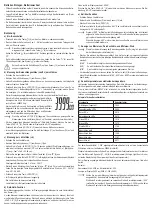
If the values are in increased, the value-display will be extend-
ed to the fifth and sixth digit (see the example in the picture on
the right, the value = 399900 Lux).
In this the single and ten digit are presented with smaller num-
bers, by increased measured values the larger number is the
important one and the numbers in the one or ten digit place
represent the tolerance/deviation.
When pressing the “LX/FC/CD” button (3) for more than 1 second you get to the meas-
urement mode for the luminous intensity (unit “cd“, Candela), see next section c).
• Press the “HOLD L.S.” button (9) shortly to “freeze” the displayed measured value (data hold
function). “HOLD” will be shown in the upper right corner of the display.
Press the “HOLD L.S.” button (9) again to exit the mode.
• When the measurement process is completed, put the protective cap (11) on to the sensor
(10) auf and switch off the luxmeter.
c) Measuring the lumionous intensity (cd)
• Switch the luxmeter on.
• Remove the protective cap (11) from the sensor (10).
• Press and hold the key “LX/FC/CD” button (3) for 1 second. The measurement display disap-
pears, the upper right corner of the display will show “CD” and the unit “m” (meter) respec-
tively “ft” (feet = 30,48 cm) will flash in the lower right corner of the display.
• Select the desired unit using the “
S
” (4) or the “
F
” (8) button.
• Briefly press the “LX/FC/CD” button (3). Now, the distance value (the distance between the
centre of the light source and the sensor) will flash on the display.
The pre-set distance value is “1 m” resp. “3,28 ft”.
• Set the distance using the “
S
” (4) or the “
F
” (8) button. For quick adjustment, hold the cor-
responding button for a little longer. The adjustable range for the distance value is between
0,01 and 30,47 m resp. 0,01 and 99,99 ft.
• Briefly press the “LX/FC/CD” button (3).
• The measured value is shown on the display.
The luminous intensity can be calculated as follows:
Luminous intensity (cd) = illuminance level (lux) x distance
d) Data hold function
During the measurement process, the measured value shown on the display changes accord-
ing to the incidence of light on the sensor (10).
In order to better read the measured value (or to be able to save it), you have the possibility
to activate the data hold function. To do so, briefly press the “HOLD L.S.” button (9) during the
measurement. The measured value displayed “freezes” and will not change any more so that
it is easier to read or save it.
“HOLD” will be shown in the upper right corner of the display.
Press the “HOLD L.S.” button (9) again to exit the mode. The “HOLD” symbol disappears.
e) Calibrating function
• Switch the luxmeter on.
• Put the protective cap (11) on to the sensor (10).
• Briefly press the “ZERO” button (5).
• “AdJ” will be shown on the display for a few seconds. The luxmeter will be calibrated and the
display will be reset to 0.00.
If “CAP” appears on the display, the protective cap is not mounted completely or cor-
rectly and the sensor measures too much light. If so, execute the calibration process
in a slightly darker environment.
If “CAP” does not disppear from the display, briefly switch off the luxmeter and switch
it on again.
f) Displaying maximum, average and minimum value
This is only possible during the measurement process of the illuminance level (Lux/
Fc), but not during the measurement of the lumious intensity (cd).
• Press the “
S
” button repeatedly during the measurement in order to switch between the
following operation modes (the respective operation mode will be displayed above the meas-
ured value):
“MAX” The luxmeter will only show the highest measured value.
“AVG” The luxmeter will continuously calculate and display the average value.
“MIN”
The luxmeter will only show the lowest measured value.
• To exit the current operation mode, hold down the “
S
” button (4) for about one second. The
operation mode (“MAX“, “AVG” or “MIN“) will no longer be shown on the display.
g) Selecting/changing/saving correction parameters
Light sources have different colour spectra. In order to be able to compare the measured light
intensity, different sensors would be required.
With the luxmeter MS-200 this is not necessary since the light intensity can automatically be
corrected and displayed using an adjustable correction factor (9 different memories available).
Examples using the correction factor:
Light source
Correction factor
Incandescent bulbs/daylight
1.000
Daylight white LEDs
0.990
Red LEDs
0.516
Amber yellow LEDs
0.815
Green LEDs
1.216
Blue LEDs
1.475
Purple LEDs
1.148
Neon tubes white
0.870
Neon tubes blue
1.286
Neon tubes green
1.167
Neon tubes red
0.671
The measured value displayed when the correction factor is set to “1.000” refers to a standard
incandescent bulb with a colour temperature of 2856 K (illuminant A).
More information on this can be found in the corresponding technical literature or on the In-
ternet.
The luxmeter has 9 memories (L1....L9) for correction parameters (“Light Source” is shown in
the bottom line of the display incl. the currently active correction parameter).
If necessary, the measured value shown on the display can be corrected automatically.
Example:
Measured value: 2000 lux, correction factor 1.200:
The display shows: 2400 lux (2000 x 1.200 = 2400)
Always ensure that the correct correction parameter is selected during the measure-
ment process as otherwise the displayed value may be wrong.
If you don’t want the value to be corrected, select correction parameter “1.000” (set
the correction parameter “1.000” in one of the 9 memories and select the respective
memory for the display of the uncorrected measured value).

