L
W
ALIGN THE CENTRAL VERTICAL LINE ON THE SCREEN
SCREEN
4-M8*70 SETSCREW
M:VERTICAL ADJUSTMENT ROTATION SREW
FRAME 1
H1
SETTING DRILLING PAPER OF
BRACKET 1 PROPER POSITION
ALIGN THE CENTRAL VERTICAL
LINE ON THE SCREEN
WALL
8.5
60
9
SCREENSHOT 1
INSTALLING STEP 1
SCREENSHOT 2
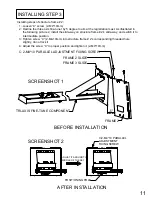
Installing steps of holder 1:
1: Ensure the projector image allies with the center line of the screen, and determine the corresponding
vertical distance value (H1) according to the projector distance chart.
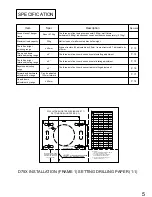
2: Use D79X setting perforating paper of ultra short throw series (1:1) to determine the corresponding
vertical distance.(H2) = (H1)-27.2mm
3: Fix the D79X setting perforating paper of ultra short throw series (1:1) and drill the wall according to the
hole position on paper.(see picture 1).
4: Drive the attached setscrew (4-M8*70mm) in the corresponding wall’s hole.
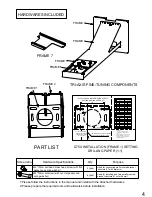
5: Loosen screw “B” (4-M4*10), and dismantle the setting wall components. (structure frame # 1 and
structure frame # 2)
6: Install the structure frame # 1 and tighten the screw (see picture 2) to ensure that the installation is correct
and reliable.


