background image

3

ENGLISH          

Attention!

• 

the  device  is  not  a  toy!  Do  not  allow 
children to play with the device.

• 

Before  using  the  device,  read  this 
instruction carefully. Use the device only 
for  intended  purposes,  as  it  is  stated  in 
this  manual.  Mishandling  the  device  can 
lead  to  its  breakage  and  cause  harm  to 
the user or damage to his/her property.

• 

this  device  is  not  intended  for  usage 
by  children.  Children  can  use  the  device 
onLY under supervision of a person, who 
is responsible for their safety, and if they 
are  given  all  the  necessary  instructions 
on  safety  measures  and  information 
about  danger,  that  can  be  caused  by 
improper usage of the device.

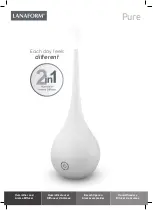
ULtRASoniC HUMiDiFieR

Description

1. 

On/Off button  

2. 

Mist release intensity control knob 

3. 

Mist release intensity indication

4. 

Lid with a mist release opening

5. 

Water tank

6. 

Water inlet

7. 

Water tank lid

8. 

Sprayer

9. 

Humidifier body

10. 

Power adapter connector

11. 

Power adapter

12. 

Cleaning brush for sprayer

SAFetY MeASUReS

Before using the air humidifier, please read this 
instruction  carefully  and  keep  it  for  the  whole 
operation period.

• 

Before  switching  on  make  sure  that  voltage 
of  the  mains  corresponds  to  unit  operating 
voltage.

• 

Place the unit on flat, moisture-resistant sur-
face. Distance to the walls should be at least 
15 cm. 

• 

Do not place the humidifier in places exposed 
to  direct  sunlight,  high  temperatures,  near 
computers or other sensitive electronic appli-
ances.

• 

Do not leave the unit unattended in a closed 
room,  this  can  lead  to  appearance  of  con-

densation  on  furniture  and  walls.  That’s  why 
we recommend to keep the door of the room, 
where the humidifier is used, half-opened.

• 

Do not use the unit outdoors.

• 

Use  only  removable  parts  supplied  with  the 
unit.

• 

For children safety do not leave polyeth-
ylene  bags,  used  as  a  packaging,  unat-
tended. 

• 


Attention!

 Do not allow children to play with 

polyethylene  bags  or  film

.


Danger  of  suf-

focation!

• 

Keep the unit out of reach of children.

• 

Do not allow children to use the unit as a toy.

• 

This unit is not intended for usage by children 
or disabled persons unless they are given all 
the  necessary  instructions  by  a  person  who 
is responsible for their safety on safety mea-
sures and information about danger that can 
be caused by improper usage of the unit.

• 

Do not switch the humidifier on without water, 
disconnect  the  unit  from  the  mains  immedi-
ately once the water tank becomes empty.

• 

Do not use soda water or any perfume addi-
tives

• 

Unplug  the  unit  before  removing  the  water 
tank.

• 

Do  not  cover  the  mist  release  opening  and 
avoid getting of foreign objects inside it.

• 

Do  not  immerse  the  humidifier  body  and 
power adapter into water or other liquids.

• 

Do not move or tilt the unit during operation.

• 

Always  unplug  the  unit  and  pour  out  water 
from the water tank before cleaning or if you 
do not use the unit. 

• 

Unplug  the  humidifier  before  moving  it  to 
another place.

• 

Do  not  touch  the  power  adapter  with  wet 
hands.

• 

Before  using  the  unit,  closely  examine  the 
power  adapter  and  make  sure  that  it  is  not 
damaged.  Do  not  use  the  unit  if  the  power 
adapter is damaged.

• 

Do  not  dismantle  the  humidifier  by  yourself; 
if  any  malfunction  is  detected,  apply  to  the 
nearest authorized service center.

WX-3101.indd   3

12.02.2013   16:38:34

Содержание Winx club WX-3101 FL

Страница 1: ...10 14 18 21 24 28 32 Ultrasonic humidifier WX 3101 indd 1 12 02 2013 16 38 34...

Страница 2: ...1 6 7 2 3 5 9 8 12 11 10 4 WX 3101 indd 2 12 02 2013 16 38 34...

Страница 3: ...sation on furniture and walls That s why we recommend to keep the door of the room where the humidifier is used half opened Do not use the unit outdoors Use only removable parts supplied with the unit...

Страница 4: ...the tank 5 and fill it with water install it to its place and switch on the unit 12 After the humidifier finishes operation switch it off by pressing the button 1 the indication will go out Cleaning...

Страница 5: ...erms of this guarantee This product conforms to the EMC Requirements as laid down by the Council Directive 89 336 EEC and to the Low Voltage Regulation 73 23 EEC Troubleshooting Failure Possible cause...

Страница 6: ...an die Orte die direkten Sonnenstrahlen und hohen Temperaturen ausgesetzt sind sowie in der N he von Computern und empfindlicher Elektrotechnik nicht ein Lassen Sie das eingeschaltete Ger t im geschl...

Страница 7: ...en Deckel 7 indem Sie ihn entgegen dem Uhrzeigersinn drehen 4 F llen Sie den Wasserbeh lter 5 mit notwen diger Wassermenge ein schlie en Sie den Deckel 7 indem Sie ihn im Uhrzeigersinn drehen 5 Stelle...

Страница 8: ...M gliche Ursache St rungsbeseitigung Dekorative Beleuchtung leuchtet nicht es gibt keinen Dampfablass Es gibt keine Spannung in der Steckdose Schlie en Sie das Ger t ans Stromnetz an Schlie en Sie ei...

Страница 9: ...60 Hz 800mA Ausgangsspannung des Netzadapters DC 24V 1000mA Aufnahmeleistung 20 W Fassungsverm gen des Wasserbeh lters 1 3 Liter Wasserverbrauch 100 ml Stunde Befeuchtungsfl che bis 10 m Der Herstell...

Страница 10: ...10 10 1 2 3 4 5 6 7 8 9 10 11 12 15 WX 3101 indd 10 12 02 2013 16 38 35...

Страница 11: ...11 30 5 40 80 40 1 4 5 2 5 3 5 7 4 5 7 5 5 6 11 10 7 8 1 3 9 2 10 5 3 11 1 5 12 1 WX 3101 indd 11 12 02 2013 16 38 35...

Страница 12: ...12 1 5 2 3 5 10 8 2 5 12 8 12 WX 3101 indd 12 12 02 2013 16 38 35...

Страница 13: ...13 1 1 1 1 1 1 1 1 1 100 240 50 60 800 DC 24 1000 20 1 3 100 10 3 38 7 1070 WX 3101 indd 13 12 02 2013 16 38 35...

Страница 14: ...14 1 2 3 4 5 6 7 8 9 10 11 12 15 WX 3101 indd 14 12 02 2013 16 38 35...

Страница 15: ...15 30 5 40 80 40 1 4 5 2 5 3 5 7 4 5 7 5 5 6 11 10 7 8 1 3 9 2 10 5 3 11 1 5 12 1 WX 3101 indd 15 12 02 2013 16 38 35...

Страница 16: ...16 1 5 2 3 8 5 10 2 5 12 8 12 WX 3101 indd 16 12 02 2013 16 38 35...

Страница 17: ...17 1 1 1 1 1 1 1 1 1 100 240 50 60 800 DC 24 1000 20 1 3 100 10 3 i i i i i i i i i i i i i i i i 89 336 EEC i i i i i i 73 23 EEC WX 3101 indd 17 12 02 2013 16 38 36...

Страница 18: ...ri nchise n caz contrar pe mobilier i pere i se poate forma condens de aceea u a de la nc perea unde func ioneaz umidificatorul se recomand s r m n ntredeschis Nu folosi i aparatul n afara nc perilor...

Страница 19: ...i i umple i rezervorul 5 cu ap instala i l n pozi ia ini ial i porni i aparatul 12 Dup utilizare opri i umidificatorul prin ap sa rea butonului 1 indica ia luminoas se va stinge Cur are i ntre inere A...

Страница 20: ...ar care confirm cump rarea produsului dat Acest produs corespunde cerin elor EMC ntocmite n conformitate cu Directiva 89 336 EEC i Directiva cu privire la electro securitate joas tensiune 73 23 EEC nl...

Страница 21: ...ch vejte p stroj bez dohledu v uzav e n m prostoru jinak na n bytku a st n ch m e se za t tvo it kondenz t Proto dve e do m stnosti s funguj c m zvlh ova em se doporu uje ponechat pootev en Nikdy nepo...

Страница 22: ...strcku s ov ho adapt ru s o v ho adapt ru ze zasuvky Odstra te a napl n te n dobu 5 vodou polo te ji zp t na z kladnu a zapn te p stroj 12 Po skon en pr ce vypn te p stroj stisknut m tla tka 1 p itom...

Страница 23: ...o adavk m na elektromagnetickou kompatibilitu stanoven m direktivou 89 336 EEC a p edpisem 73 23 EEC Evropsk ko mise o n zkonap ov ch p stroj ch e en probl m Z vada Mo n p ina e en probl m Dekorativn...

Страница 24: ...24 1 2 3 4 5 6 7 8 9 10 11 12 15 24 WX 3101 indd 24 12 02 2013 16 38 36...

Страница 25: ...25 30 5 40 80 40 1 4 5 2 5 3 5 7 4 5 7 5 5 6 11 10 7 8 1 i 3 9 2 10 5 i 3 11 1 i 5 12 1 i 1 5 WX 3101 indd 25 12 02 2013 16 38 36...

Страница 26: ...26 2 3 5 10 8 2 5 12 8 12 WX 3101 indd 26 12 02 2013 16 38 36...

Страница 27: ...27 1 1 1 1 1 1 1 1 1 i i 100 240 50 60 800 DC 24 1000 20 1 3 100 10 3 89 336 73 23 WX 3101 indd 27 12 02 2013 16 38 36...

Страница 28: ...28 I I 1 2 i 3 i 4 5 6 7 8 9 10 11 12 15 WX 3101 indd 28 12 02 2013 16 38 37...

Страница 29: ...29 30 5 40 80 40 1 4 5 2 5 3 5 7 4 5 7 5 5 6 11 10 7 8 1 i i 3 9 2 10 5 i i 3 11 1 i 5 12 1 i WX 3101 indd 29 12 02 2013 16 38 37...

Страница 30: ...30 1 5 2 3 5 10 8 2 5 12 8 12 WX 3101 indd 30 12 02 2013 16 38 37...

Страница 31: ...31 1 1 1 1 1 1 1 1 1 100 240 50 60 800 DC 24 1000 20 1 3 100 10 3 i 89 336 i i i 73 23 EC WX 3101 indd 31 12 02 2013 16 38 37...

Страница 32: ...ole a temperature alte vicino al computer o alle apparecchia ture elettroniche sensibili Non lasciare l apparecchio incustodito in una stanza chiusa in caso contrario sui mobili e sulle pareti pu form...

Страница 33: ...e per il suo collegamento 10 7 Collegare la spina dell adattatore di rete alla presa elettrica 8 Collegare l umidificatore premendo il pulsante 1 si accende l indicazione d intensit del vapore 3 9 Reg...

Страница 34: ...uminazione decorativa spenta e non fuoriesce il vapore Non c la tensione nella presa di rete Collegare il dispositivo alla rete Per verificare che la presa di rete funzioni collegare alla stessa presa...

Страница 35: ...riserva il diritto di modificare il de sign e le caratteristiche dell apparecchio senza alcun preavviso Durata operativa del dispositivo 3 anni Servizio di garanzia Le informazioni dettagliate rispett...

Страница 36: ...num rul de serie pe tabelul cu datele tehnice Num rul de serie reprezint un num r din unsprezece cifre primele patru cifre indic nd data fabric rii De exemplu dac num rul de serie este 0606xxxxxxx nse...

Отзывы: